“4 Rooms Study” – a project which aimed at creating convincing interiors in extremely short time. Lasse Rode of Xoio guides us through the process of creation and explains how Corona helped him achieve the desired results.
Continue reading for the full article and more images.
I stumbled across the Corona renderer about two years ago or so, and from the very beginning I was fascinated about how quickly you see results. Even after a few passes of rendering, you have the full response of how light and shaders react.
At Xoio we value the importance of non-commissioned and personal work very highly, as we think these are a very powerful way to freely explore tools, experiment and develop your skills. Being open, moving and awake, finding new paths, and pursuing ideas has always led us forward and opened up new opportunities!
As much fun as this is, of course, time is always short, and sometimes the paid projects overwhelm us and leave us little space for these kinds of professional development activities.
Also, effectivity plays a big role in any kind of professional work, and it’s true for us as a visualization studio. We are constantly looking out for how we can be faster and get better results in a shorter time frame – not just in terms of faster hardware and render times. In these times of fast computers and easily accessible renderfarms, rendering time does not play such a big role for us anymore. The main focus lies in the time spent before hitting the render button – concepting, setting up a scene, lighting, shading, finding perspectives.
The Idea
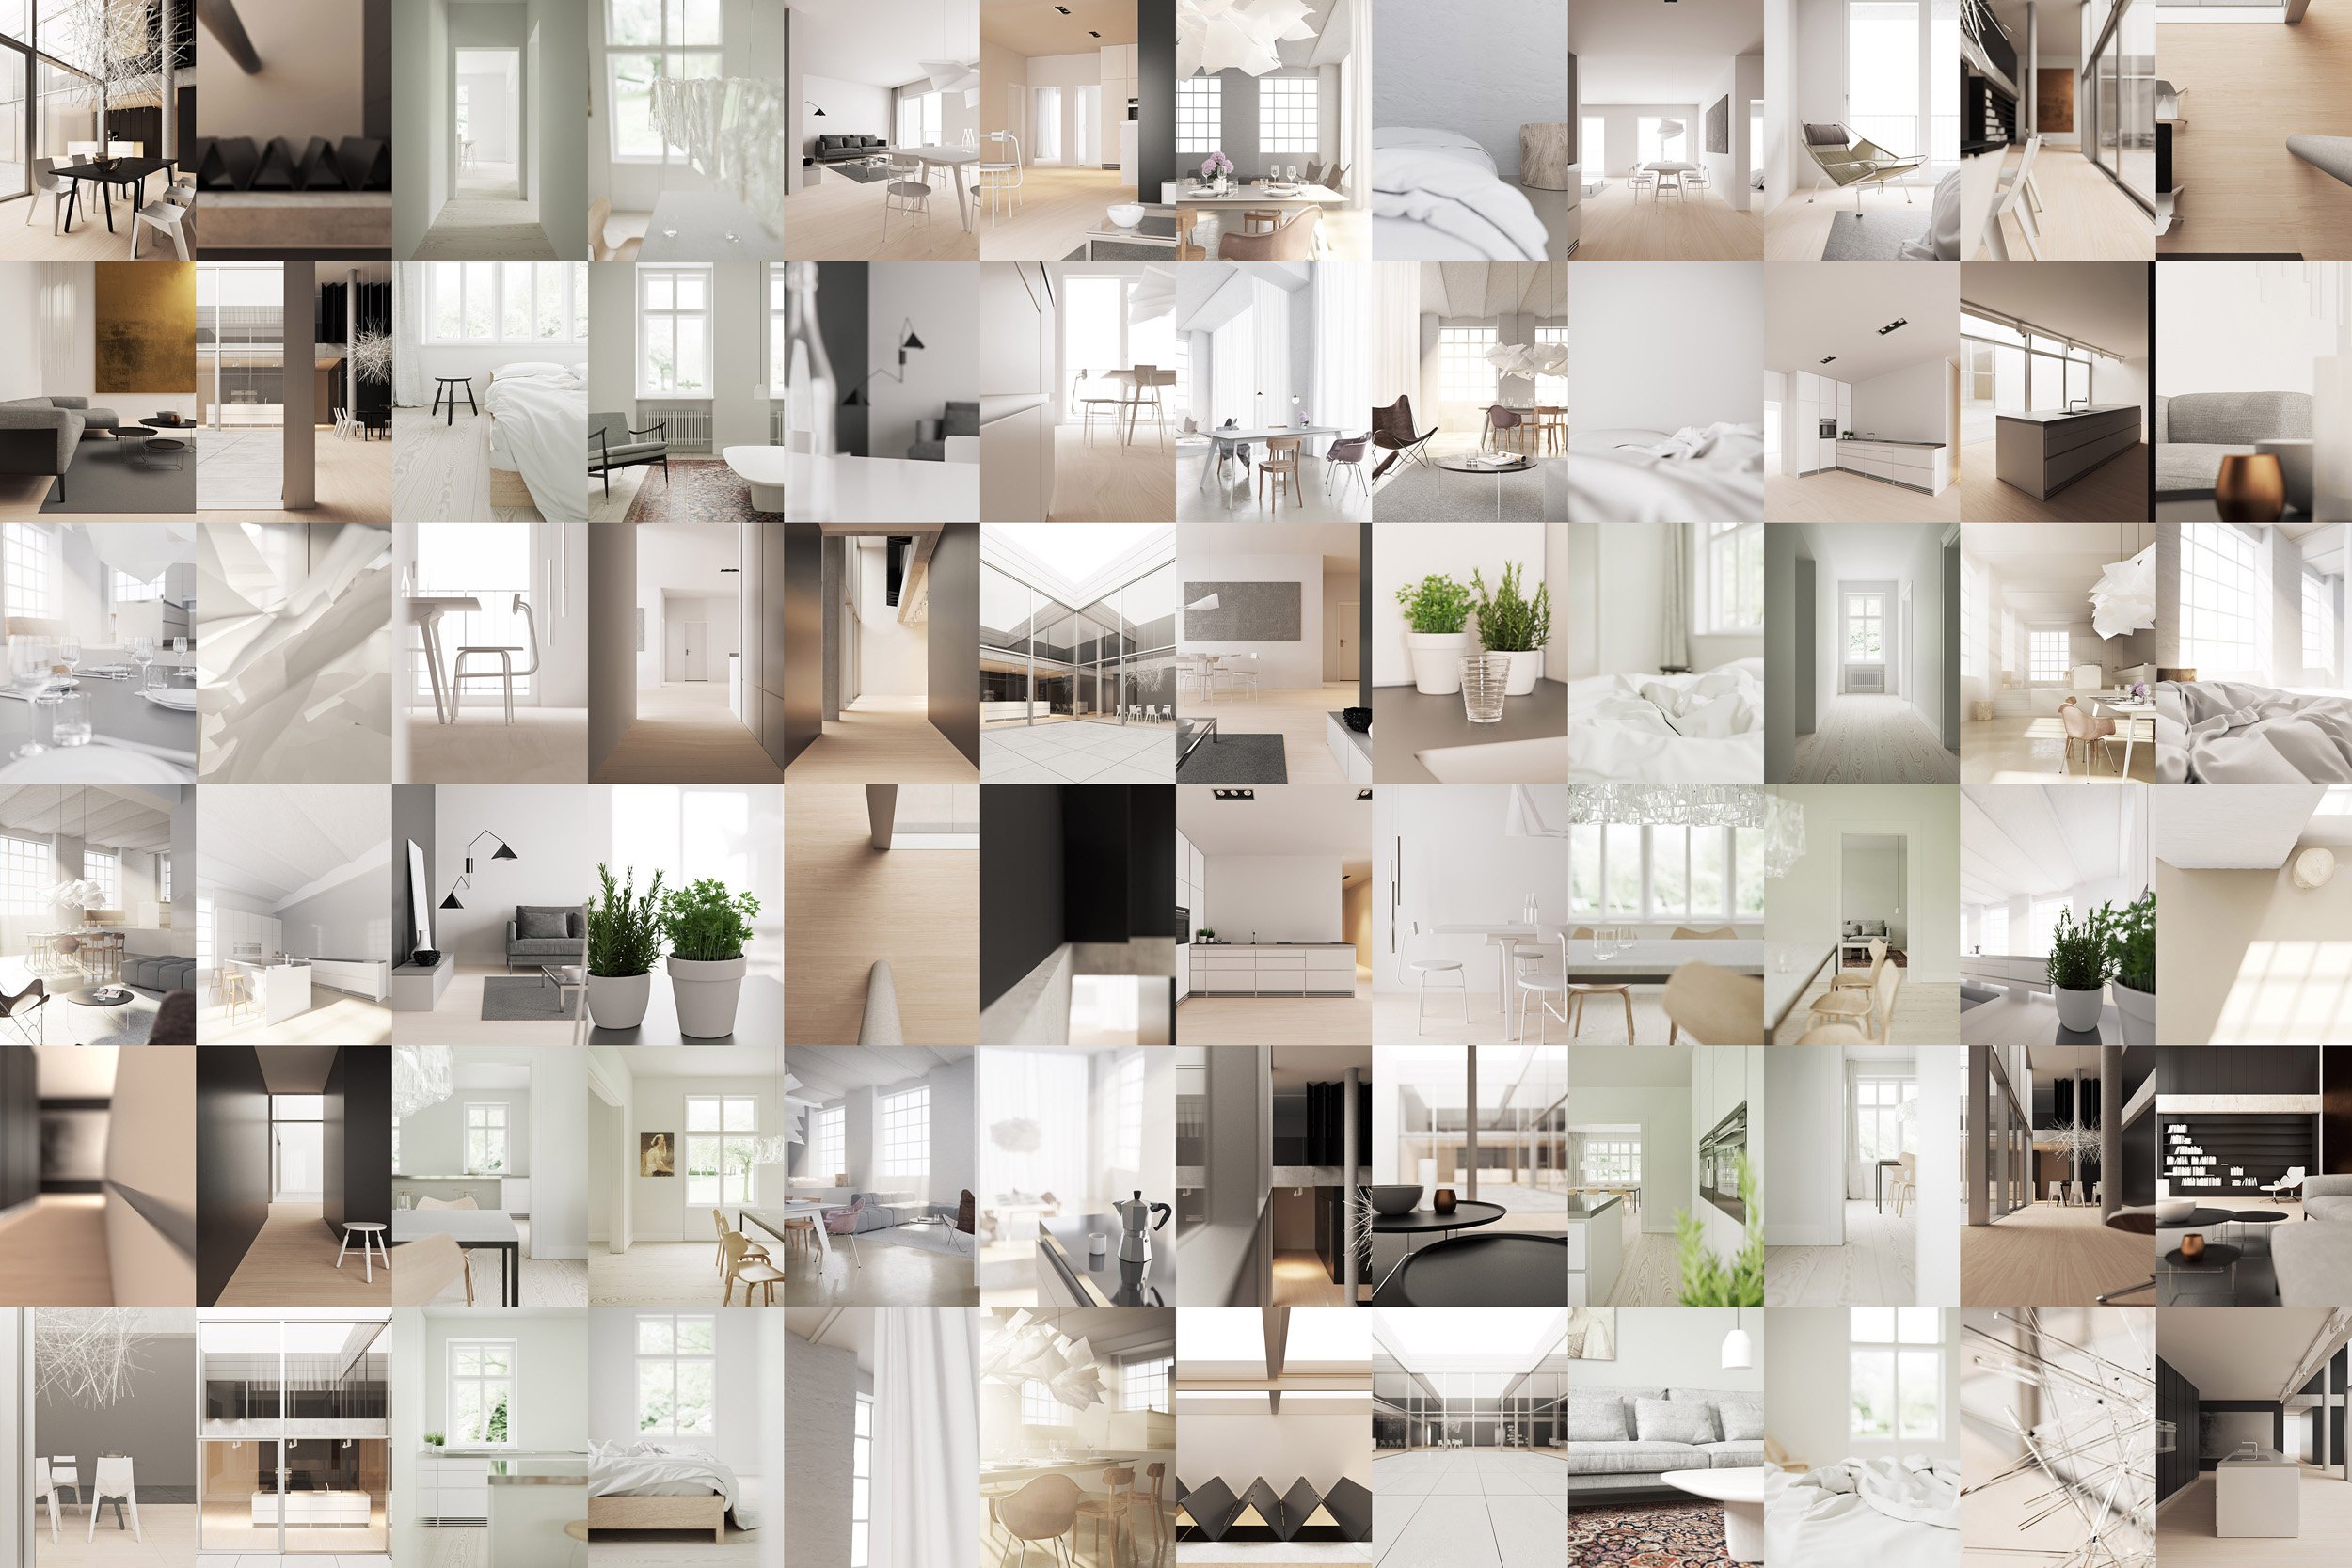
Well, I tried to make a virtue of necessity and challenged myself to see how far I could get within a day. The goal was to make 4 spaces and render 20 images of it – each within the time frame of a single day.
In the end, one space was produced with 24 perspectives, the other ones with 16 different views. In total, it took me a little longer than one day each. But anyhow, I learned a lot about arranging a scene and setting it up, so I could get results in a short time.
Honestly, the whole thing also resulted in certain aesthetics as well. Due to very minimalistic propping, re-use of several assets, and very simple shading and lighting, the images share a certain vibe. But anyhow 🙂
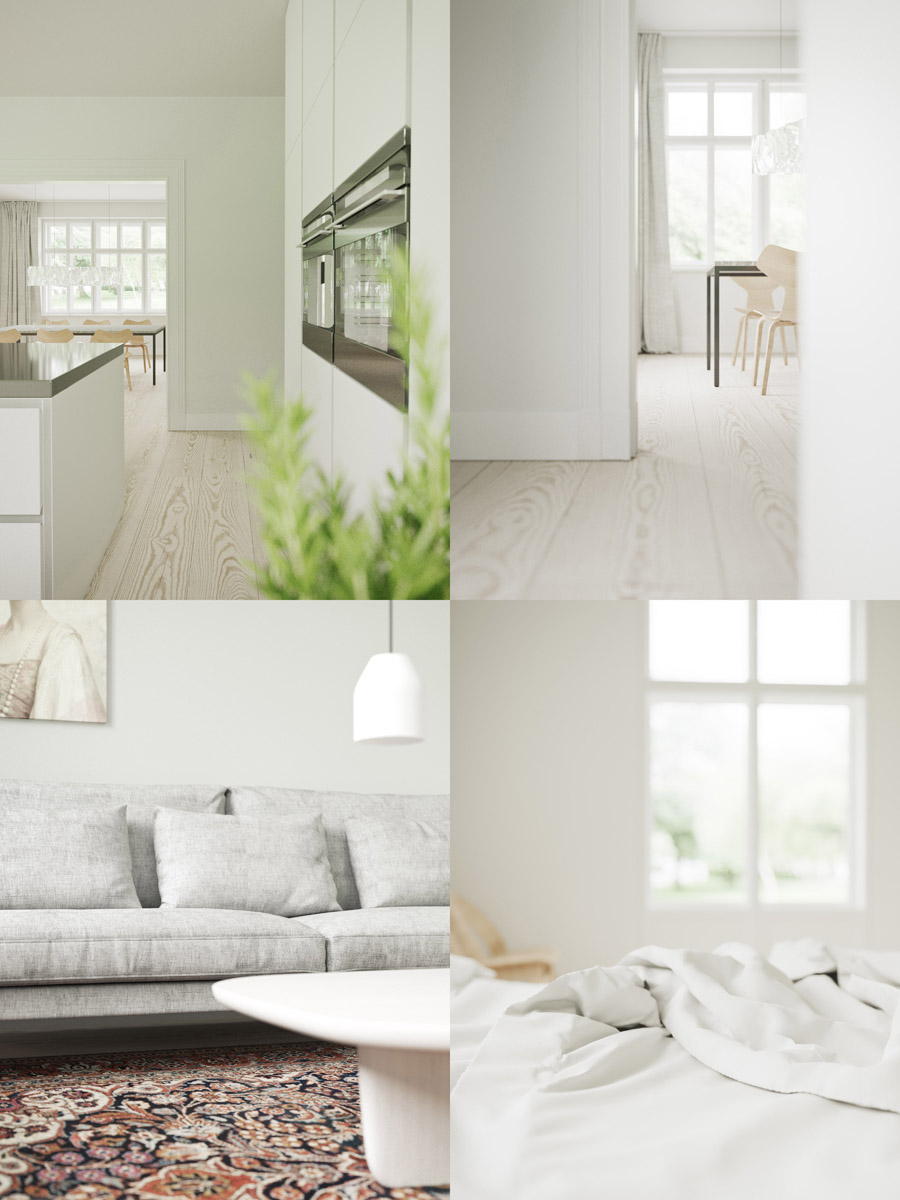
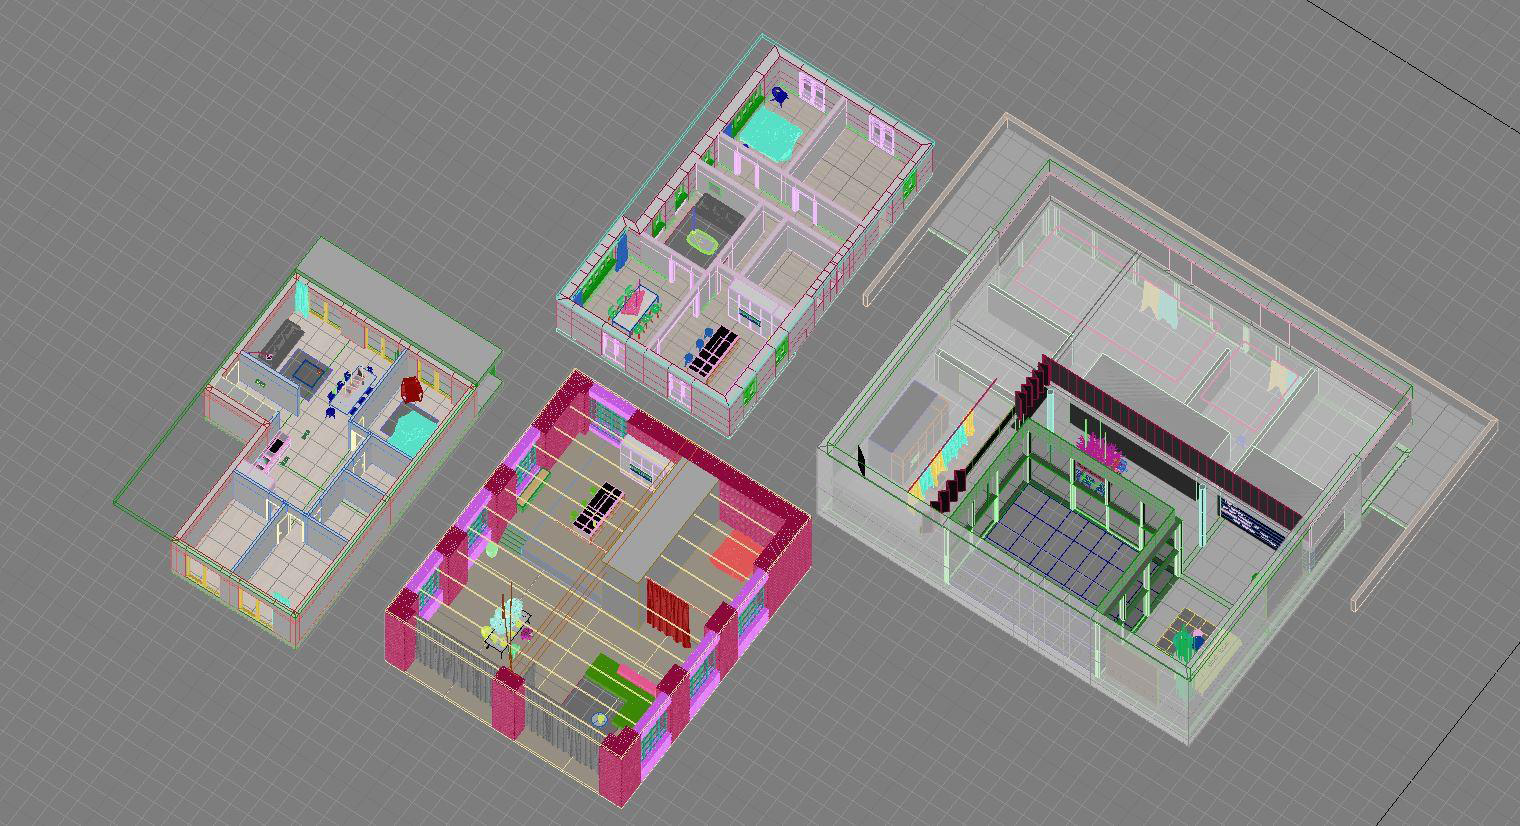 the four spaces
Shading and Lighting the Fast Way
The no-bullshit attitude of Corona when it comes to lighting and shading is simply unbeatable.
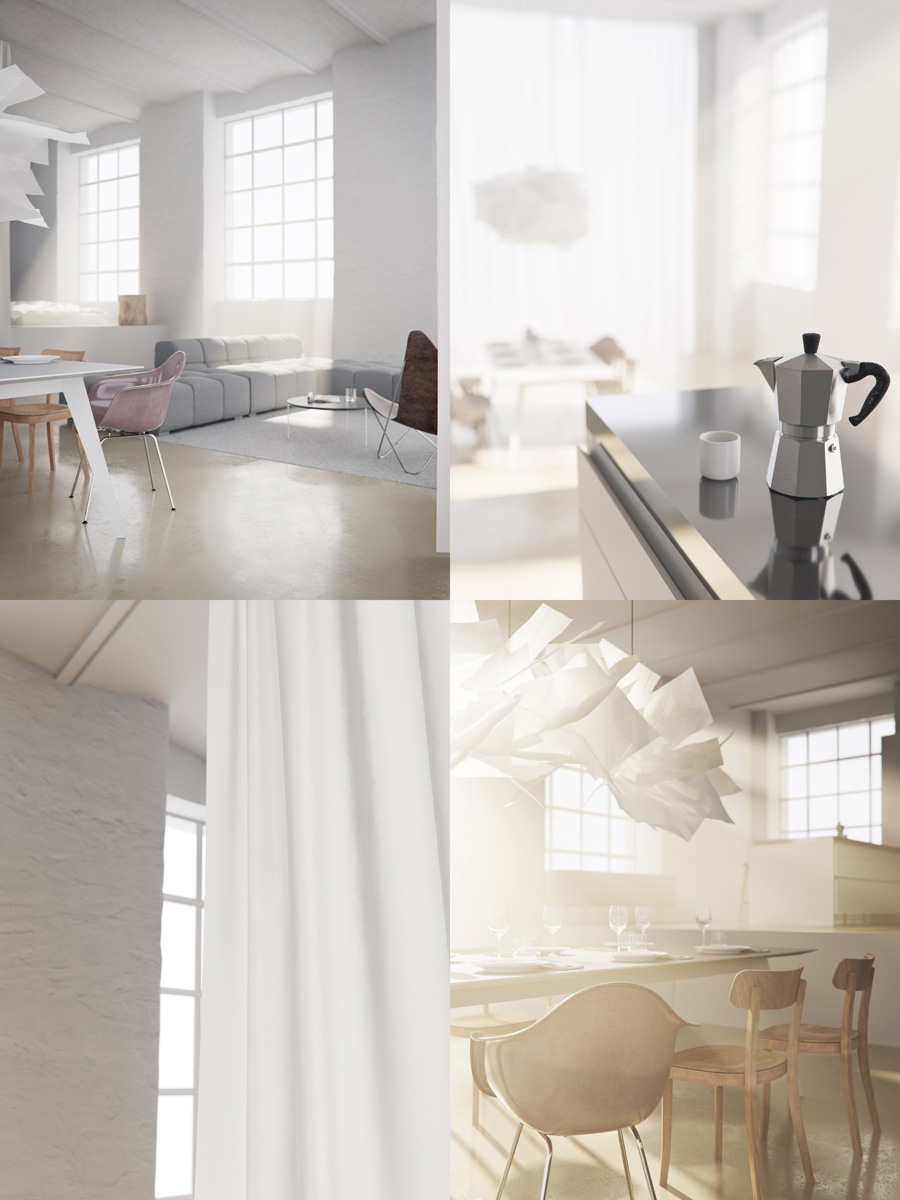
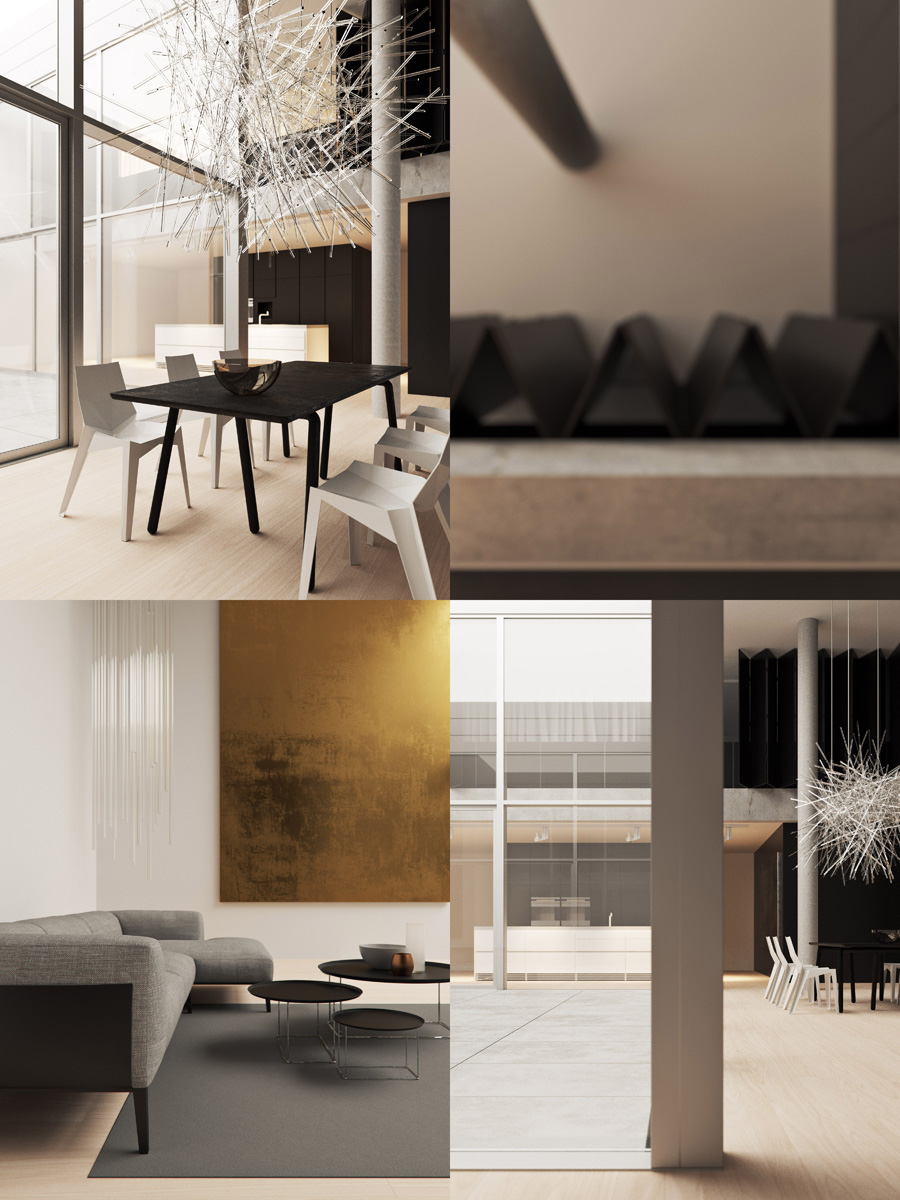
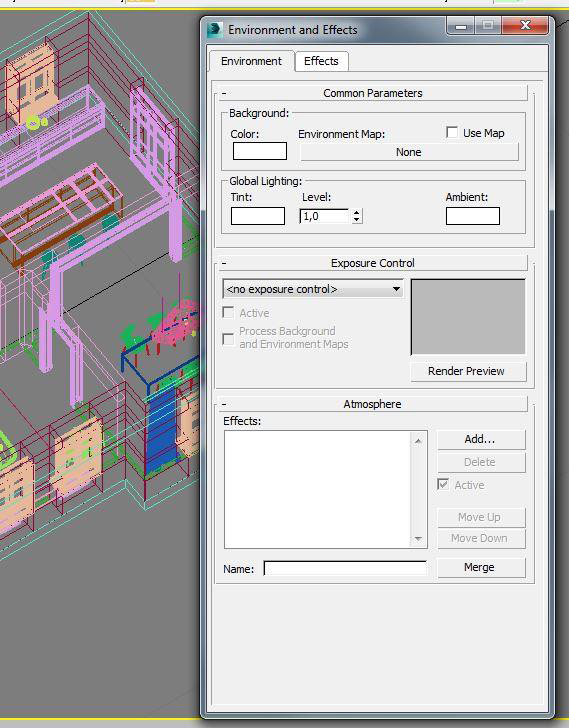
I wanted the spaces to appear in overcast diffuse lighting – except for the loft one. For that, I tried out the technique of generating god rays as Ludvík Koutný shows in his video tutorial: https://www.youtube.com/watch?v=68m776w7loU
 Extremely simple lighting
To create this light, I simply used white background color. This is absolutely sufficient in this case to simulate a day with diffuse lighting.
Shader setup is as simple as can be. But, one very important thing I find is the strategy of creating every material from scratch and not re-using the same material twice. This creates a nice subtle variation throughout the scene.
Also the shader setup for the floor is very simple, if not primitive. I wanted the floor to have this “soft” feel, not only reacting to the light but also having this high class, understated softness. CG-people tend to overdo wood with reflection, glossiness maps, normal mapping, and gaps. But if you look at the samples of manufacturers of high quality wooden floors you don‘t see any of these attributes (http://dinesen.com/projects/) – just a soft and gentle reaction to diffuse lighting.
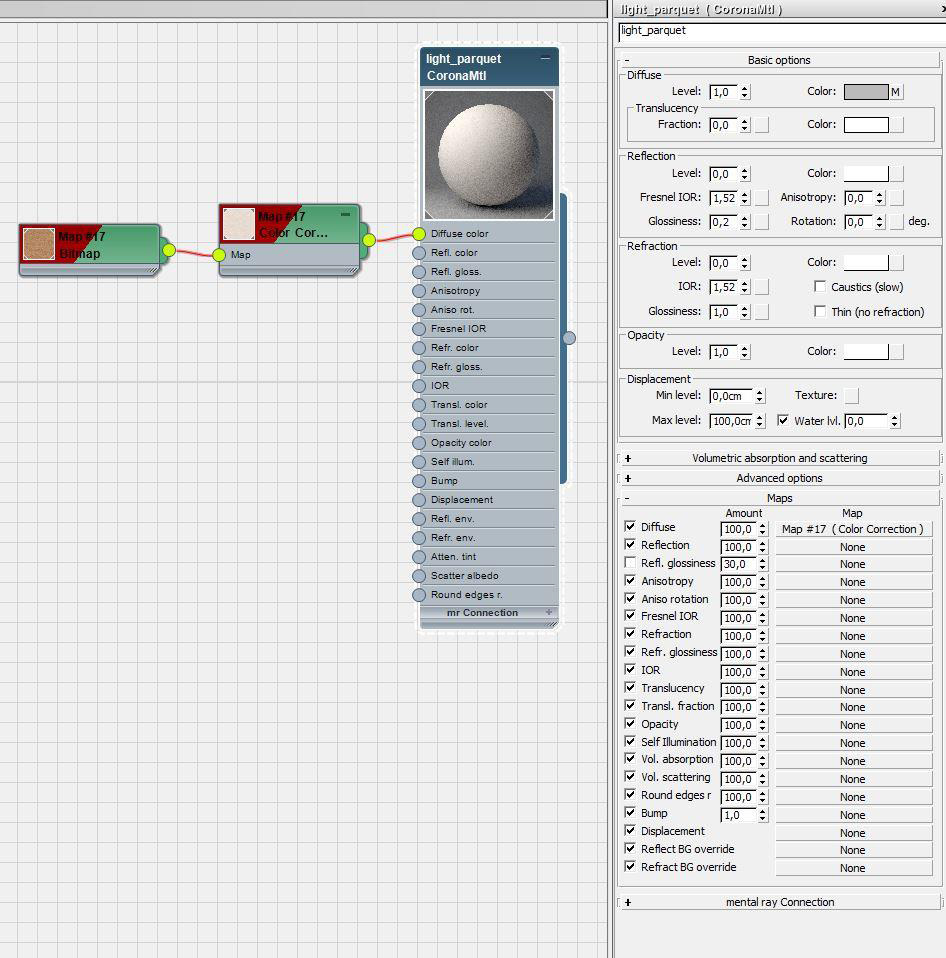 Primitive setup for flooring material
This is what I like about Corona as a render engine – it supports me in my straightforward way of working. I don’t want to spend hours on faking something which is such a simple setup, even in reality.
The quality of details, gaps, the haptic quality of materials, even with the simplest shaders, are so convincing and lovely, it is just fun to work this way!
Rendering and Iterating
For finding perspectives and composing the views with light, props, etc., Corona‘s interactive rendering option is the tool to use! The instant feedback makes it super fast.
For moving things in a scene in different views or switching interior lights on and off, I set up keyframe animations and scene states.
Once I set all the desired cameras, I configured the good ol’ 3ds Max Batch Renderer for every view with unique output filenames and used scene state and correct frame.
This is very helpful for shooting the cameras off to the network render.
After one quick round of mid-res renders of 50 passes each, I could fix issues appearing then – like geometric mistakes, wrong texture scaling, etc.
After fixing these things I sent all images with the same output as configured in the batch renderer for final rendering, with all images set to 200 passes.
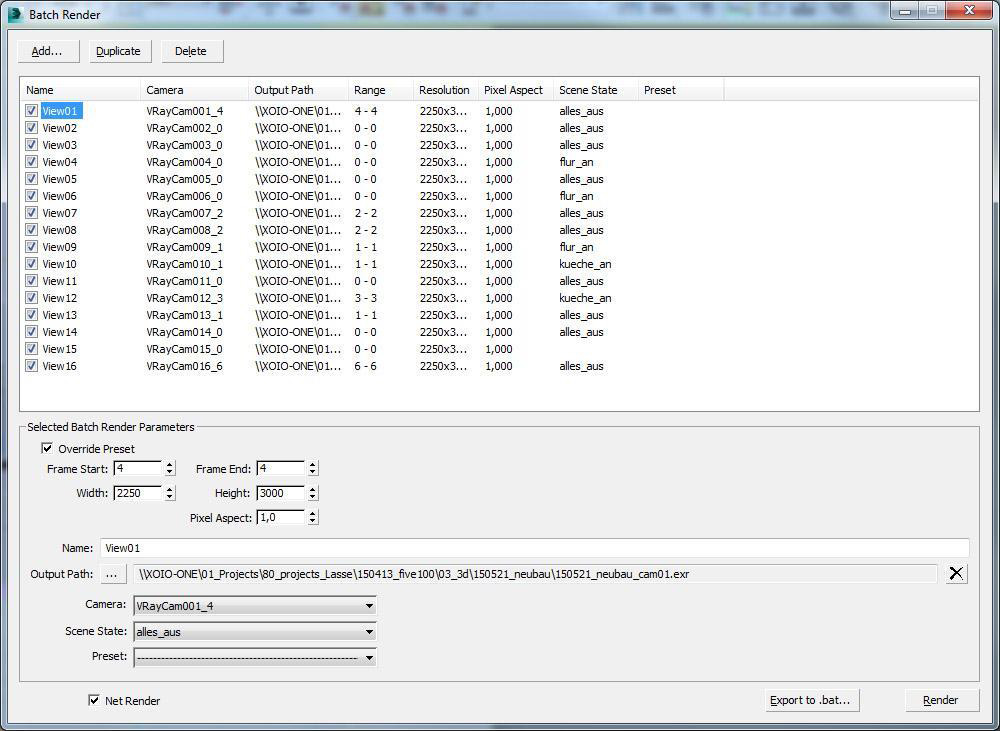 Old-school batch render setup
Postproduction
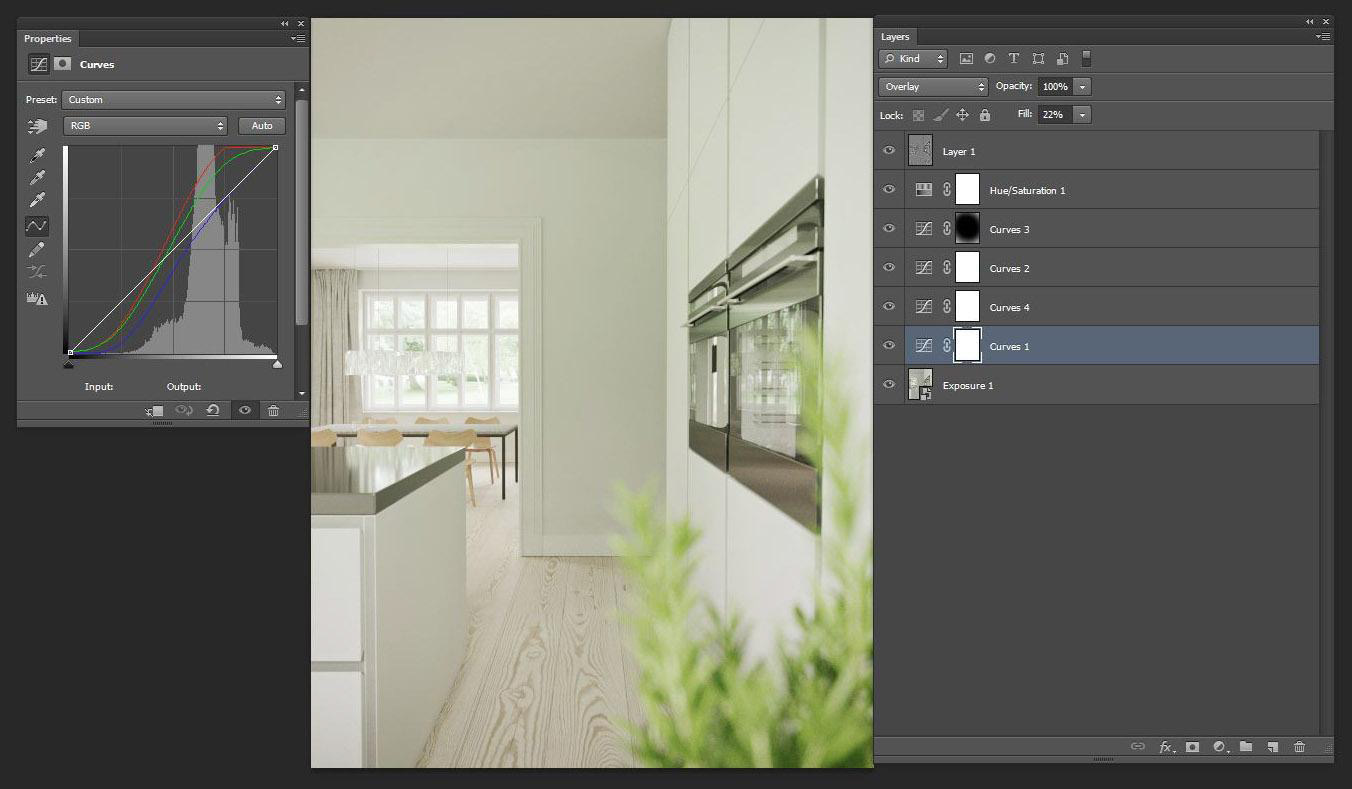
Once the set went through, I did a quick post-processing routine in PS. On one of them, I just did a rough vignette, cross-processing contrast/warmth curves and a local contrast layer.
I recorded this action and batch applied this to the other images put out to prepare the psd files for each image.
After that, I opened every image again to fine tune the colors, brightness, contrast, etc.
With these techniques, I managed to do the post-processing in under an hour per set.

 Postproduction
Conclusion
I initially thought I could make out a set of “rules” or workflow to be faster and more efficient when it comes to finding cameras, composition, etc., and indeed the classical rules of composition come in quite handy here!
It’s also important to set up a good database of assets that you need every time, like certain window types, doors, furniture, etc. As I always lack pendant lights for dining spaces, I “designed” each one quickly. But nonetheless, I learned that a database of good assets can never be too big! 🙂
But apart from working VERY fast, there is the way Corona gives you an idea of how the rendering will look in the end after only a few passes – which means in less than one minute.
Using the interactive render mode, the feedback is even instant!
Even though I did not achieve my initial idea of finishing one scene in a single day – in total it took me 2-3 days each – I managed to send off the first test renders after that time. Refining and doing the “final”, including the postwork, consumed a bit more time in the end.
As of today, 50% of our production happens with the help of the Corona renderer – it‘s an easy and fast way to see how its results speed us up a lot in our daily work. We‘re able to get out previews quickly, to judge and use as a base for decisions; this helps us out a lot in getting much faster results.
-Lasse Rode, Xoio
4 rooms at Xoio website: http://xoio.de/en/4-rooms-study/
Hey Lasse,very nice making of, the lighting is just beautiful, i have a question regarding the materials- do you usually set them in “PBR” method of putting the reflection up to the full 255 and then managing it via glossiness (with right IOR) ?
The postproduction time(!!!) you spent on the cgi is very impressive. Great job overall! The sofa and bed are looking inviting. Once again nice workflow in Ps.
Lasse, a inspiring item as alway!
You mentioned the more assets you have the better. The more assets I have the worse it becomes 🙁
How do you keep them organized properly?
Lasse, this is amazingly helpful for someone switching from vray to Corona! Thanks!