OkDraw worked on every part of this project, from the architectural design through to the promotional renders. They shared the details of each step giving a unique insight into every phase of a project!
Read more to follow this project from start to finish!
Firstly we would like to say thanks to the Corona team for inviting us to present this project, and for the fantastic render engine they’ve created. Now, onto the project itself –
1. The Studio
We are OkDraw, a Portuguese 3D studio who specialize in Architectural and Product 3D images. Our studio was founded by an Architect (Hugo Ferreira) and a Product Designer (Pedro Teixeira).

Everything started in 2013 when Hugo, as an Architect, felt the need to create a brand that could “give a face” to the 3D works he was doing at the time. About a year, during a conversation we realized that we both worked on 3D with different specialties inside of the CG arena. We also shared our workspace with other architects, which opened up possibilities for each one of to develop independent activities and group projects or competitions.
2. The Project
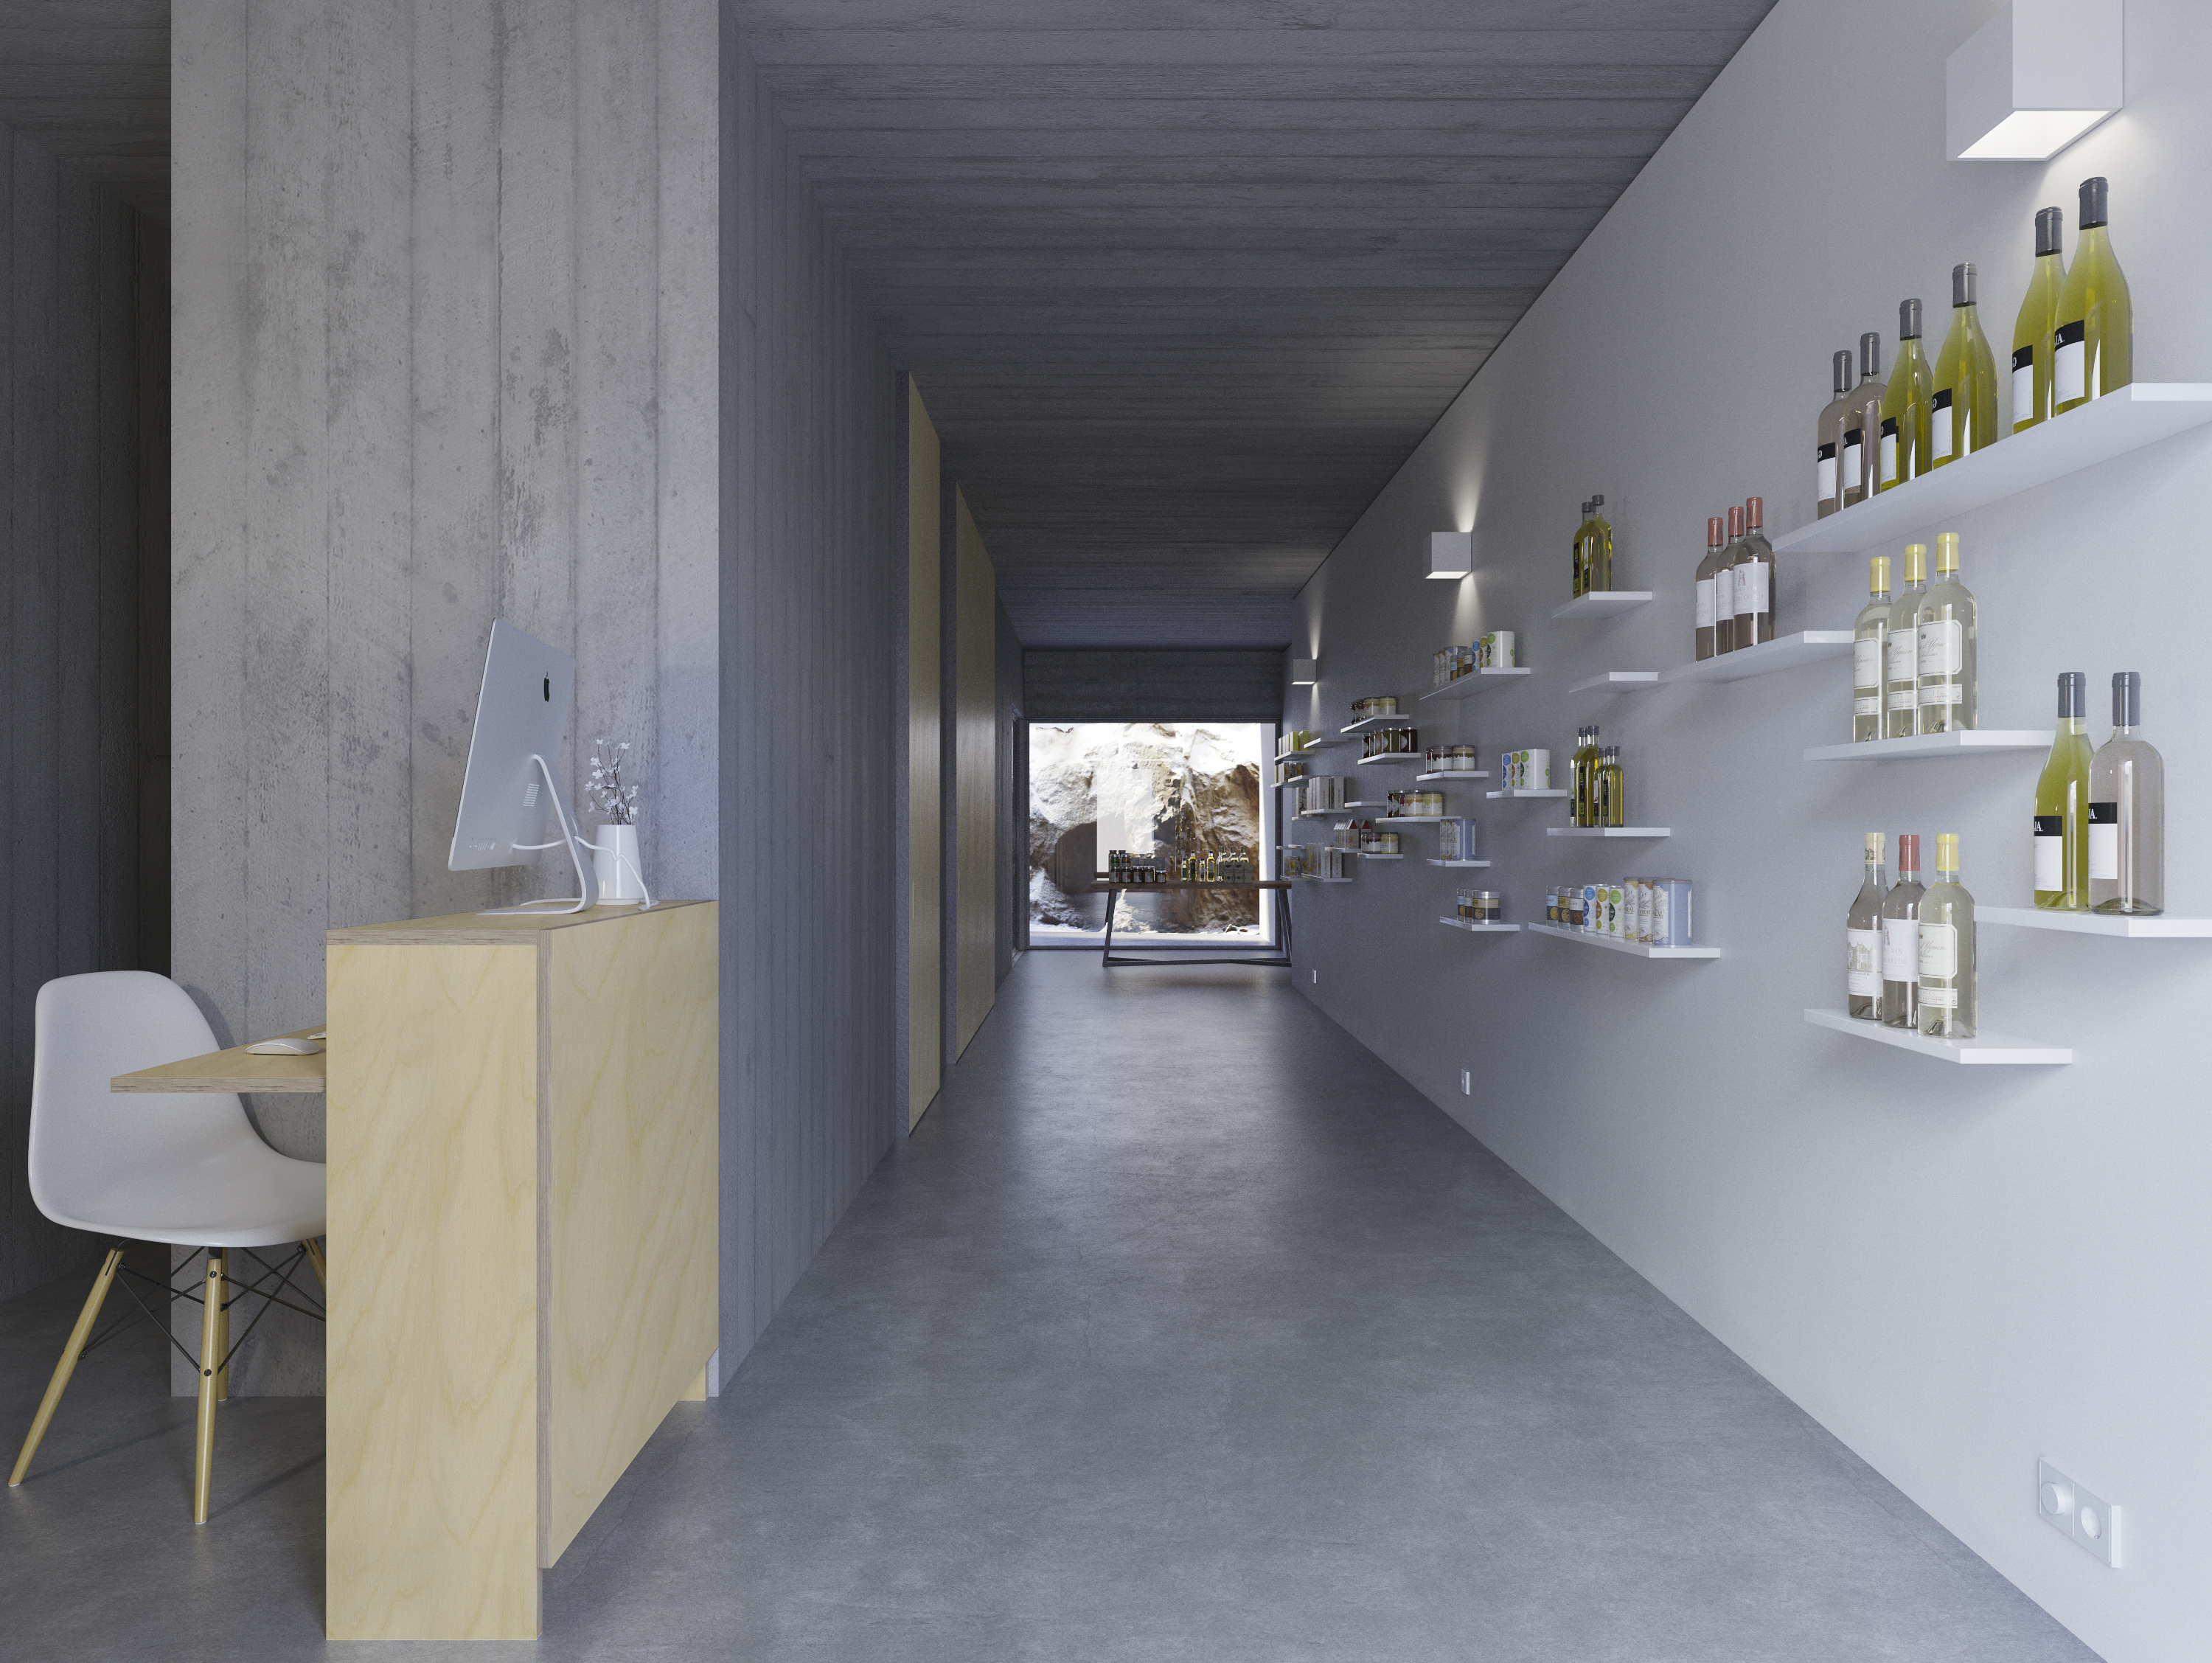
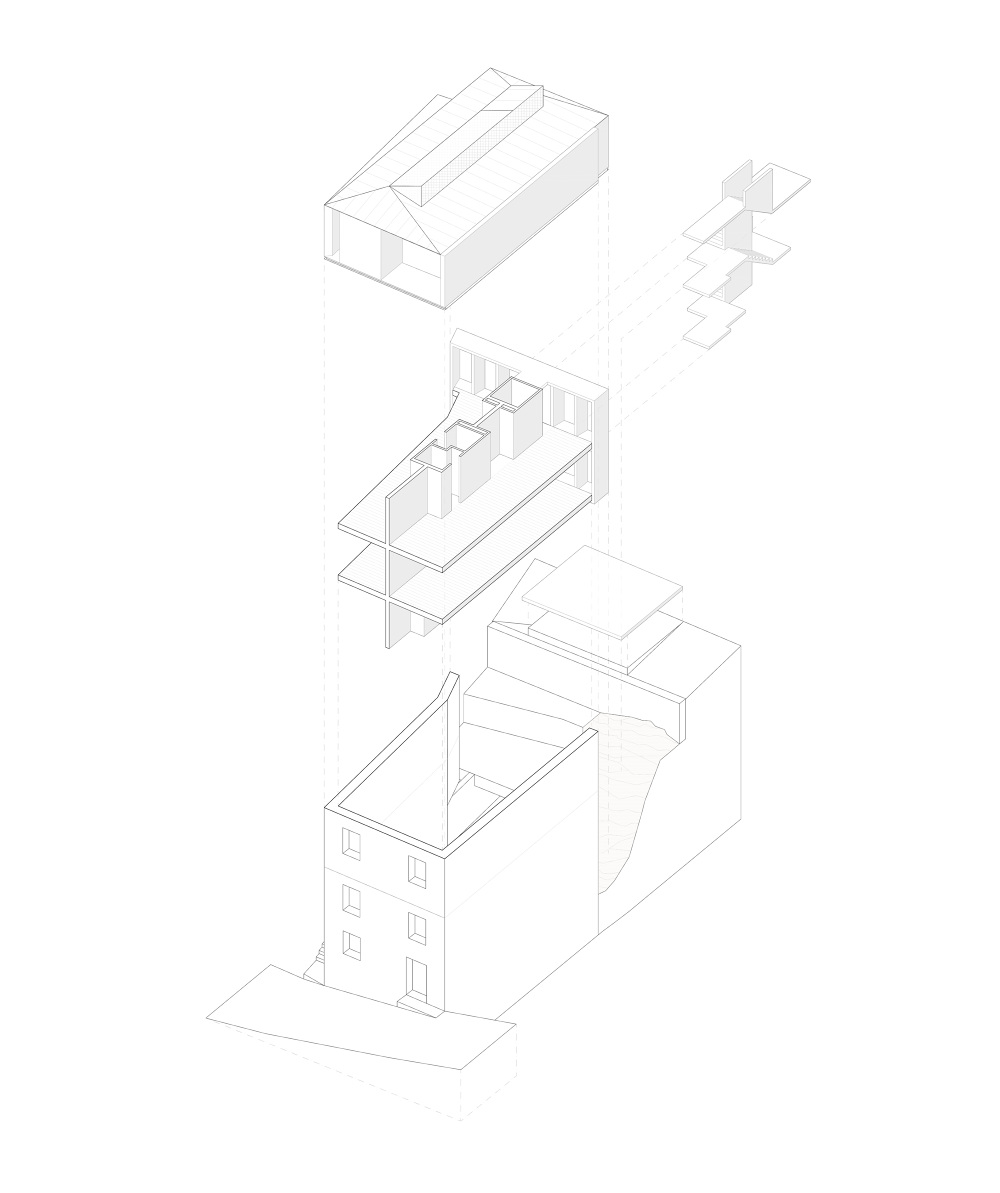
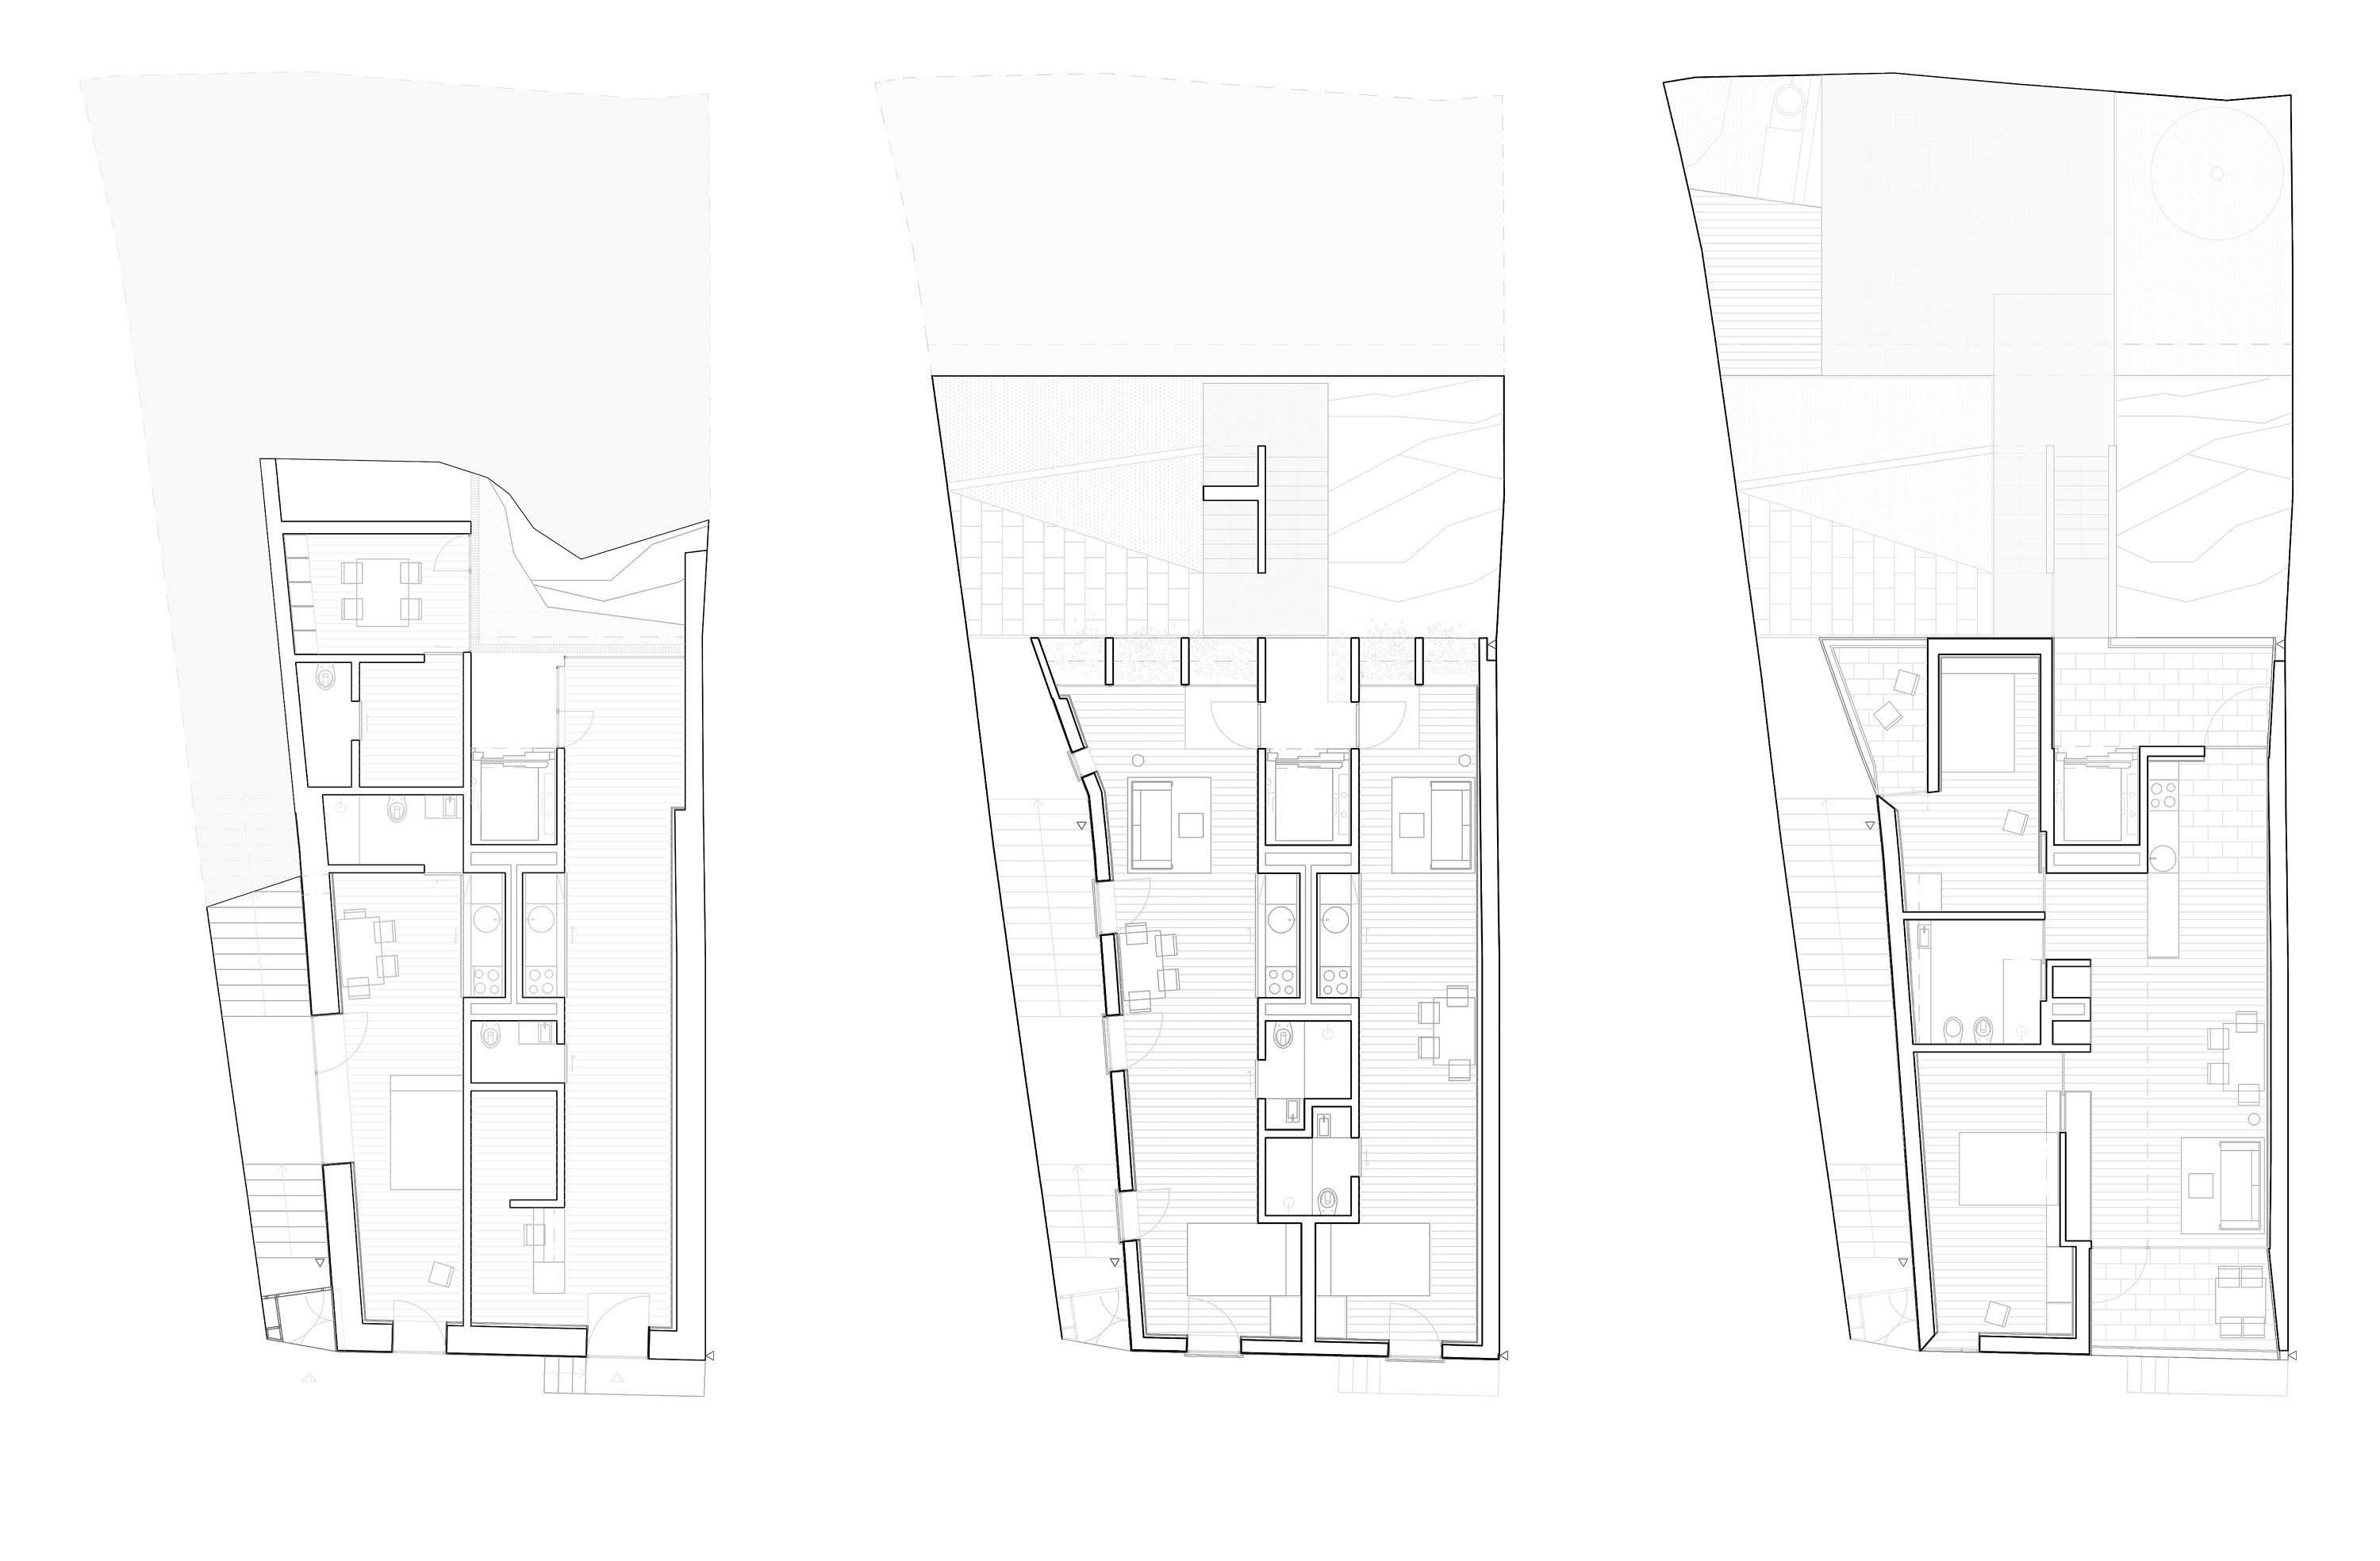
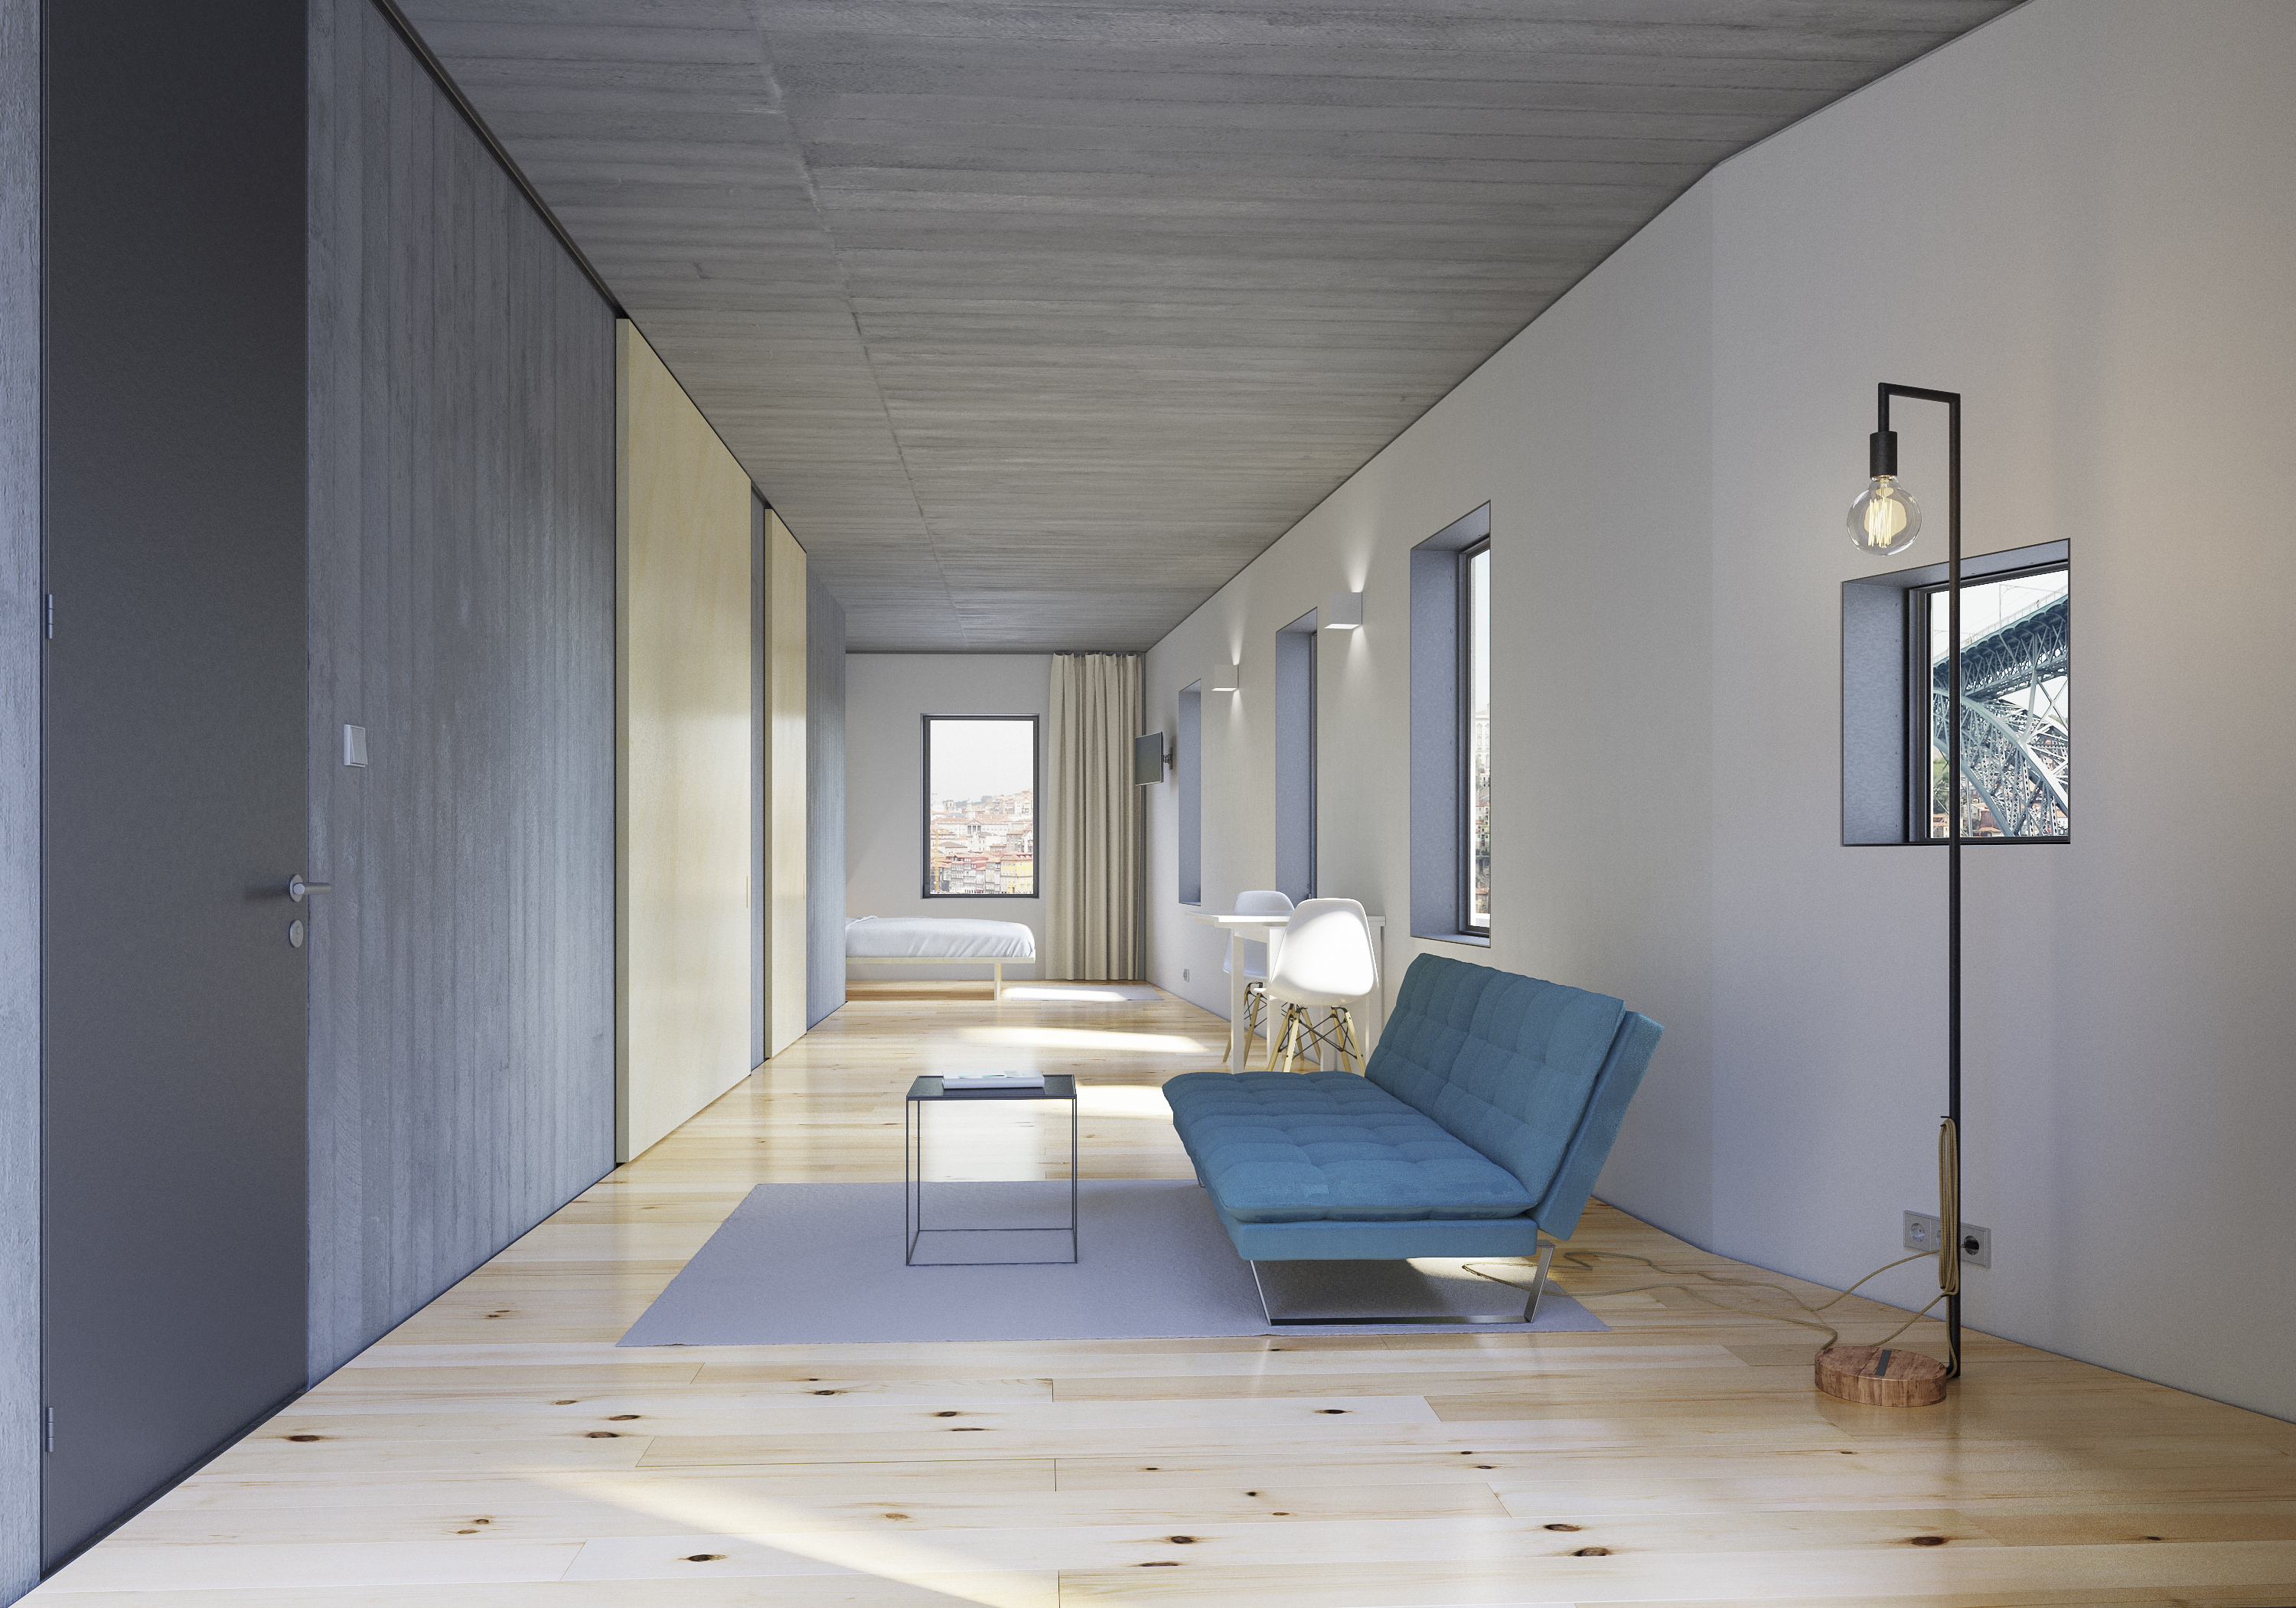
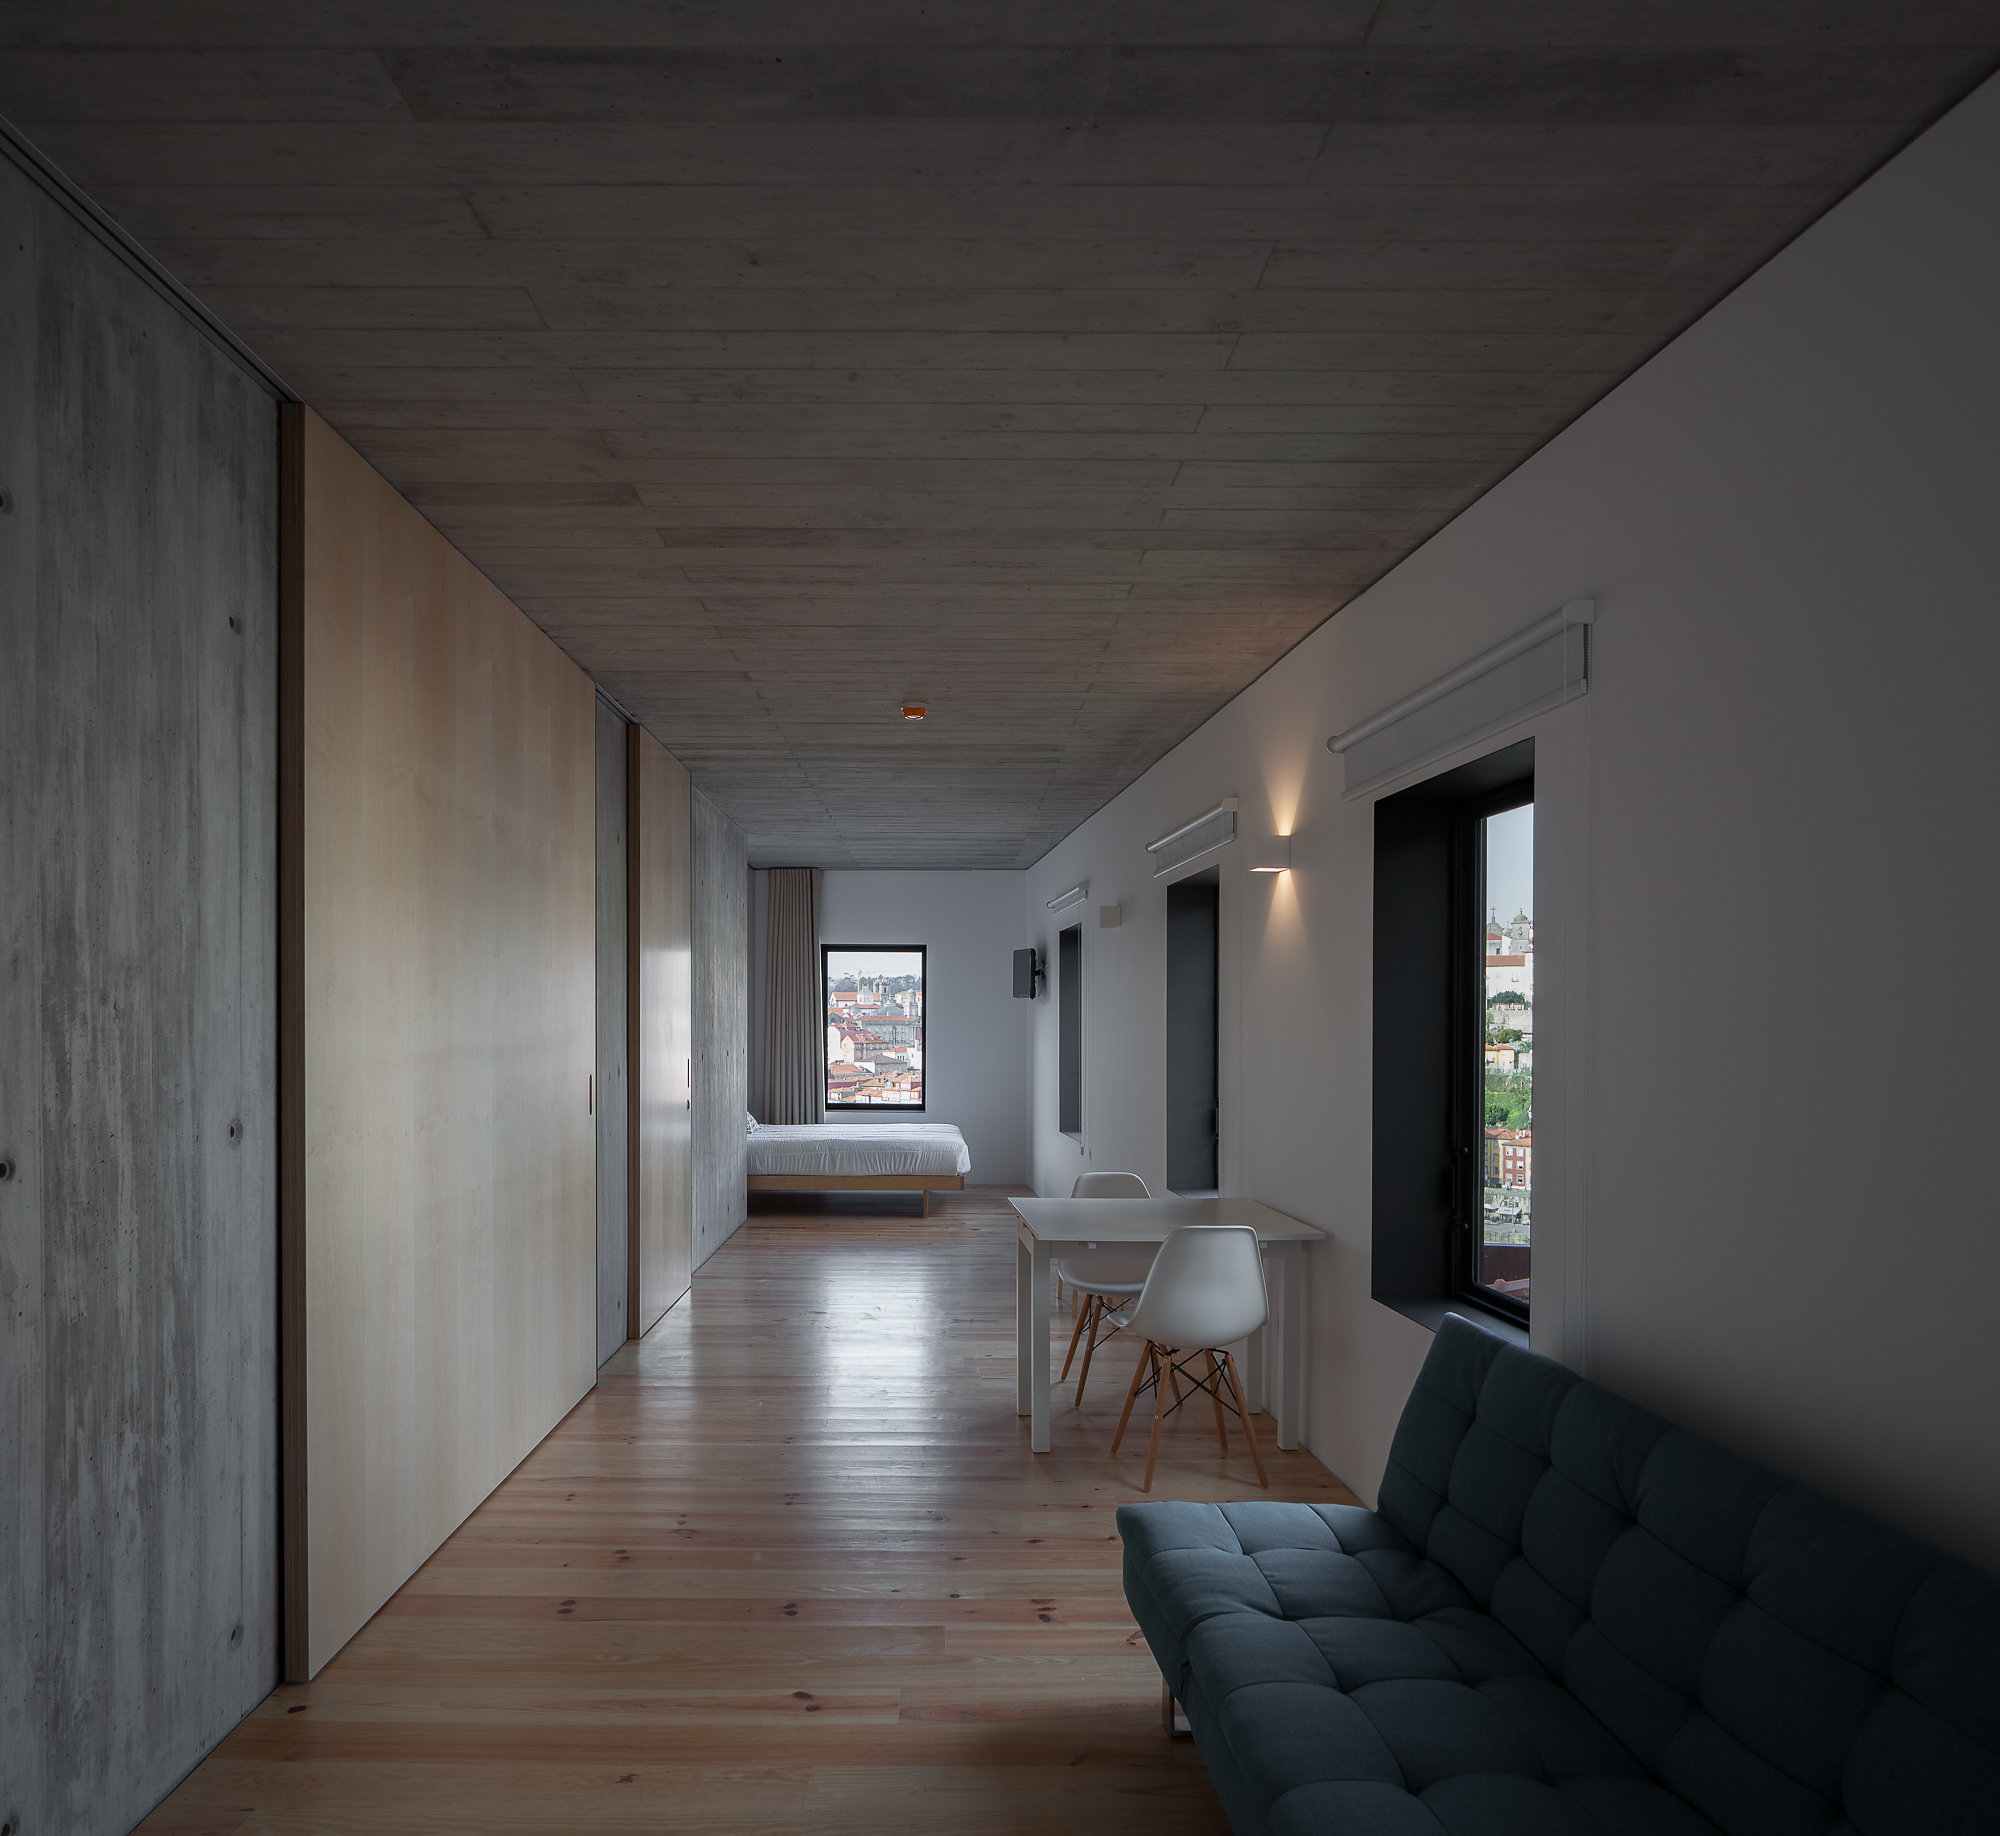
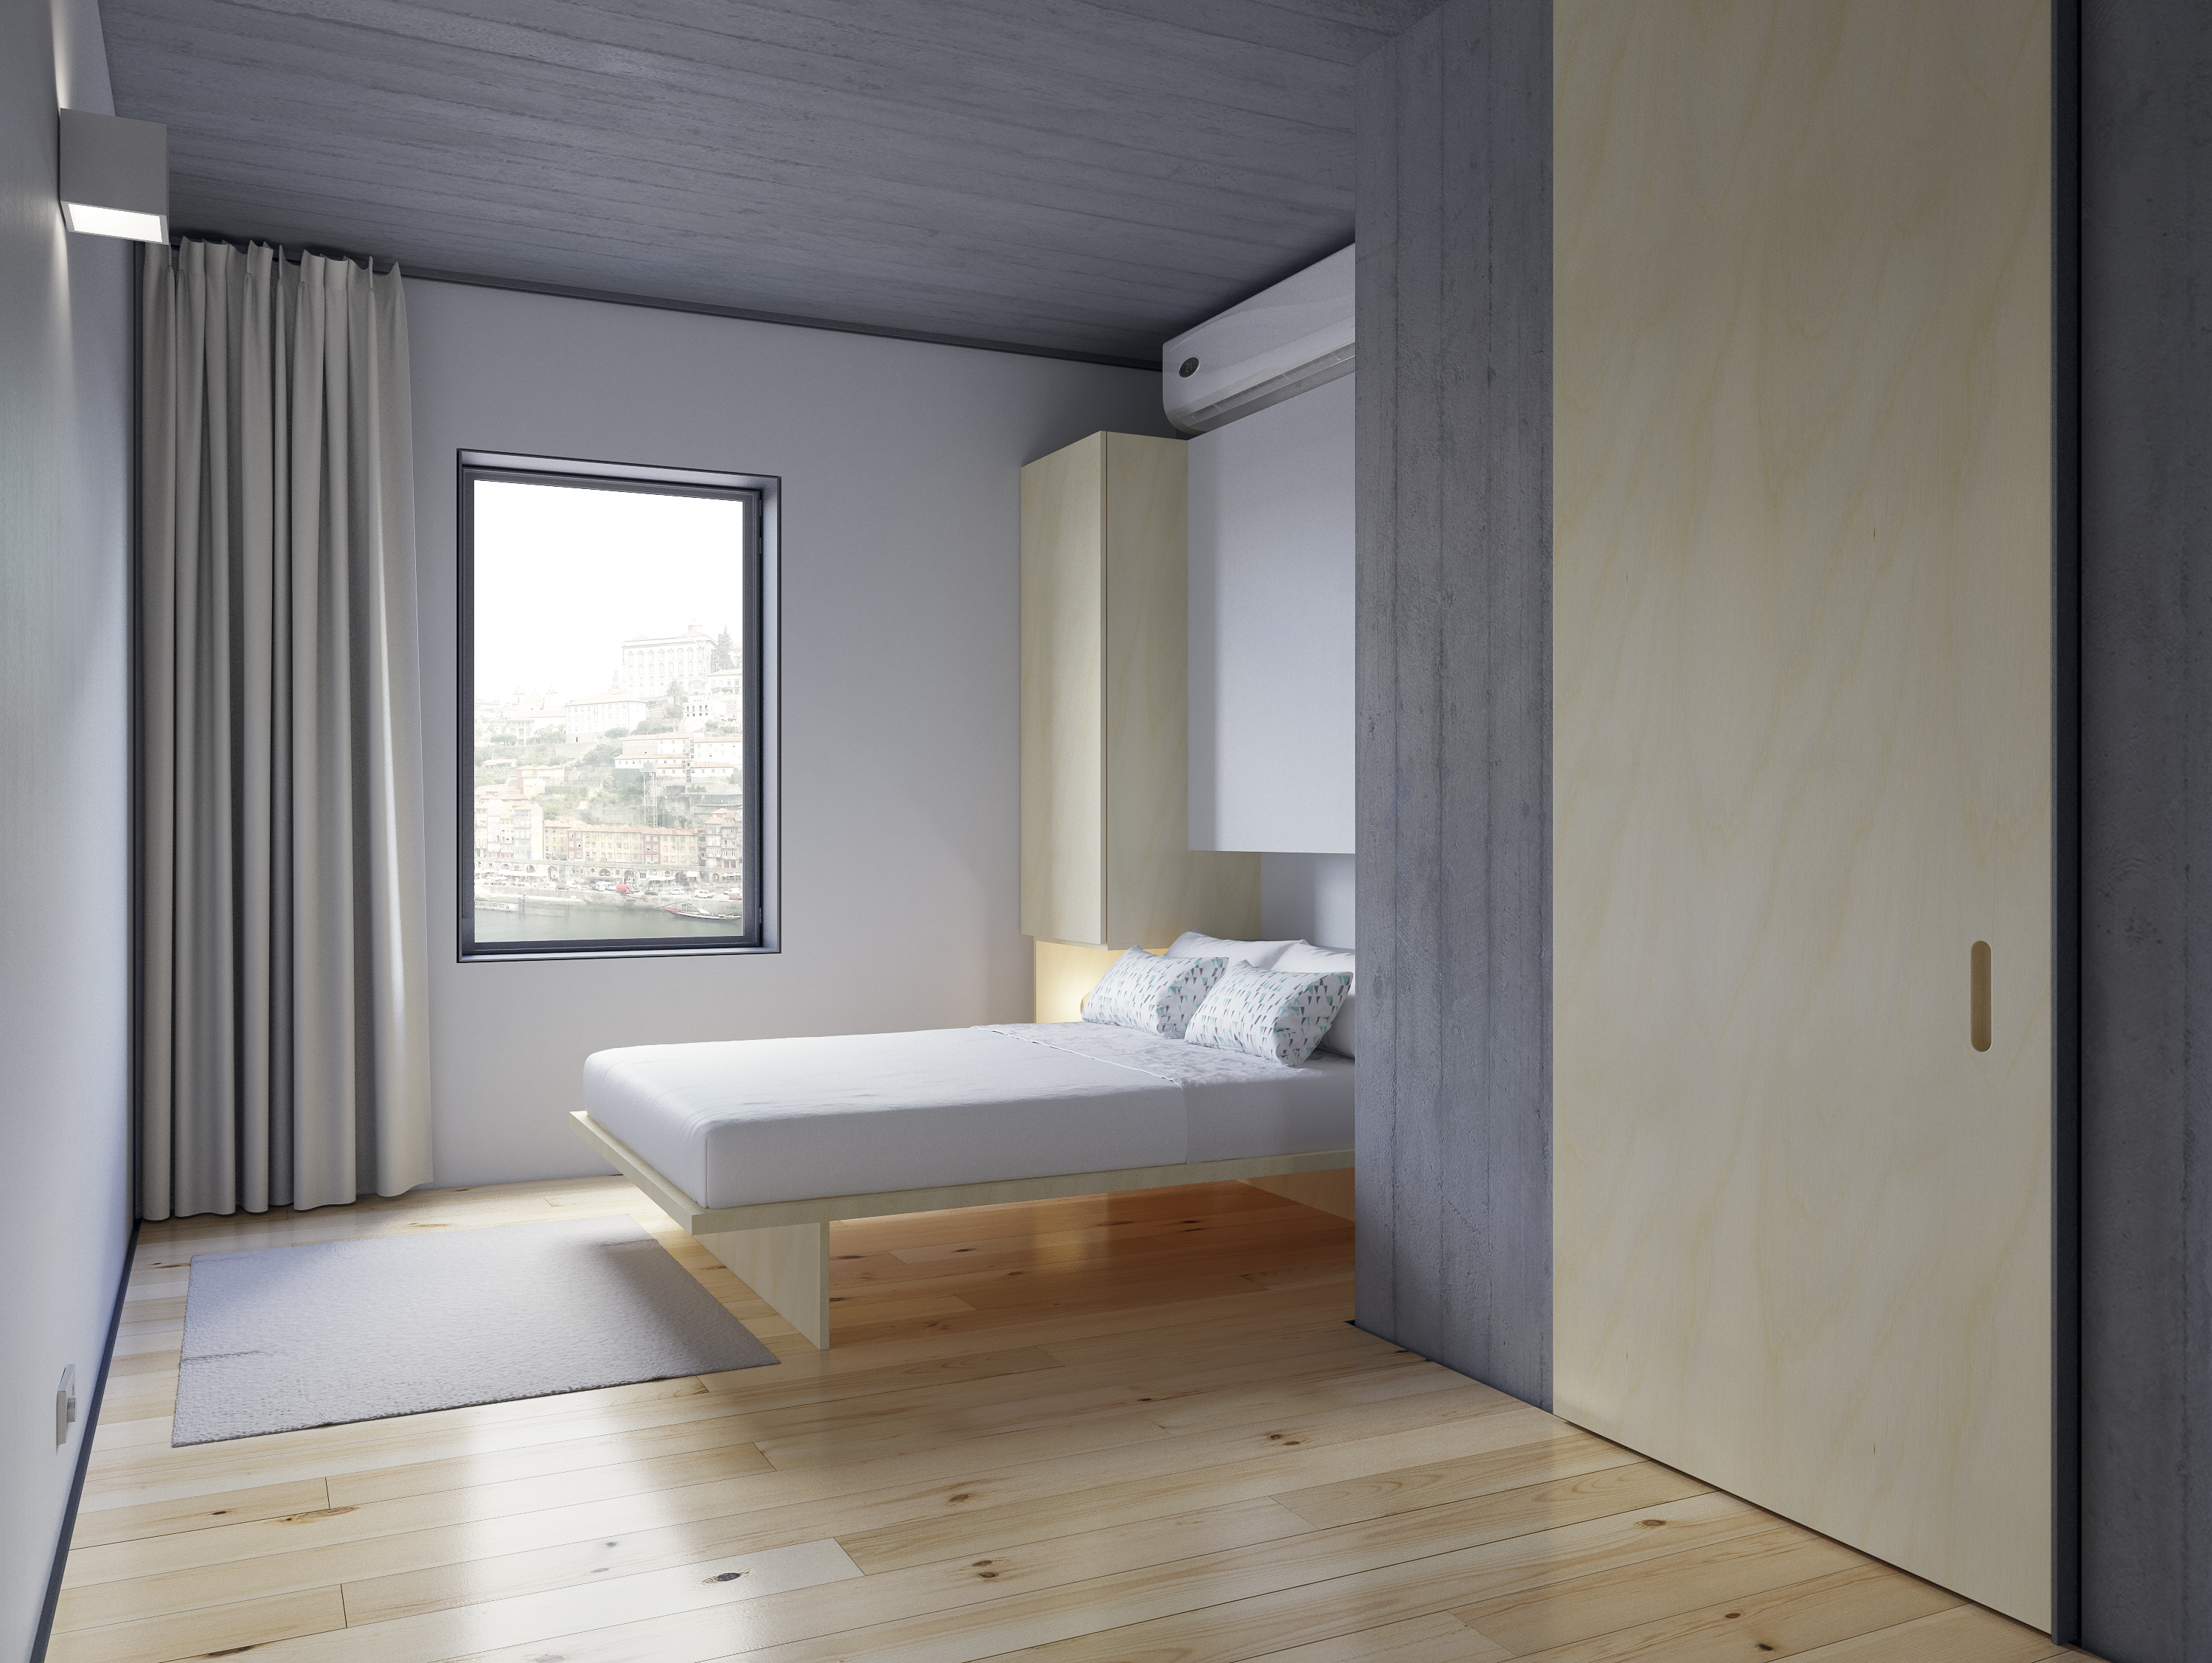
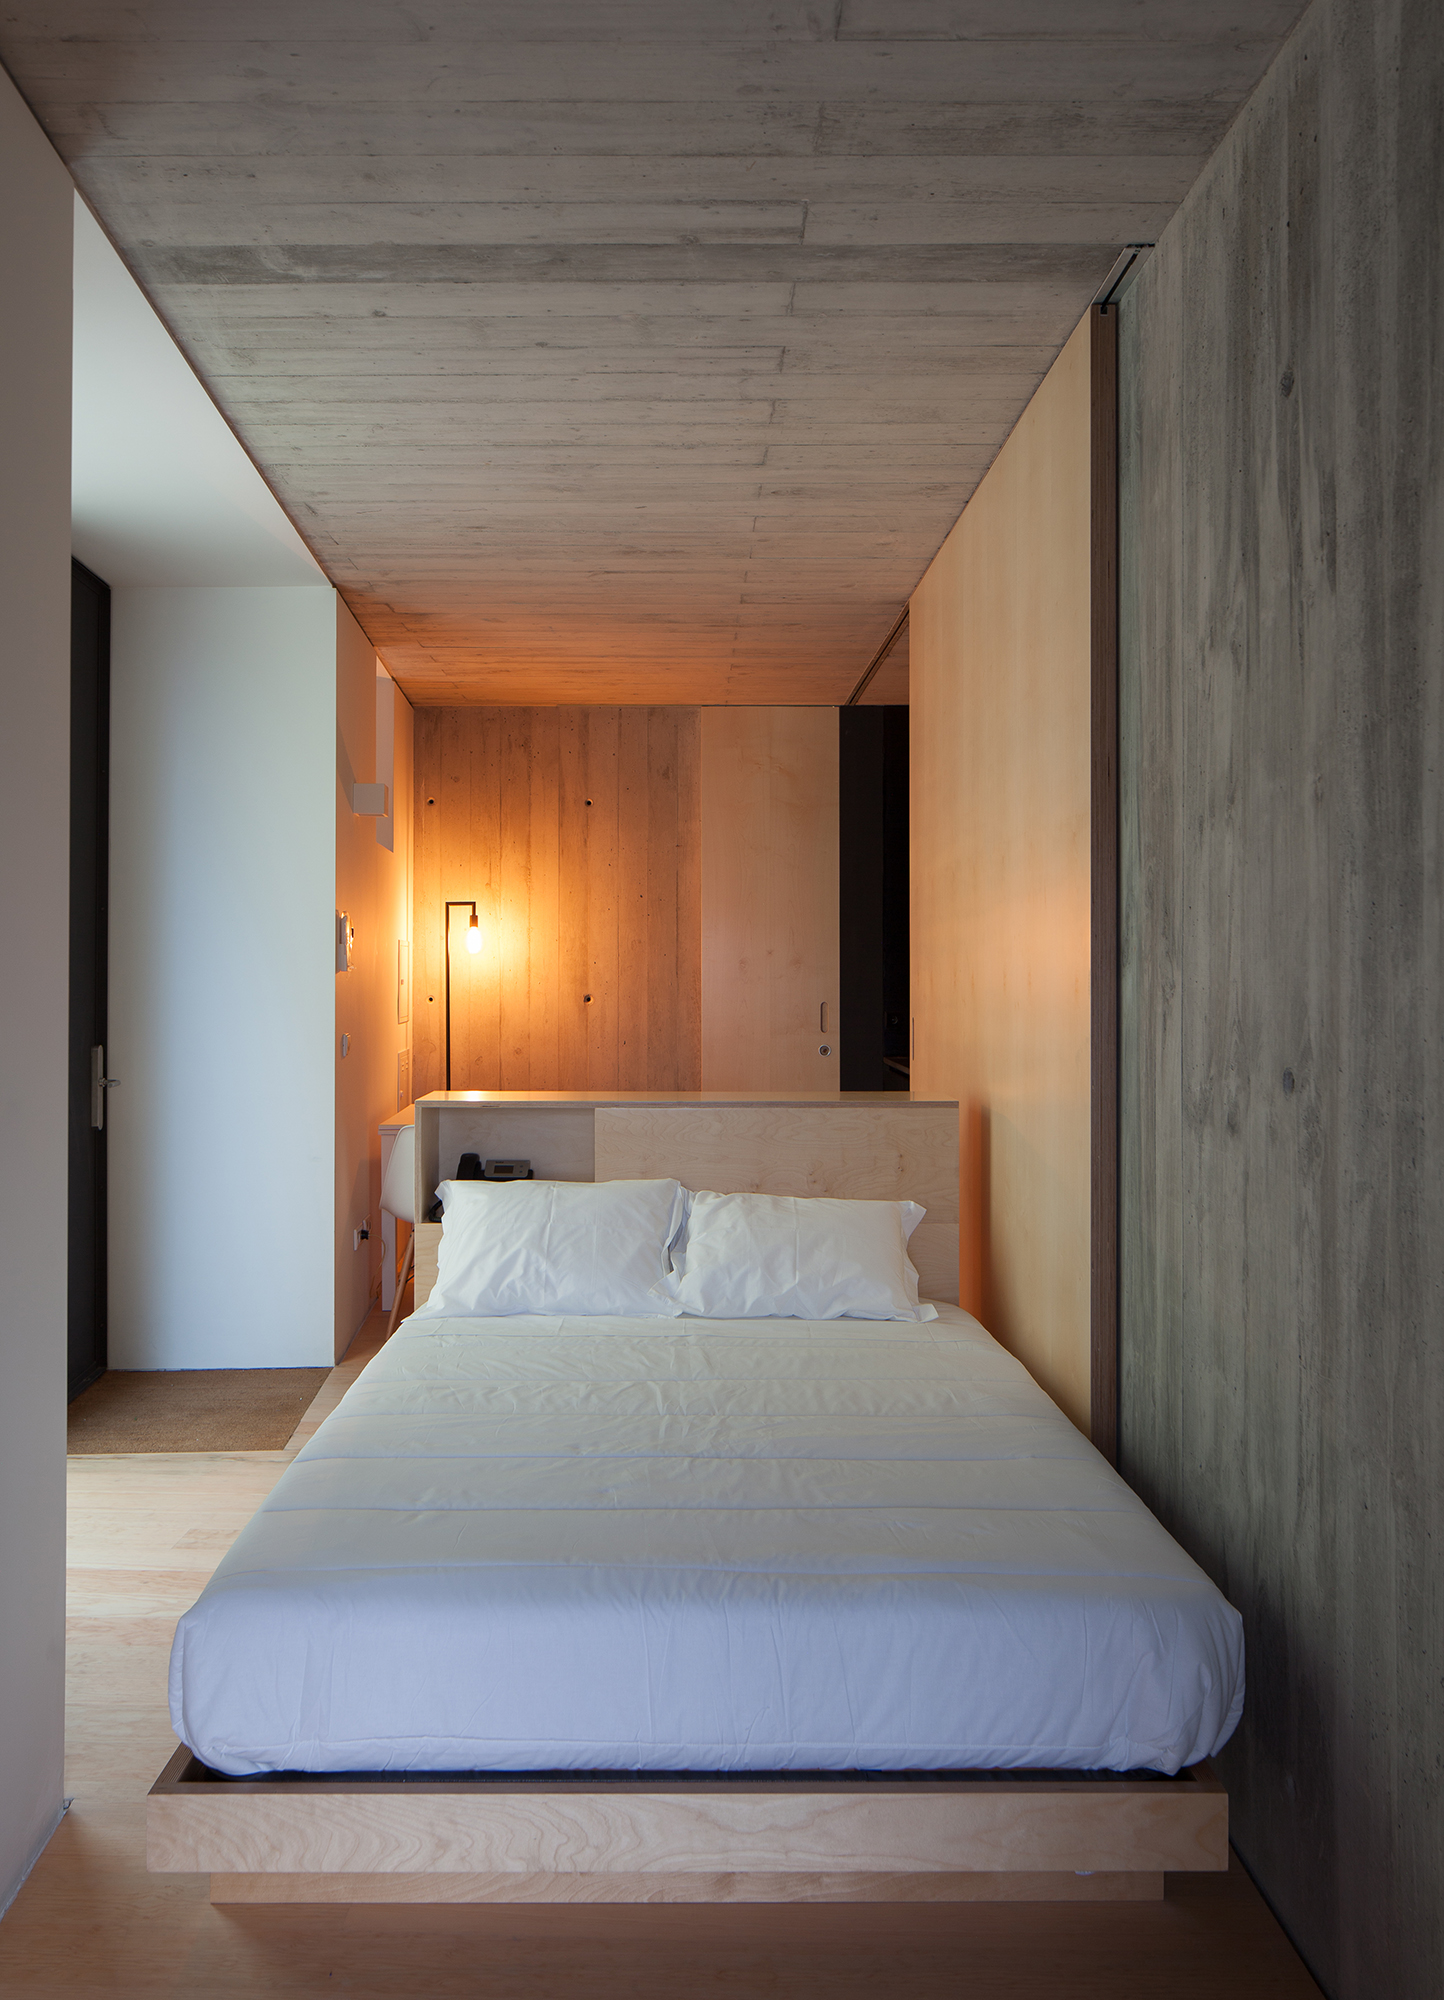
This project started with a friend of ours that wanted to to build an aparthotel on V.N.Gaia downtown (front river, Oporto city) The idea was to rehabilitate an old house with a view over the river to the City of Porto.
Hugo was one of the authors of the project along with architect Nuno Sousa of “NMS Arquitectura” and during the construction process, the client needed some 3D images so they could promote the rooms online and take in some pre-bookings, so he talked with OkDraw to make those images.
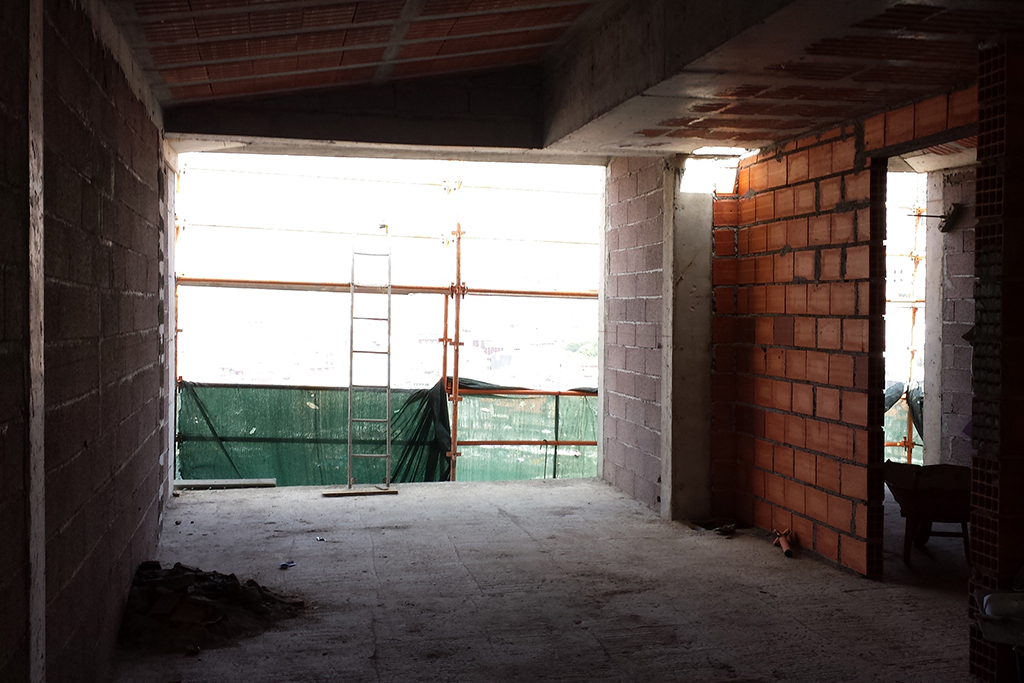
It was the perfect choice, since Hugo was also one of the architects behind the project. That made it easier to have some detailed references, sample materials and a nice finished product. This was promising to be a one-of-a-kind project, because we normally work with our clients via e-mail and we don’t always have the possibility to visit the construction site, and even more rare was the chance to visit it during construction.
3. The Briefing / The CG Preparation
As we said before, the objective of the renders was to use as promotion and visual information for any potential clients of the Hotel to look at online, so we needed to have some detailed and realistic images of the the rooms that perfectly matched them in reality.
The chance of visiting the site during construction allowed us the opportunity to take a lot of reference photographs during construction, a lot of material samples and live feedback when any construction alterations were made.
 |
 |
Due to this, the work flowed nicely with real reference to the surroundings, the natural lighting, and how materials like the concrete, the iron, the wood, or even the furniture worked with the space.
 |
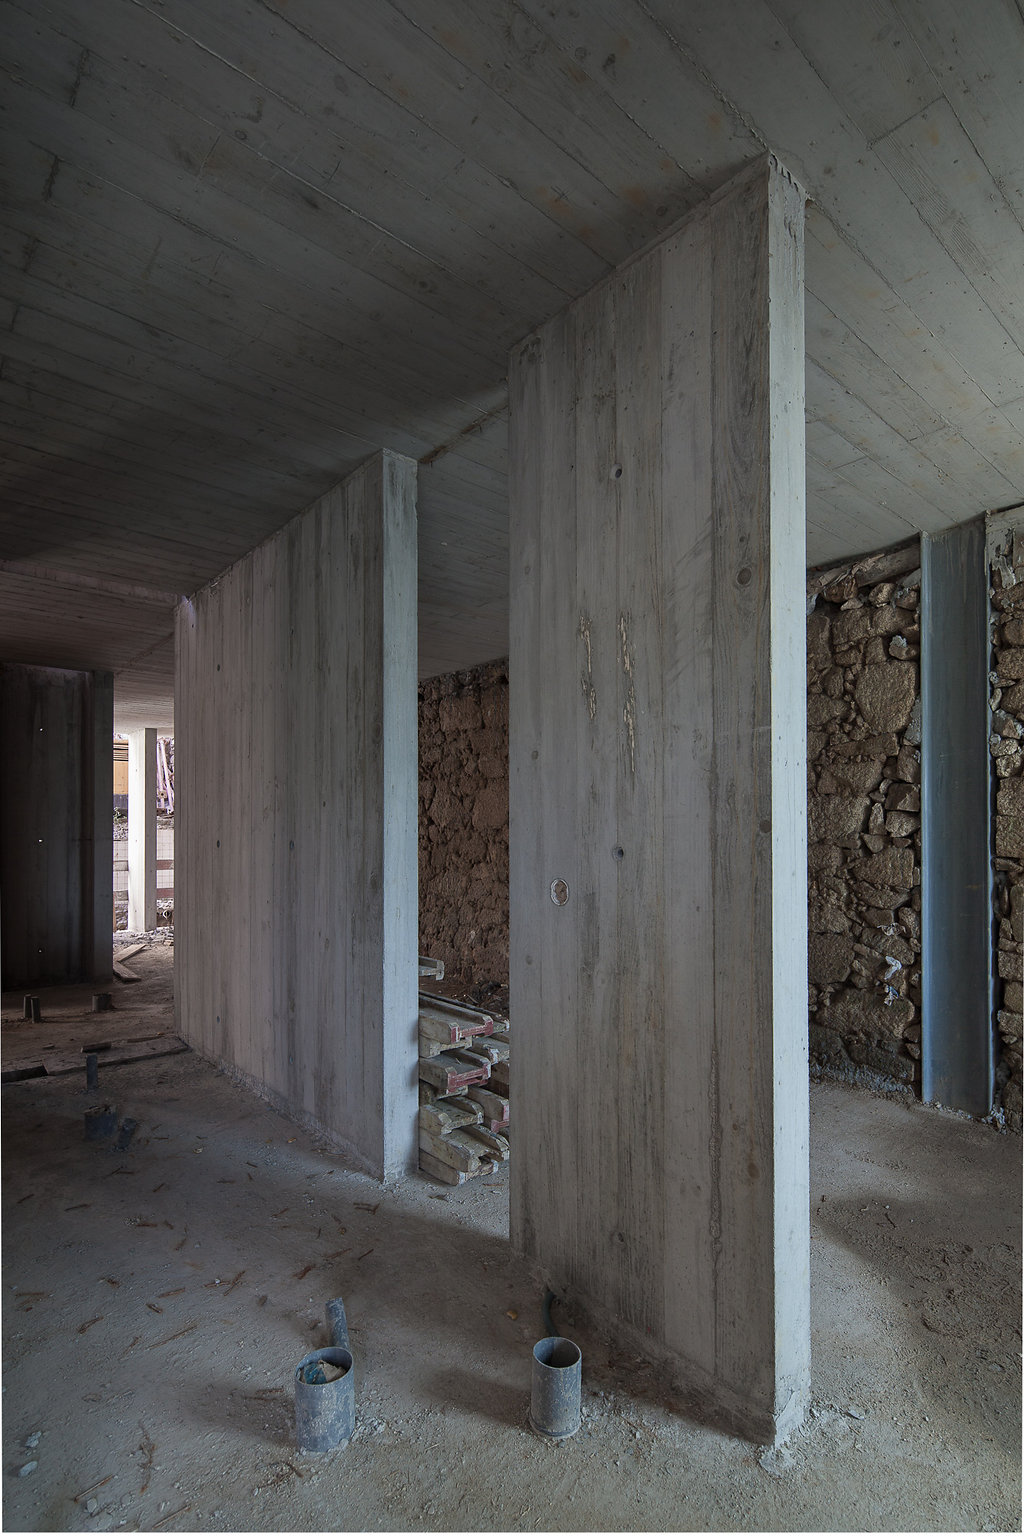 |
While you don’t need to be on a construction site to be able to do the 3D images or animation for a project, it does help a lot to have a better understanding of the space and the feeling of it! It’s almost like creating a 3D image of a building that is already built, but without having it fully finished. When it comes to references, this also made it possible to pick what and from where you wanted to photograph, instead of relying on the client’s photographs.
4. The Software
We always use 3d Studio Max as a base program with some scripts and plugins to make our life easier. The ones we use the most are: Floor Generator, Forest Pack and Quad Chamfer.
For the render engine, we started to use Corona about a year and a half ago , and we’ve stayed faithful to it ever since! We’ll talk more about the reasons we changed to Corona on the following chapters.
5. The Workflow
5.1 – Modeling
Our modeling technique starts out very simple and later on we add the amount of detail that we feel is going to be needed depending on the image resolution, the camera’s distance to the subjects, and the camera view.
We begin by creating some basic lines on the top view of the imported CAD plans, so we can extrude them to make some basic walls. The idea is to use polygon modeling to create windows, fin bevels, door entrances and other details on the base mesh.
Then we move on to the ground, in this case we would have two different ones. A wood floor for all of the Hotel apartments, and a resin/concrete floor for the hotel’s entrance and shop.
For the wood floor we used a very popular and brilliant script called Floor Generator which allowed us to easily create some fine wood boards on a project where most walls were not at 90 degree angles.
 |
 |
After having the base of the architectural project modeled, we moved on to all the architectural details, such as doors, windows, some embedded rails, built in exterior vases, etc.
Then it’s time to move on to all of the decoration elements – lamps, furniture and all the other products. As in everything else, we’ve used some old school polygon modeling techniques, as well as some pre-made objects that we had on our archive.
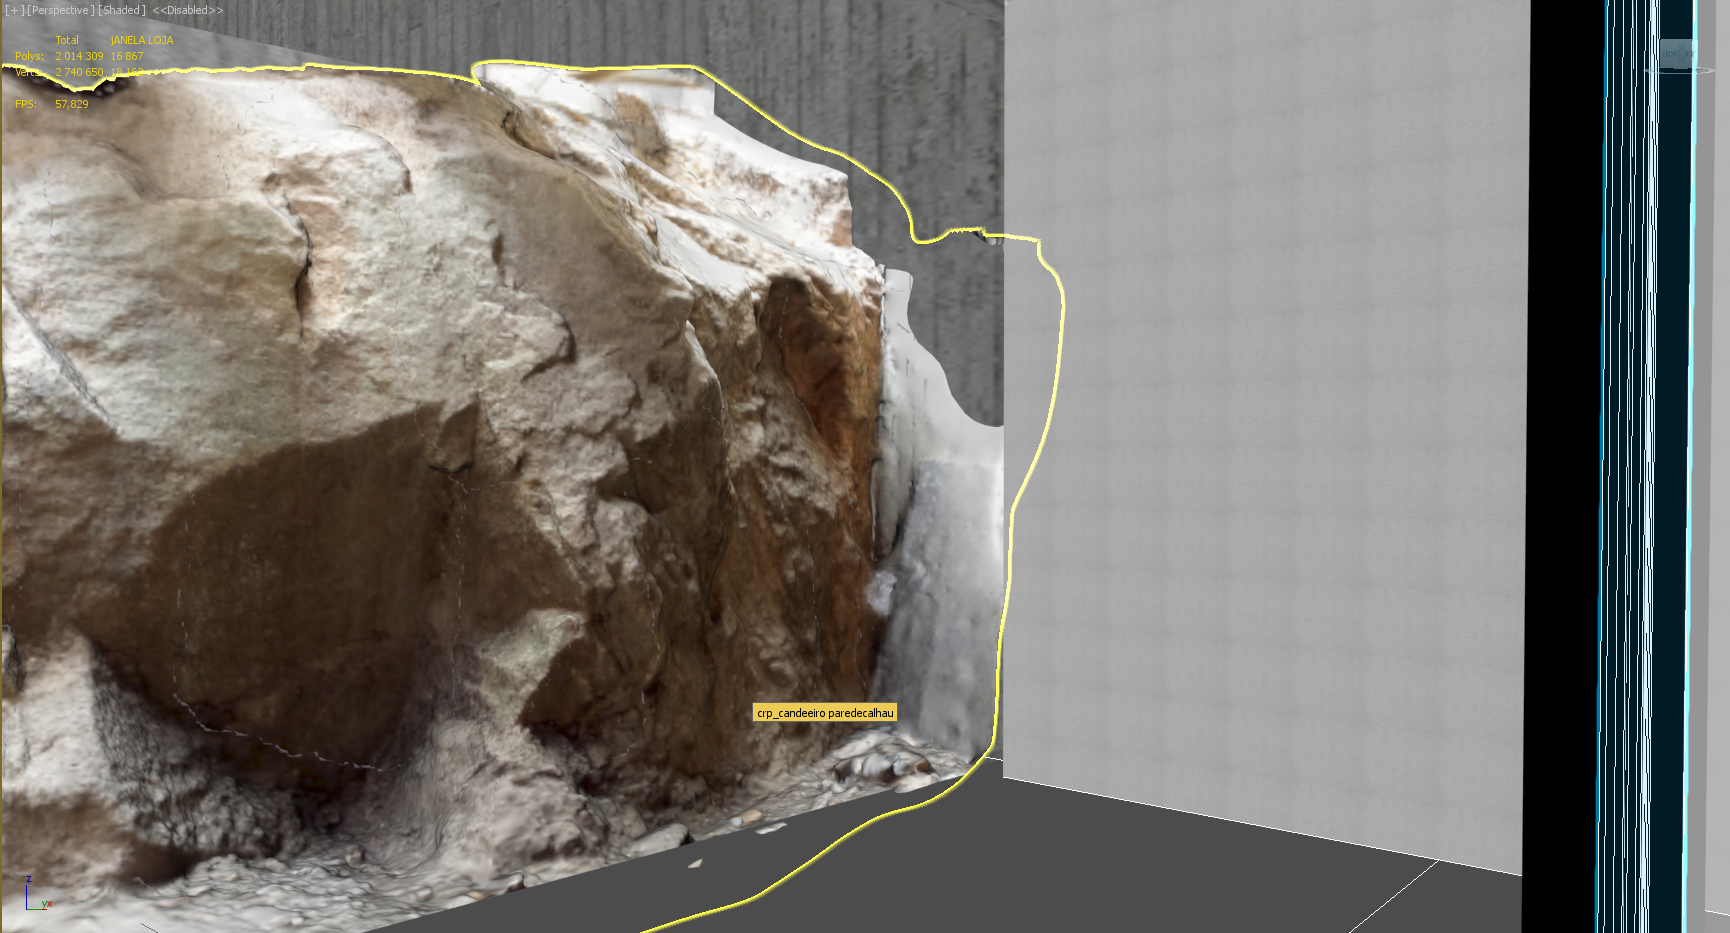
There was also this big rock that was present at the end of the corridor at the hotel entrance. The building would embrace the rock and it would be kept there, so we had to find a way to add the same rock on the 3D images, though at the time we still weren’t sure that it would be seen on any camera.
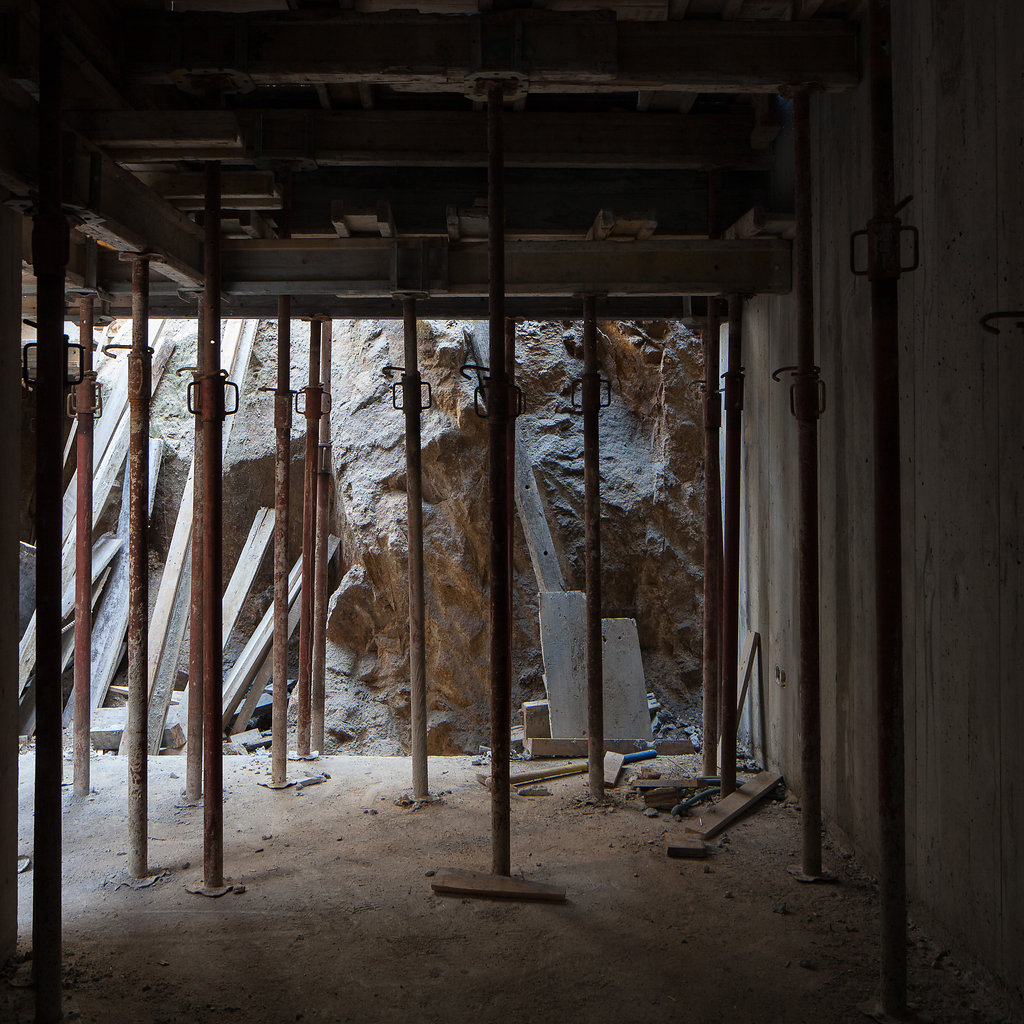
With this in mind, we decided to try photogrammetry. For those who don’t know, photogrammetry is the technology of converting a selection of photographs from different points of view, into a 3D mesh. In the end we only needed the very front of the rock that was facing the entrance.
5.2 – The furniture and interior design
Most of the furniture and interior design was designed by the architects, like beds, kitchens, shelves, and closets. Other pieces like lamps, chairs or sofas, were selected carefully to complement the space.
So we had a list of furniture and other decorations that we followed in order to have the images be as close as possible to the finished project.
We converted the more polygon-heavy objects, and the ones that were copied several times, into corona proxies. Converting into proxies is really easy, and it makes the whole scene and max file lighter, as well as speeding up render times. Fortunately we didn’t have too many objects or geometry that too poly-heavy, so we could get away with only a few proxies in the scene.
Some of the crucial decoration/furniture elements were modeled, shaded and tested in a studio scene, because they would have more prominence on the image or they would be closer to the camera. Here’s an example of one of the decorative objects we’ve modeled, with the photo on the left, and the rendered model on the right:
 |
 |
5.3 – Lighting
For the lighting we always use the daylight system of 3ds Max and we change the sun type to a Corona sun. Then we align the Daylight’s compass to have the north on the right place, in order to be sure that later on, when changing the location and time of the sun, we will have a realistic and well positioned sun. The only other change we make on the daylight options is to adjust the sun size from 1.0 to 2.0 / 3.0, so that this will make some nice, smooth shadows.
 |
 |
After all this, we used VizPark Skydome HDRI #13 (http://www.vizpark.com/shop/hdri-skydome-13/) to add some indirect lighting and some nice reflections to our scene.
Lastly, we added some Corona lights for some of the lamps in order to add some detailed lighting and some small near shadows. We also disabled the option of the light being visible directly or in refraction, as we add some “Corona Light Mtl” to the lamps to have more control with the aesthetic of the light source without changing the color of the illumination.
 |
 |
One detail that we think it’s important is to always add a plane a little bit bigger than your scene, covered by a neutral material. This ensures that you’ll have some direct lighting bouncing off to your scene, helping with render times, render noise and overall lighting of interiors.
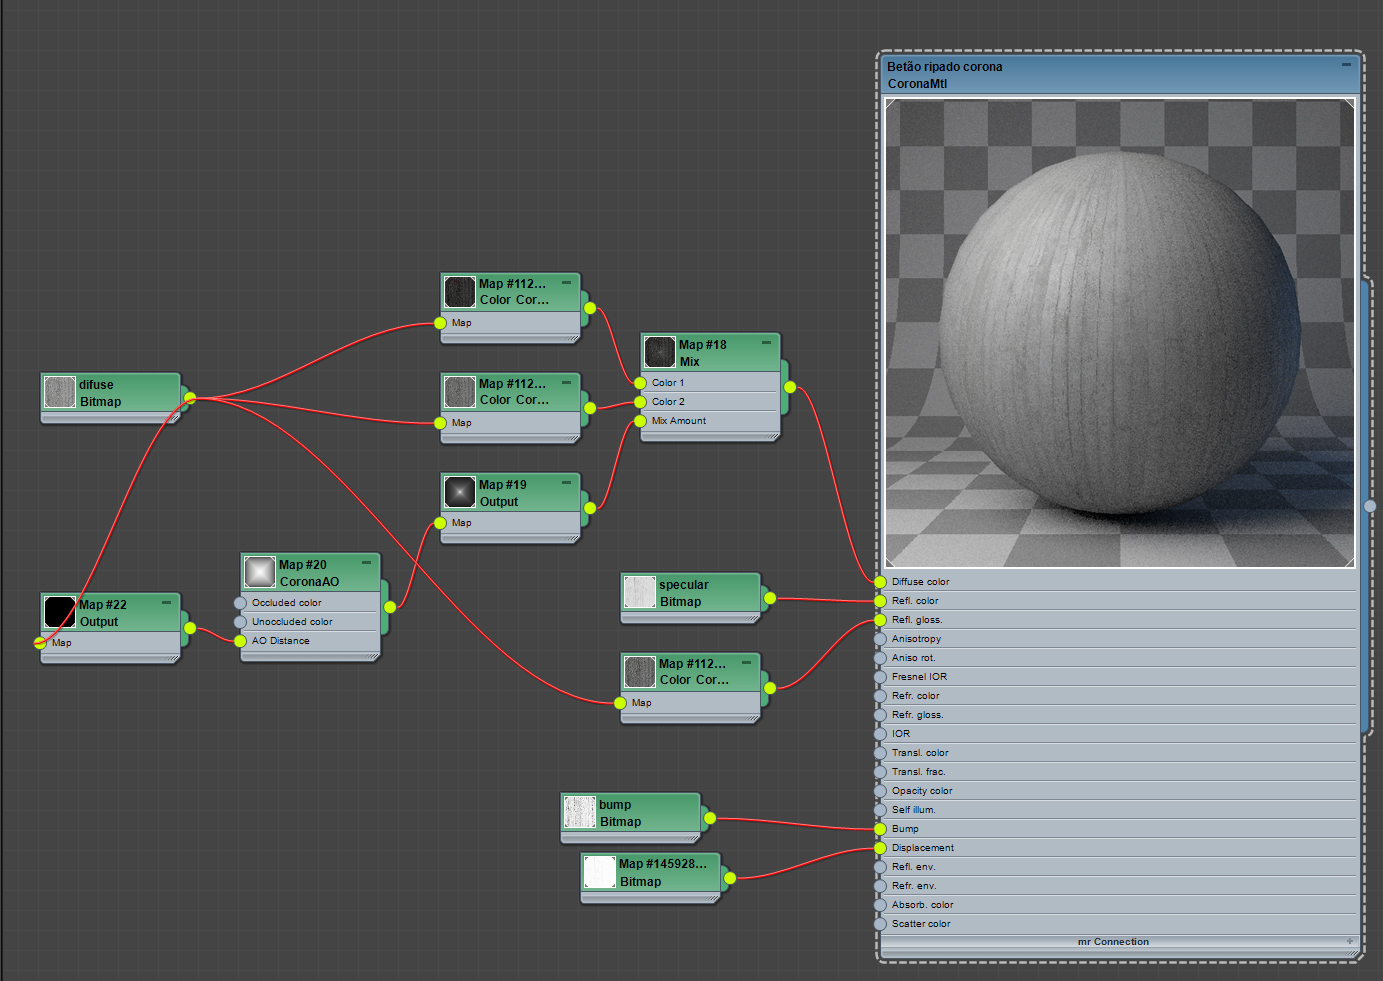
5.4 – Materials
Thankfully the materials on corona are very fast and easy to set up. It doesn’t require much going back and forth, and since the list of materials we had was very straightforward and nothing too complex, we were able to make some excellent simple materials.
The trickiest material was probably the concrete, as we would need a lot of detail, variation, and a clean texture with no repetition or visible tiling. In order to do this, we had to pick a large concrete texture from “Arroway concrete textures volume 1” (https://www.arroway-textures.ch/en/products/concrete-1) and we mixed it with our concrete site photos on photoshop, in order to have a more clean and uniform texture that would match the concrete.
It was important for the purpose of the work that the outside view from the rooms should be understood from the renders, as the view is an important part of this building. So we knew that we would need some reflections and lighting contribution from the exterior surroundings.
The logical way to achieve this, was to create a slightly bent plane surrounding the building, adding a “Corona Light Mtl” with a stitched panorama photo of the surroundings connected to the Texture slot. This worked as a lighted backplate that affected the reflections and illumination of the scene, as well as adding a background view to the exterior.
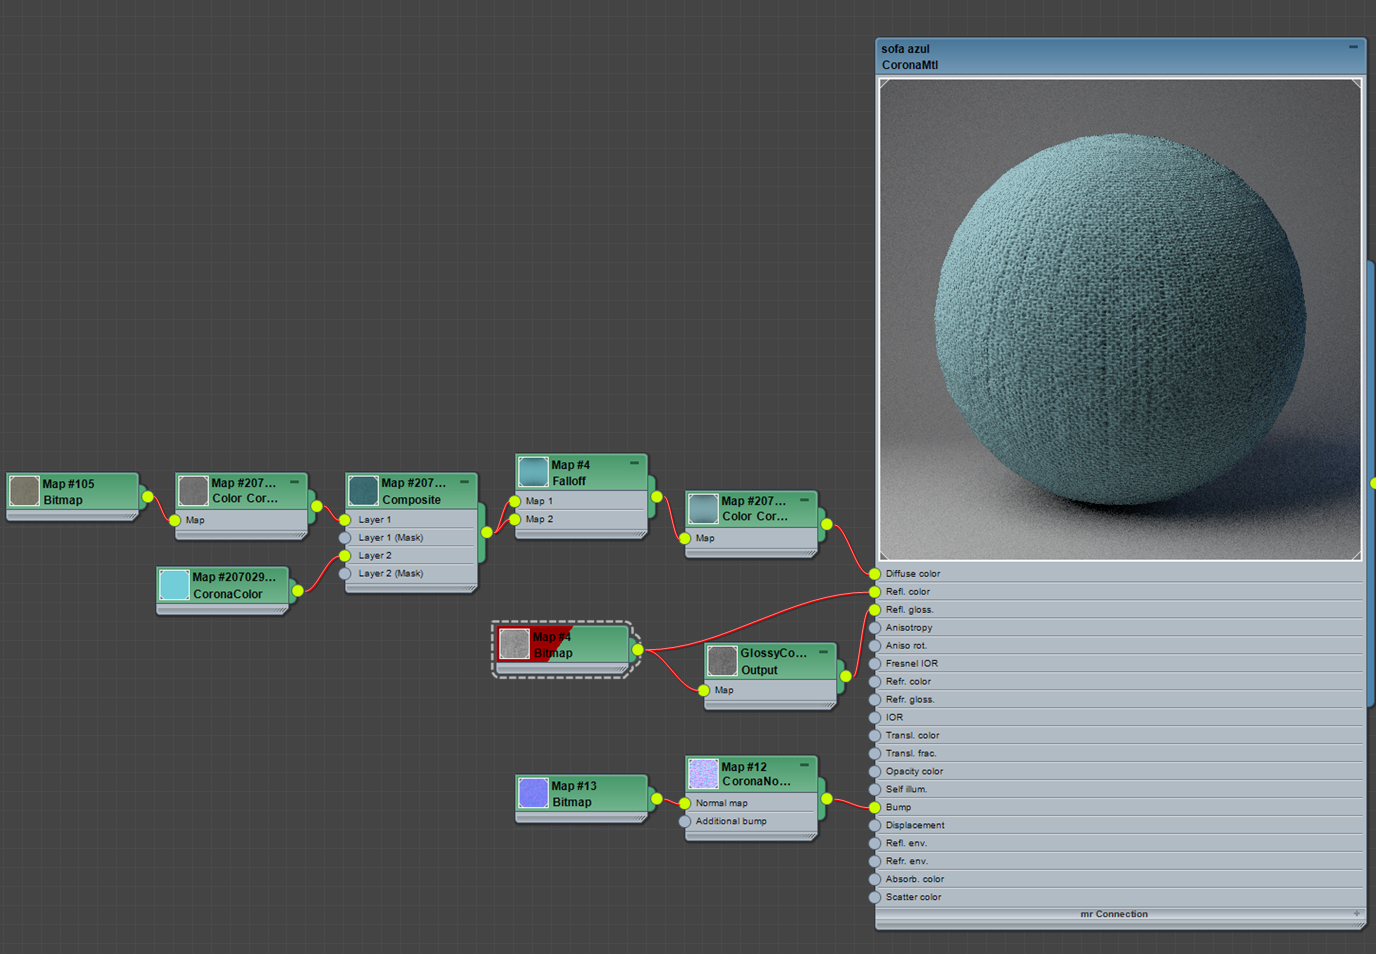
As is our usual workflow, we always use Fresnel on (Except if we are using a falloff map connected to the reflection), some diffuse, reflection, glossiness and bump/normal maps. If the material is really complex we might make it in a studio scene, so we can have a better control and a faster feedback of the material, before bringing it in to the full scene.
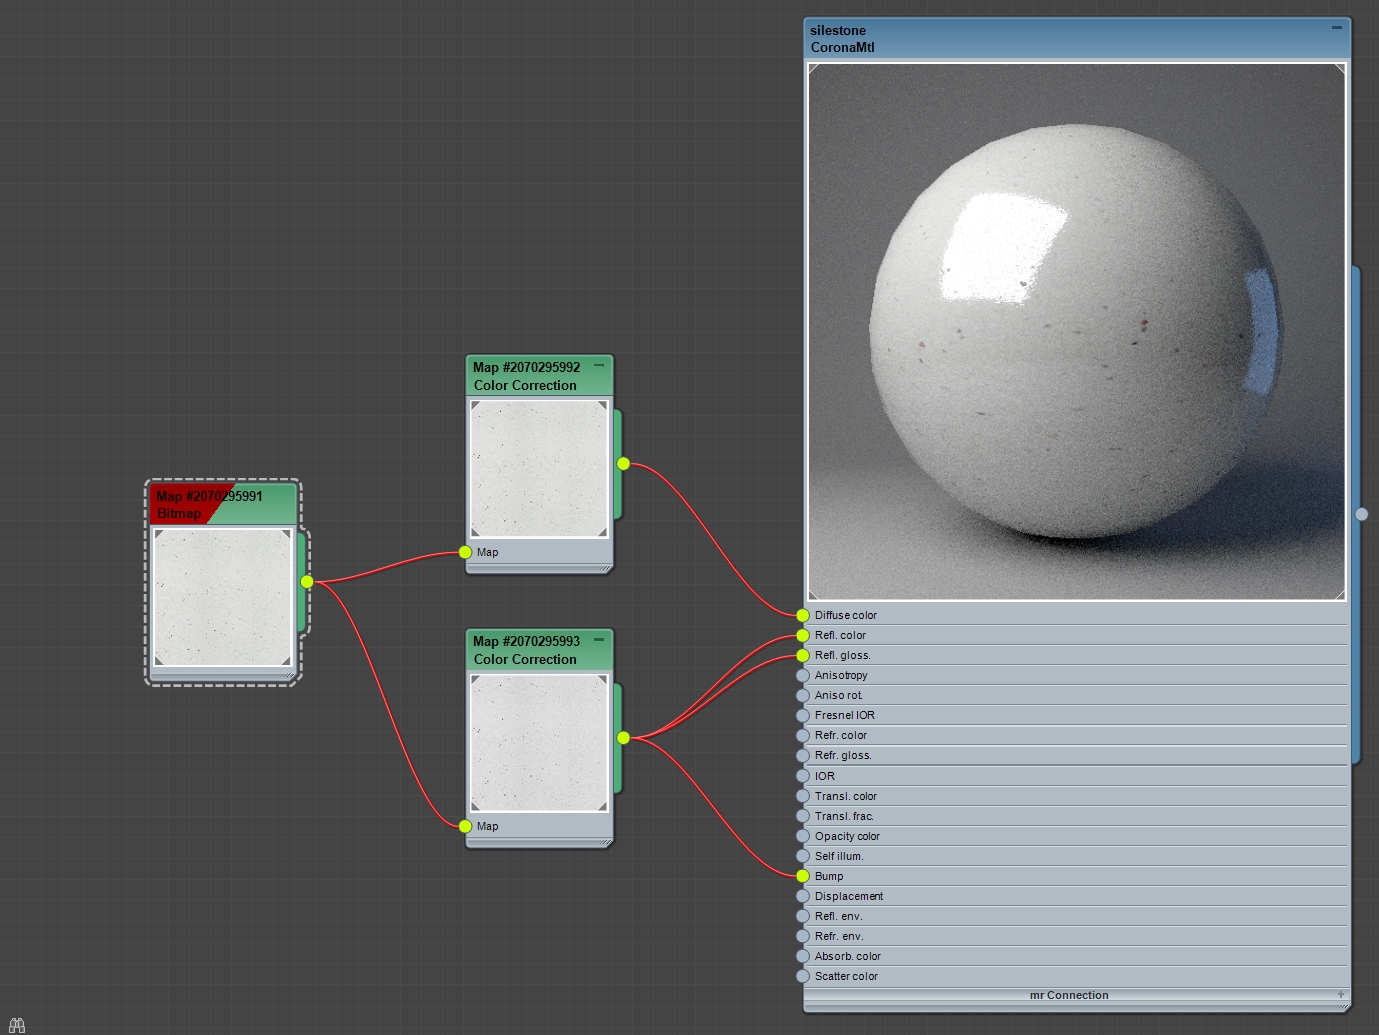
One thing you have to remember about materials is that there’s no such thing as pure whites, pure blacks or 100% saturated colors on real life materials. Another thing to keep in mind, is that every material has a degree of imperfection, so try to use some reflection, glossiness and bump maps to bring out the roughness, scratches or the dirtiness on your materials and embrace those imperfections.
5.5 – Test renders
Test renders from Corona are probably one of our main reasons for sticking with this render engine. We have the ability to use a viewport as an interactive render window, that perfectly matches the advanced final progressive render. Doing test renders in Corona is as easy as starting the interactive window and doing the changes to our lighting, materials, modeling, etc, while we get real time feedback in one of our viewports.
Along with the options to control the exposure, highlight compression and white balance in real time during and after render, this makes light tests and render tests a walk in the park. If you take all this and add the progressive rendering feature, you have the ability to do some fast renders to show to the client.
5.6 – Final renders and post-production
Since we were doing several rooms of the Hotel, after all the models were placed and everything was pretty much ready for rendering we split-up the rooms into individual files. This way we could have less polygons and calculations during render, which makes the whole process a bit quicker.
Managing the render settings in Corona is really simple. We set the resolution of the image, select the Render Elements, turn on VFB auto-save and hit render. That’s it! Corona works really well with the default settings and 90% of the times, there’s no need for us to change those.
The Render Elements we normally use are: Direct, Indirect, Reflect, Refract, Normals dotproduct, Normals geometry and Normals shading (we only use these two to check for any errors or odd behaviors during test renders), Zdepth, ID, Wirecolor, Albedo (besides using this element to check for extreme whites or blacks, we also use it from time to time to add some contrasts), Shadows and Source_color.

We are not going over what every render element does and what you can use it for, because that’s most of the times pretty easy to understand just by the name of each render element, but what we can say about post–prodution is that there’s more than one way to do it. Some people rely more on post-production then others, some projects require more post-production, and each render element can be used for different purposes in different ways. It’s a matter of trying them out and experimenting by yourself to see what suits you best.

Although we had all this render elements, the final result was so direct, that we didn’t have to do much post-production, just some minor adjustments on lightroom, some Depth of field and that was it!
One thing we needed to keep in mind when doing the post-production on this project was the need to have bright and well illuminated rooms, as well as to glimpse the view of the outside without exposing it too much.
6. Conclusion
We had a great time doing this project, not only because we all knew each other very well and were able to work together, but also because we had a rare opportunity to take a different approach to the project.
Corona makes everything straightforward and fast. The ability to have interactive test renders, progressive renders, real time exposure, highlight compression and white balance control during and after render makes everything so much better and faster.
Corona to us is really the leader when it comes to innovations, and the Corona team were able to see the flaws in this industry’s existing software. One example of this is the price and the flexibility of the payment methods available with Corona.

At the time we did this work we were using Corona 1.2, so we weren’t yet able to use the Adaptive Image Sampling and Denoising features that would probably have cut down our render times a lot, as well as the Multi Region VFB rendering option that would greatly benefit our renders.
Obviously, it wasn’t possible to cover every single detail of this project in this article, but we’ve tried to talk about the most unusual and important parts. We hope you’ve liked our making of and hope that we’ve shared something useful to the community!
Credits:
3D renders by: “OkDraw”
Architecture by: “NMS arquitectura” and “Hugo Ferreira, Arquitecto”
Architectural Photographs by: “José Campos”
Links:
http://www.okdraw.net/
https://www.facebook.com/okdrawstudio/
http://www.nmsarquitectura.com/
http://hugoferreira-arq.com/
http://www.ohporto.com/
One thought on “OhPorto Apartment Hotel by OkDraw”