Back in December 2016, Shabeer posted his “Morning After the Rain” image in the Corona forums, which proved very popular in the community! We spoke with him to learn what went into making these photo-real images.
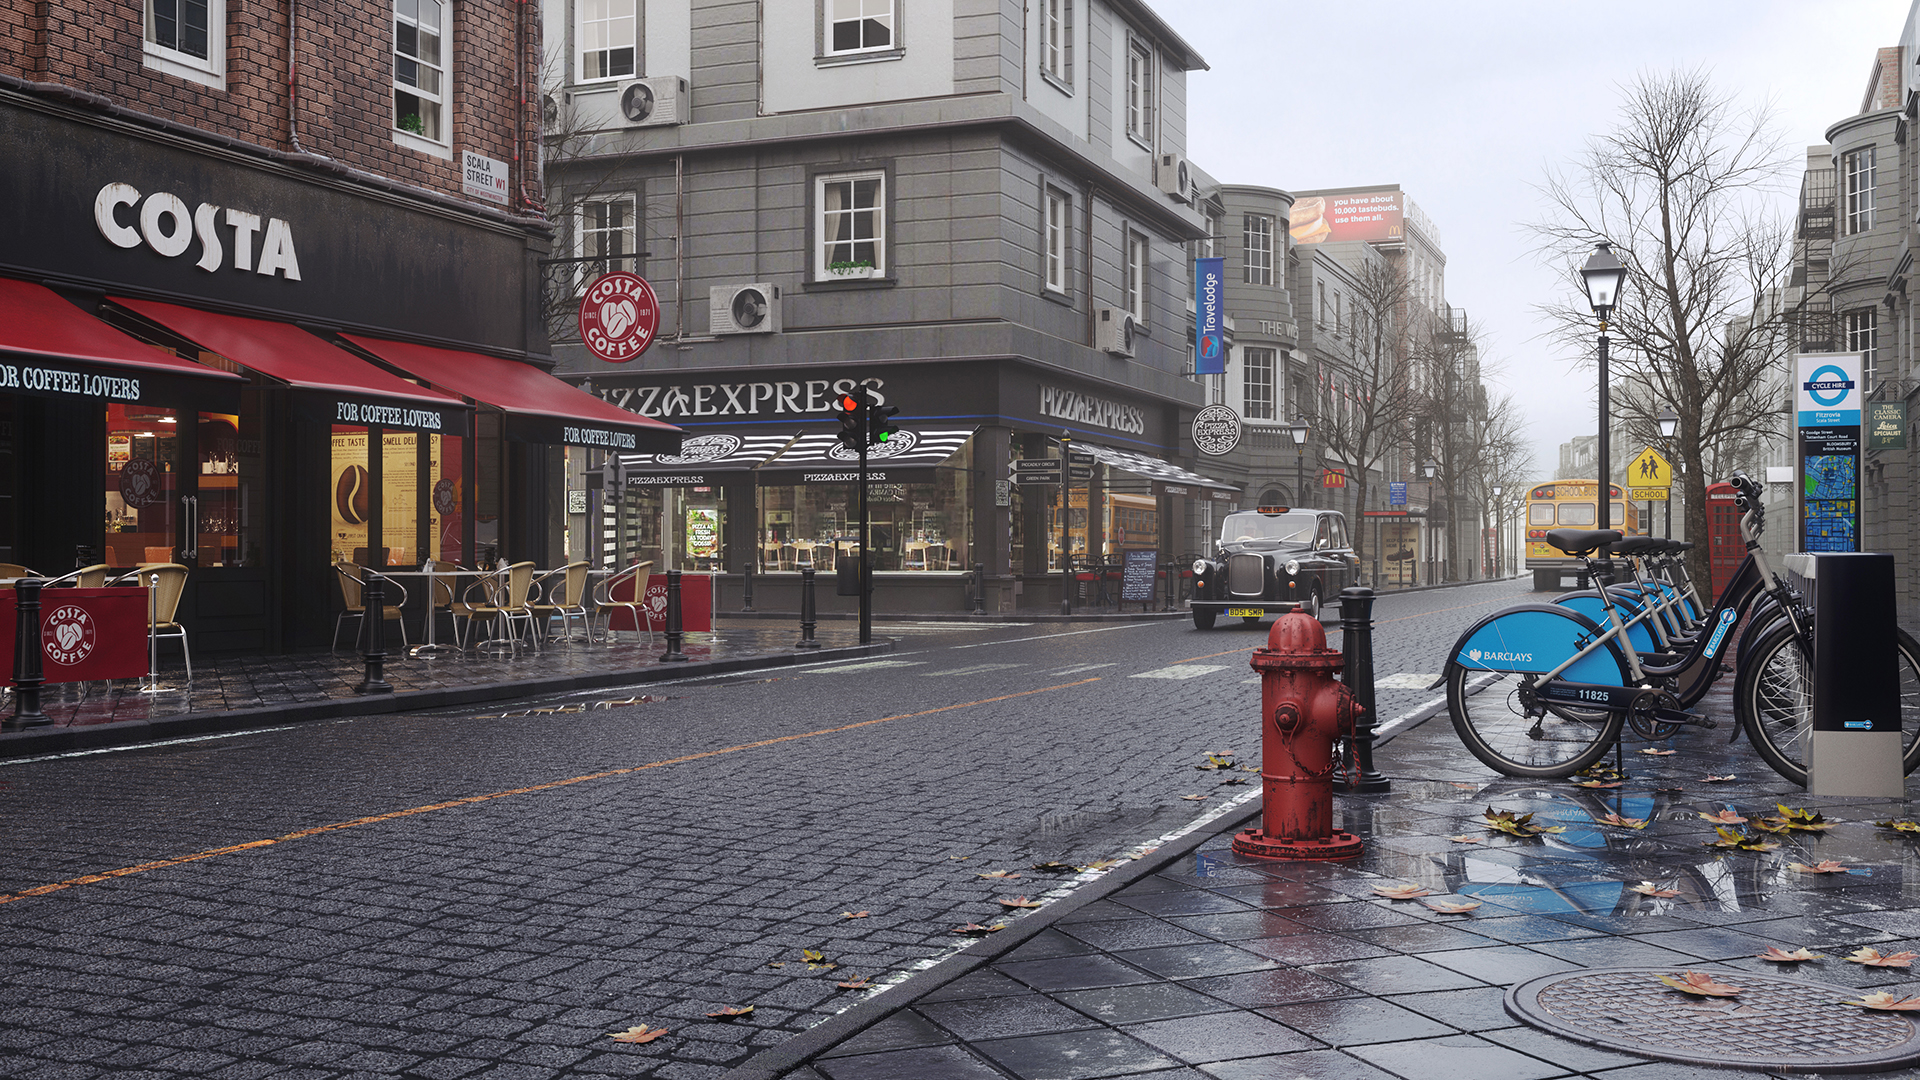
Read how Shabeer created ‘Morning After the Rain’
Hi everyone! My name is Shabeer. I am a CG artist from India, and lead artist at a British construction consultancy company in Qatar.
After my post “Morning after the rain” on the Corona forum, I received a kind proposal from the Corona team to write a ‘making of’ about the scene, to share knowledge with our community. I have to say that I’m glad and honored to do that, so let’s begin!
Inspiration
The “after rain” concept is nothing new – I had seen images from Zhang Naigang and Marek Denko on the CGSgsociety forums years ago. I thought it would be nice to make a work with a similar ambiance one day, so I put their images into my “to-do” folder where I collect references for later use.
Recently, I decided to test drive Corona Renderer. After doing some simple scenes I was impressed by the workflow and quality in Corona, so I thought “Why not tackle a technically demanding scene?” That’s how these images made their way out of the “to-do” folder.
References
With the inspiration in place, the next step was to gather some references. I started collecting photos of European streets. Googling “after the rain street” gives lots of beautiful photos, as well as other 3D renders.

Layout & Lighting
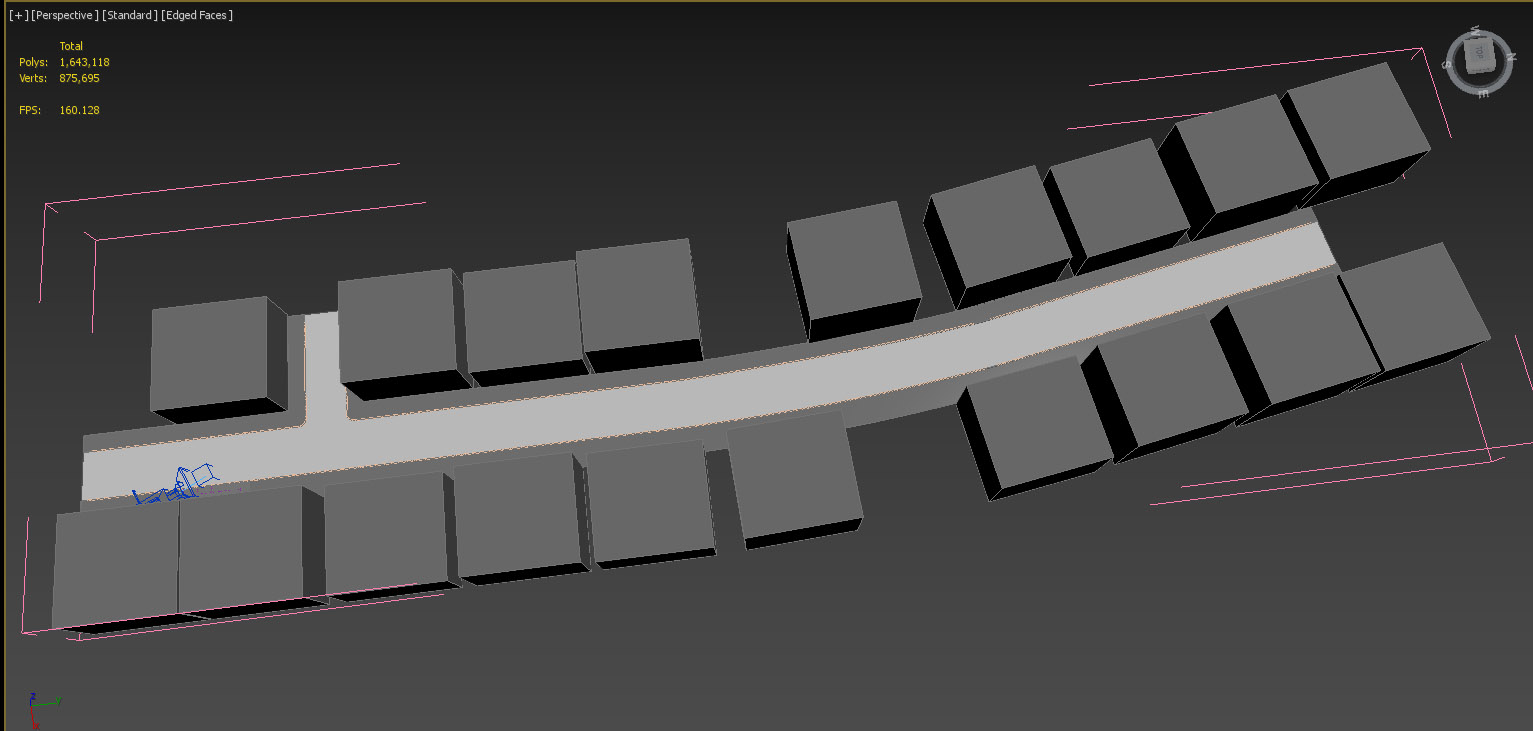
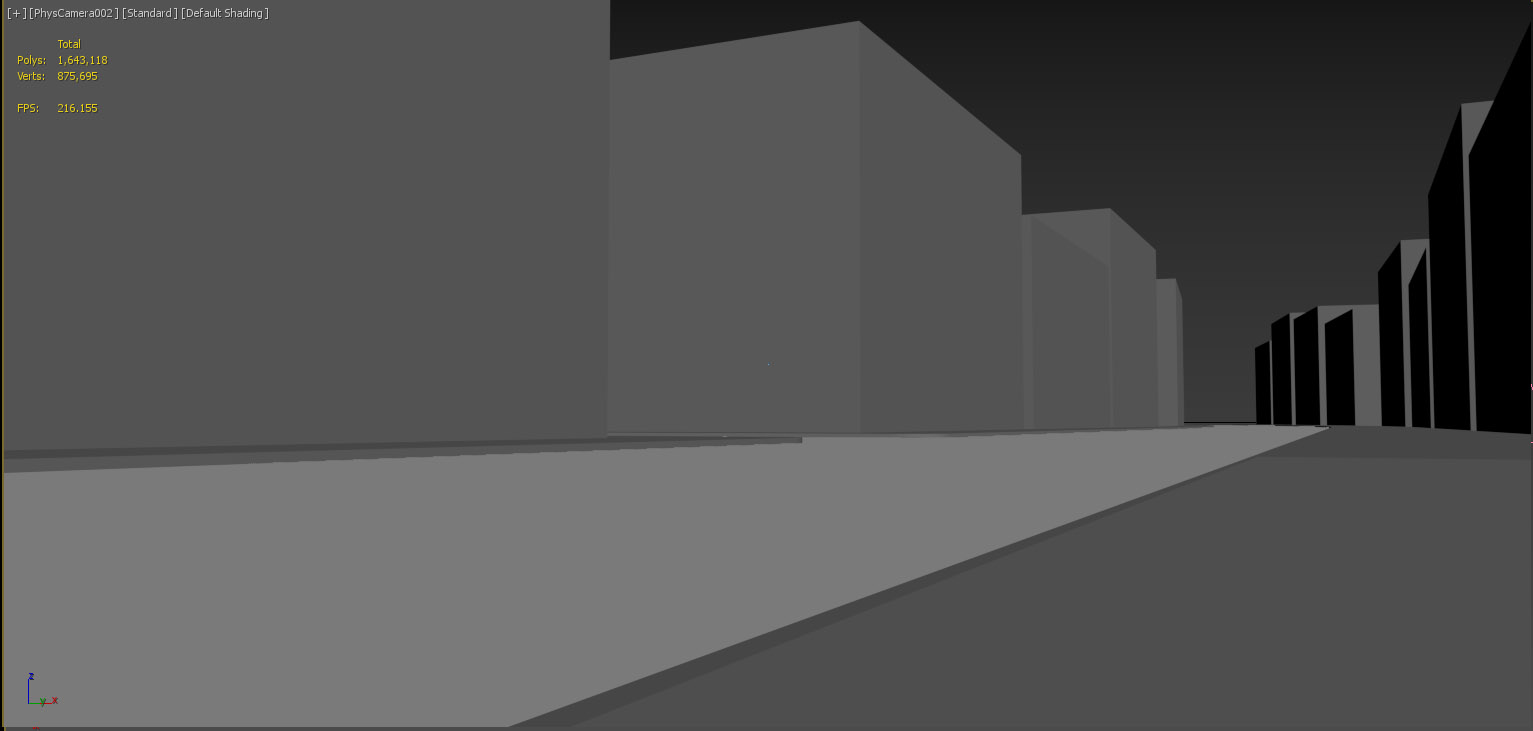
Without any plan, I quickly blocked out a narrow street with buildings on both sides and set up a camera and the lighting. The main source of light is just one ‘overcast sun’ HDRI map.
Modeling & Materials
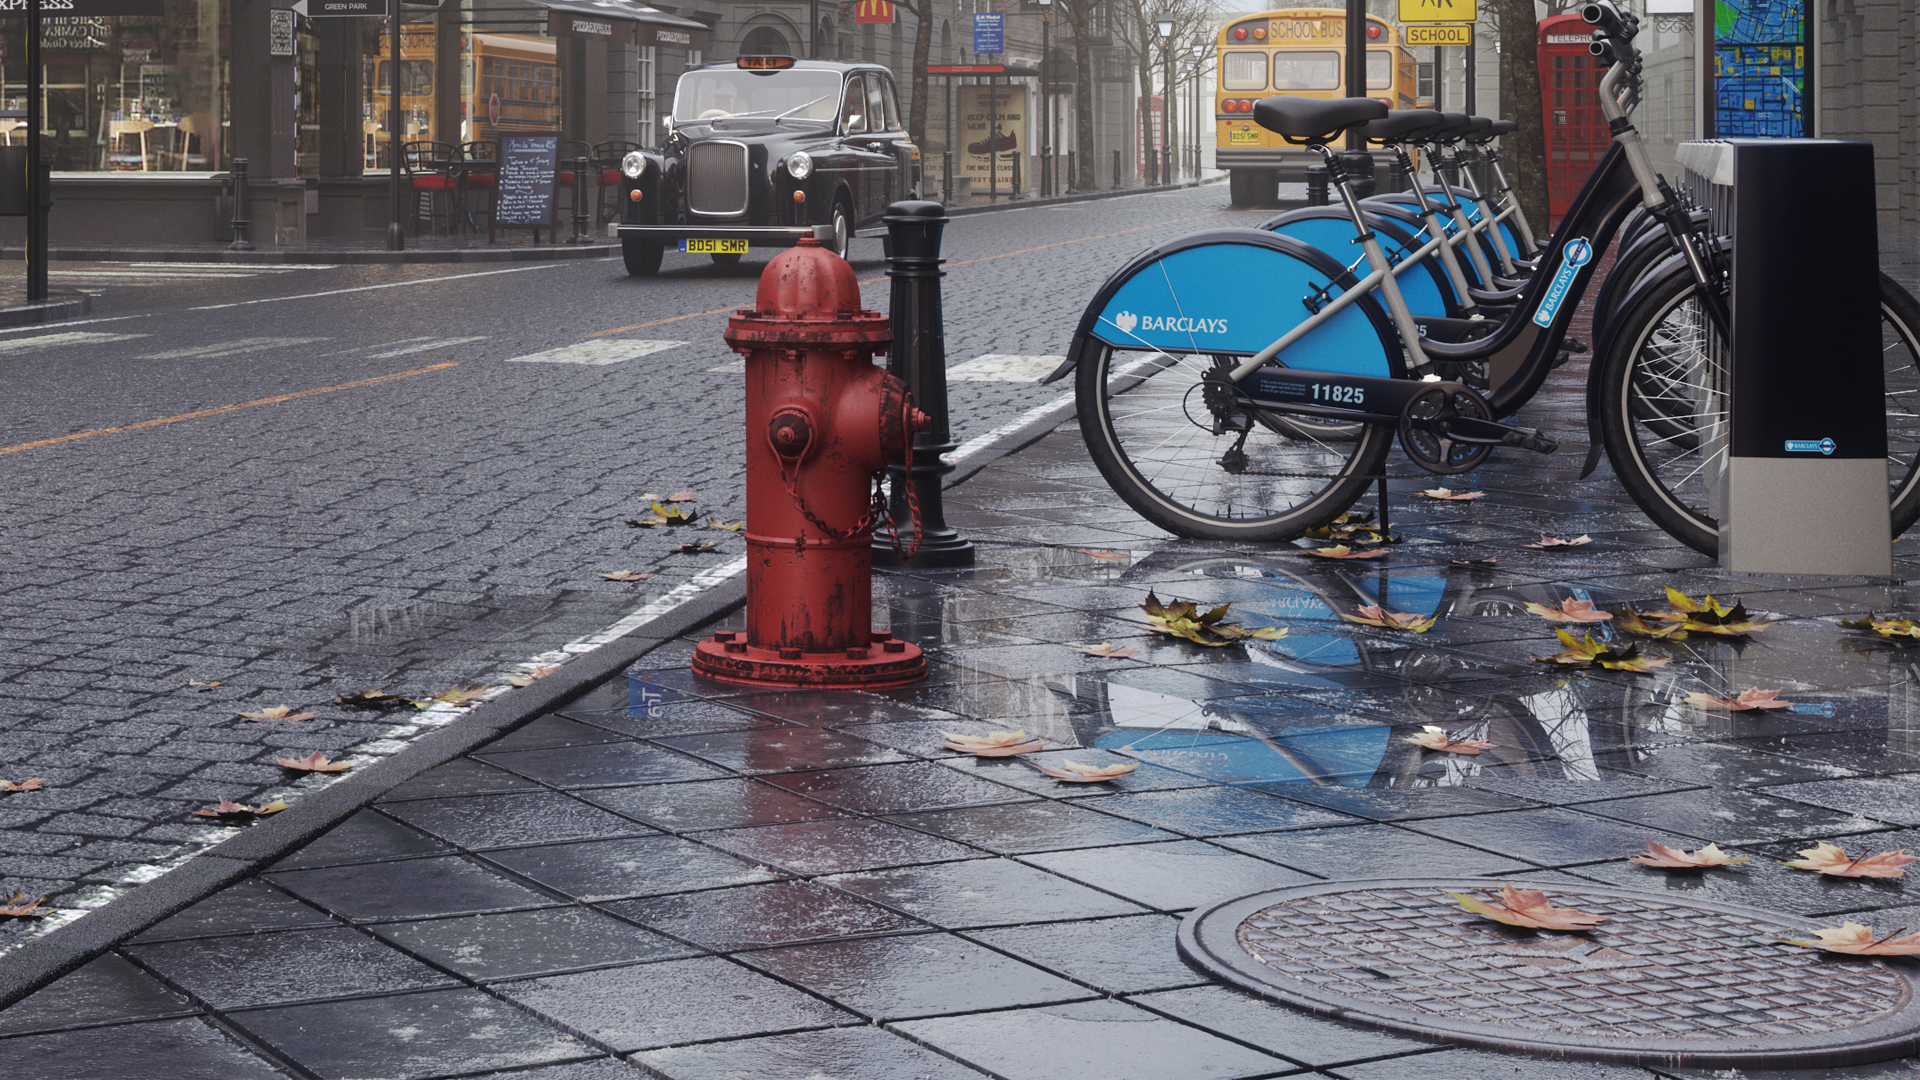
As I usually do, I started with the foreground, which is the pavement and the road. Since we want to have pools of water, the pavement needed to be irregular.
Modeling was straightforward. I first found a texture and extruded a plane with segments that matched the tiles, then added noise to give some slight irregularity to the tiles. A plane with water material was added on top to fill the dips with water:
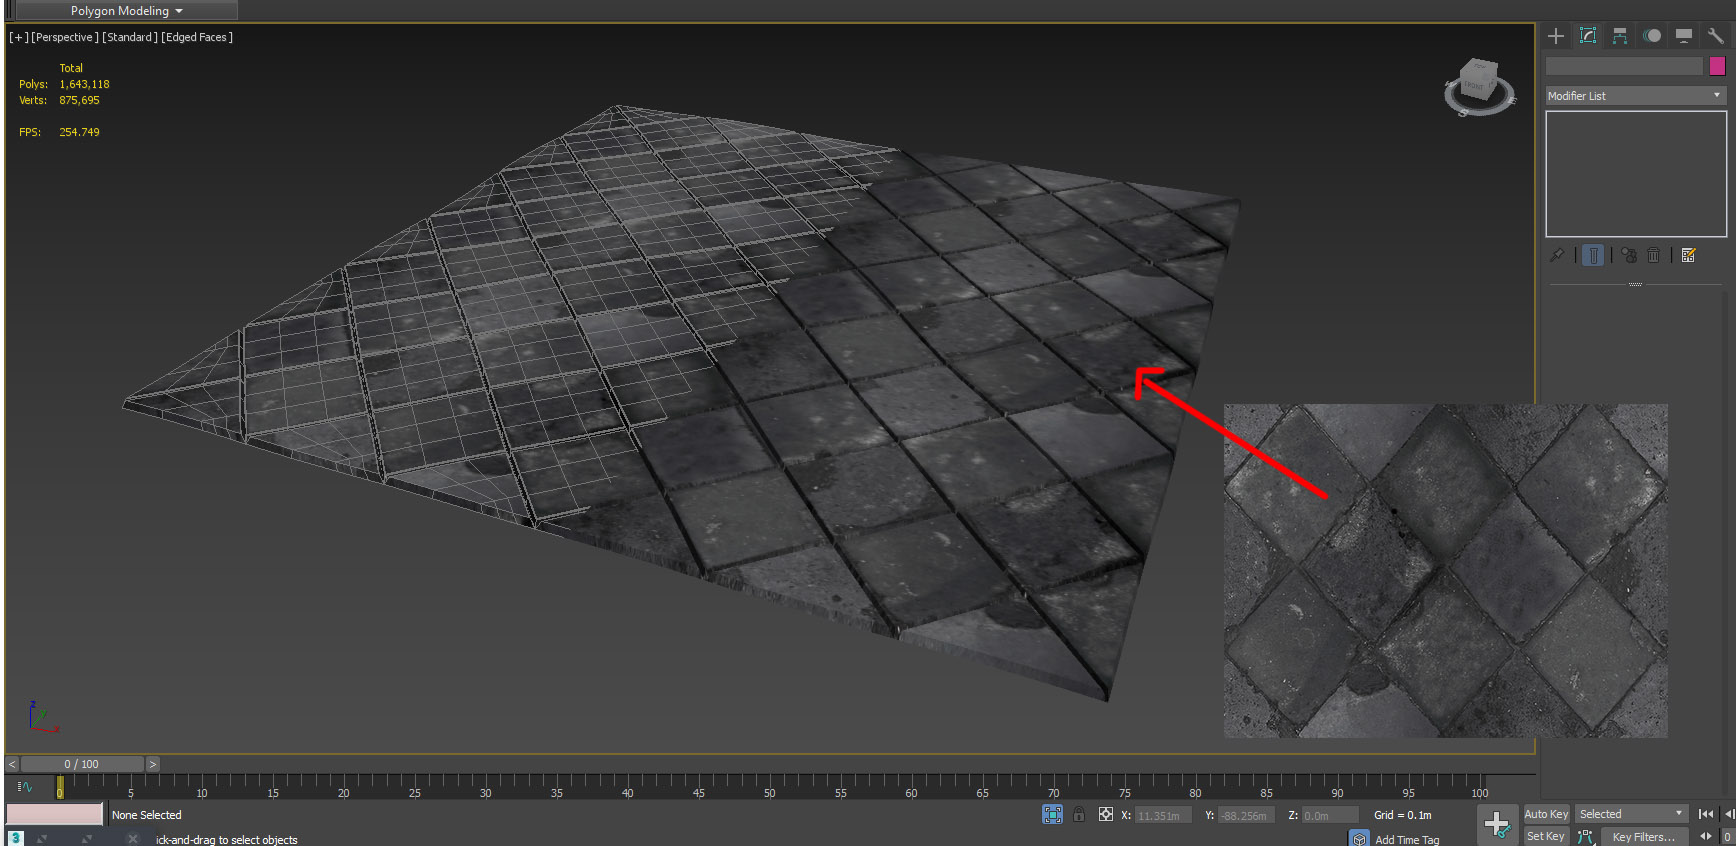
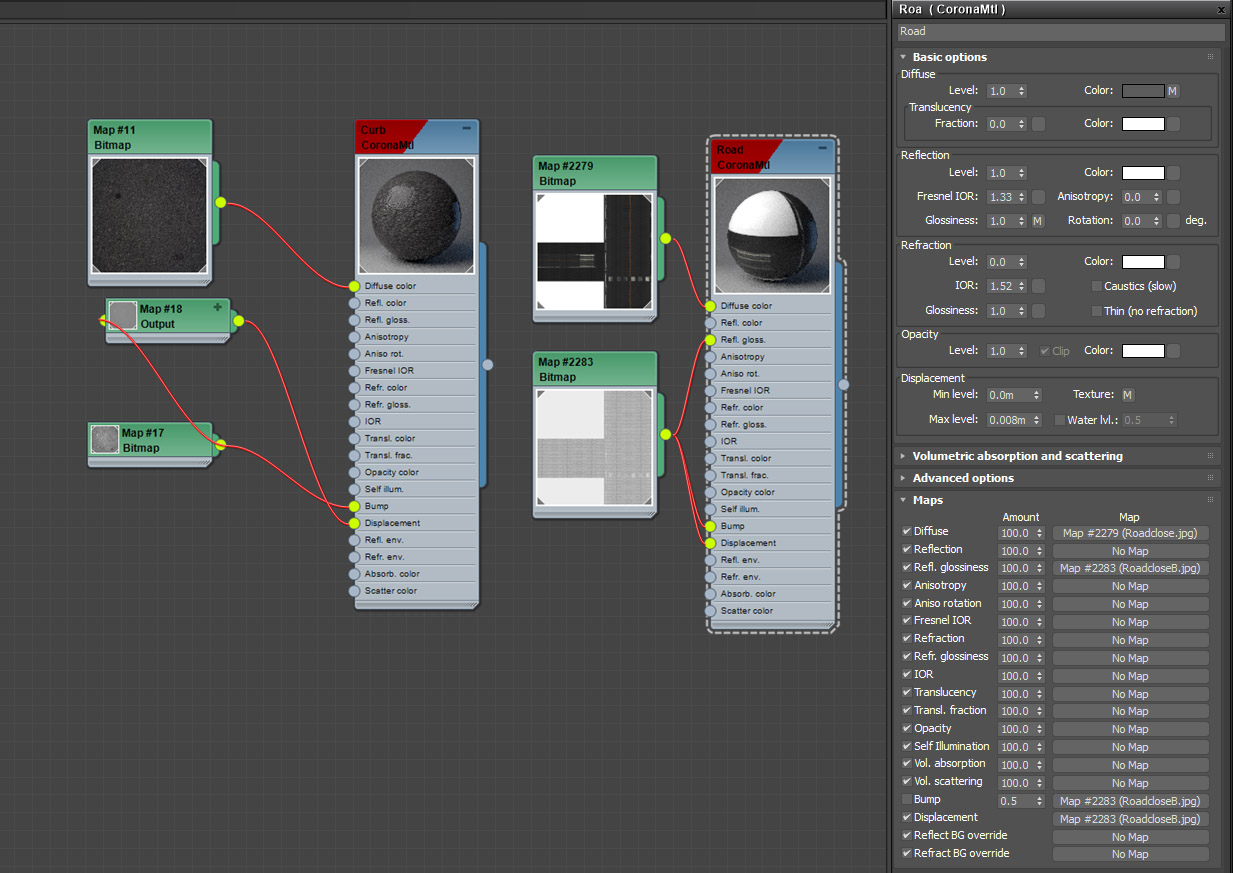
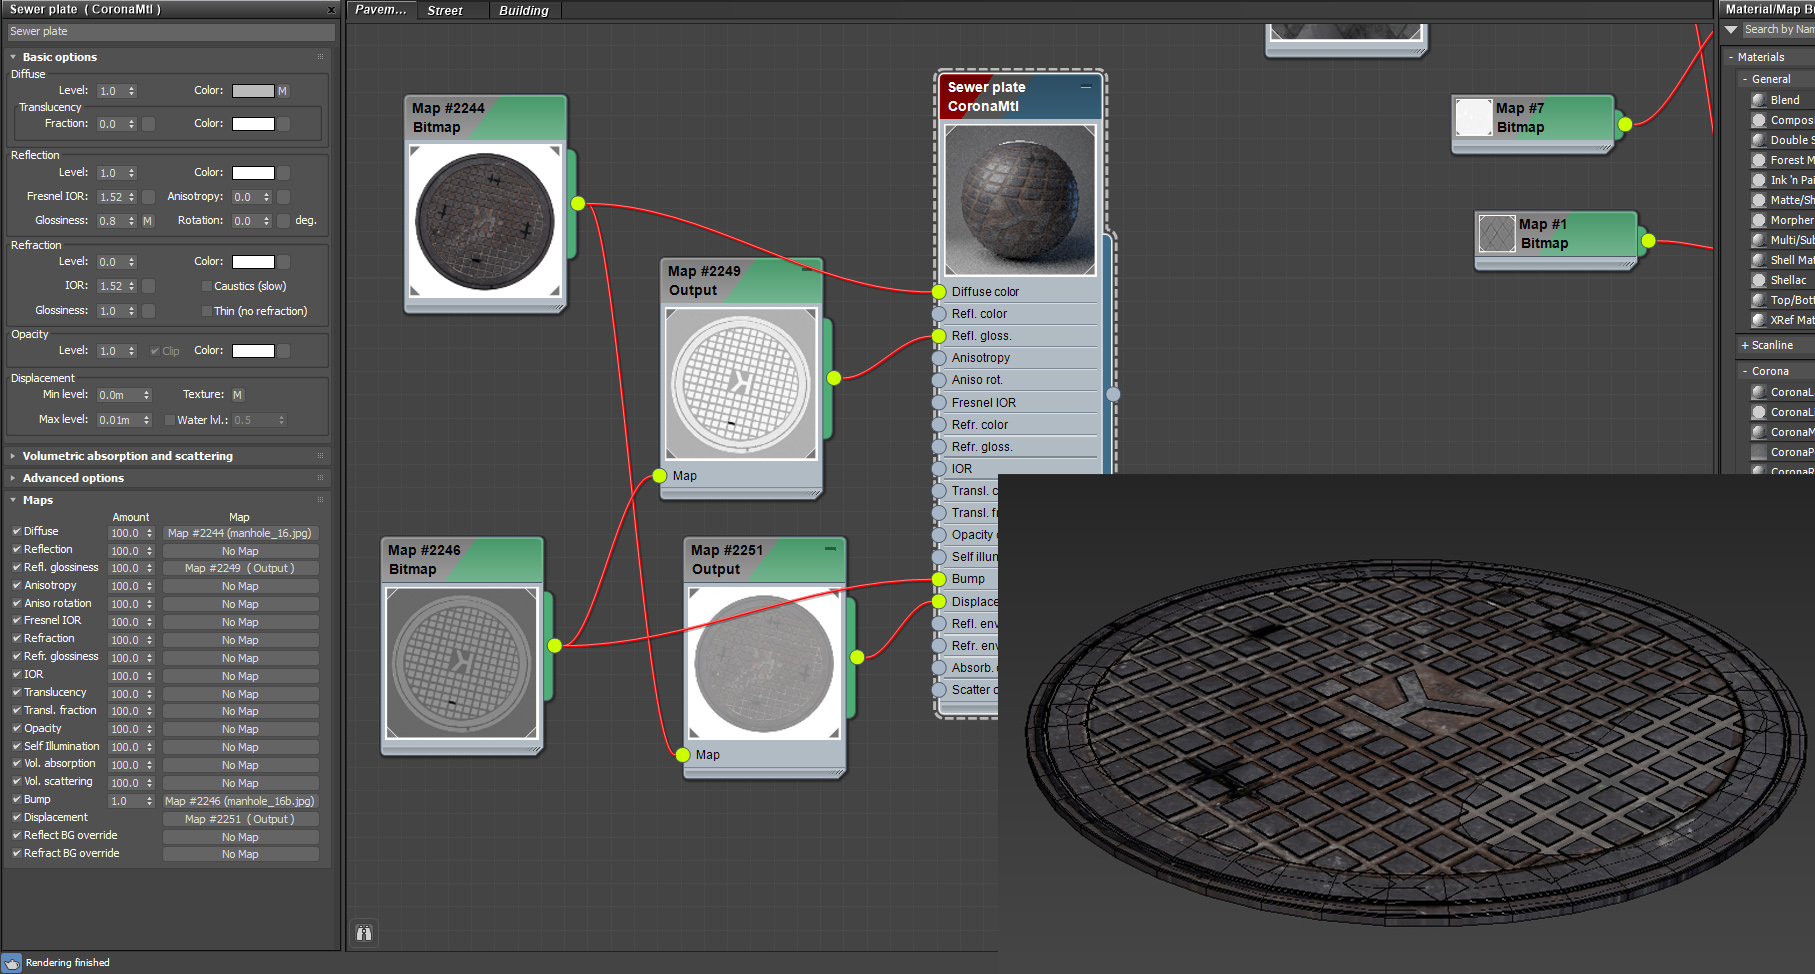
Creating the materials took up the largest part of the time. All the textures needed to be saturated and darkened – the key here is to add reflection to everything with an appropriate glossiness. The foreground materials also have displacement for the fine details:
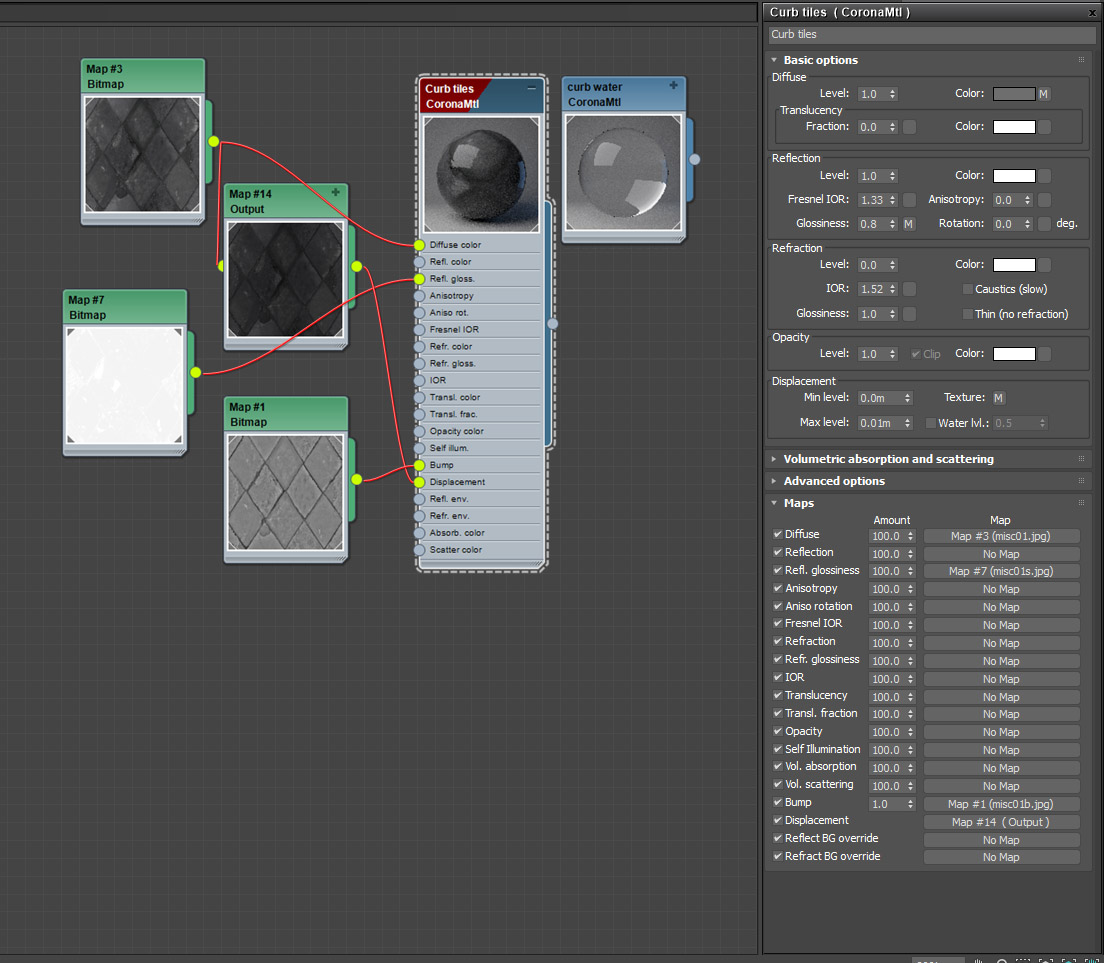
The curb was done in the same way and rail-cloned along the road:
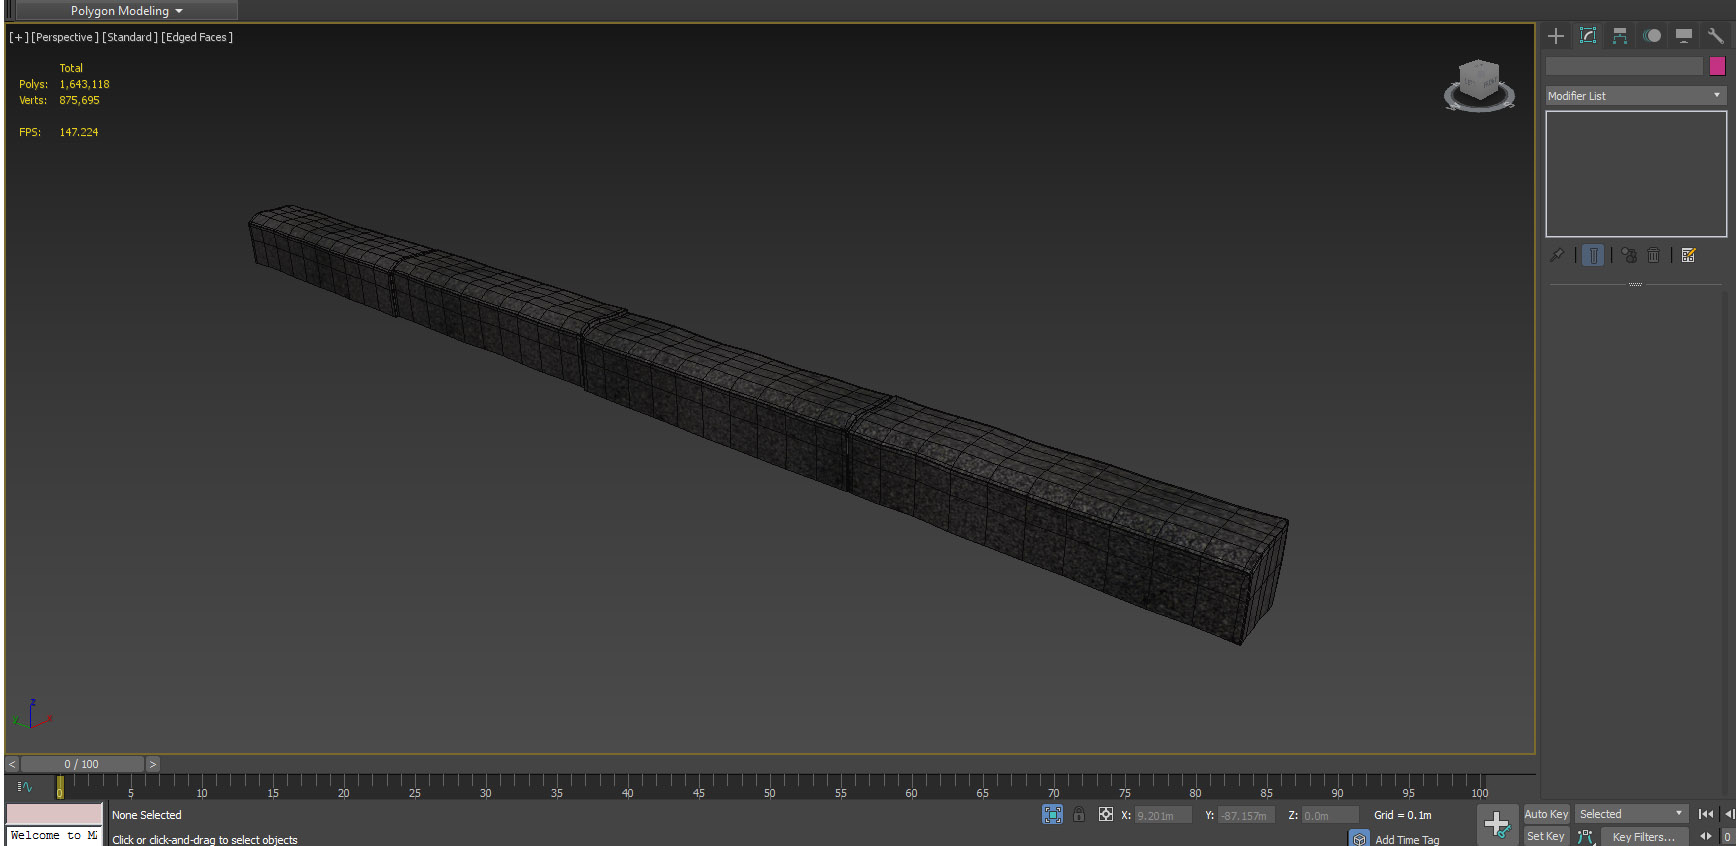
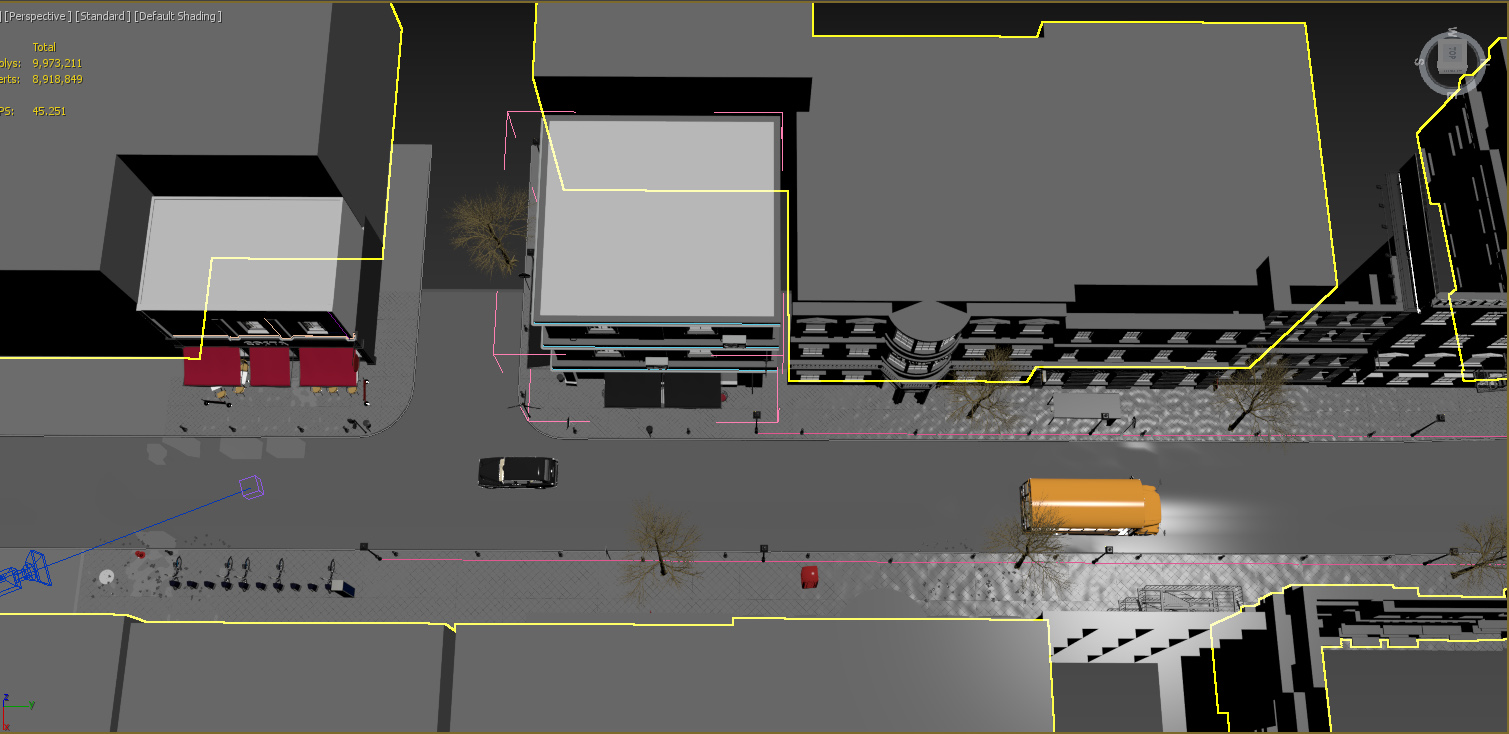
There’s not much modeling on the road other than moving some vertices down to create the pools:
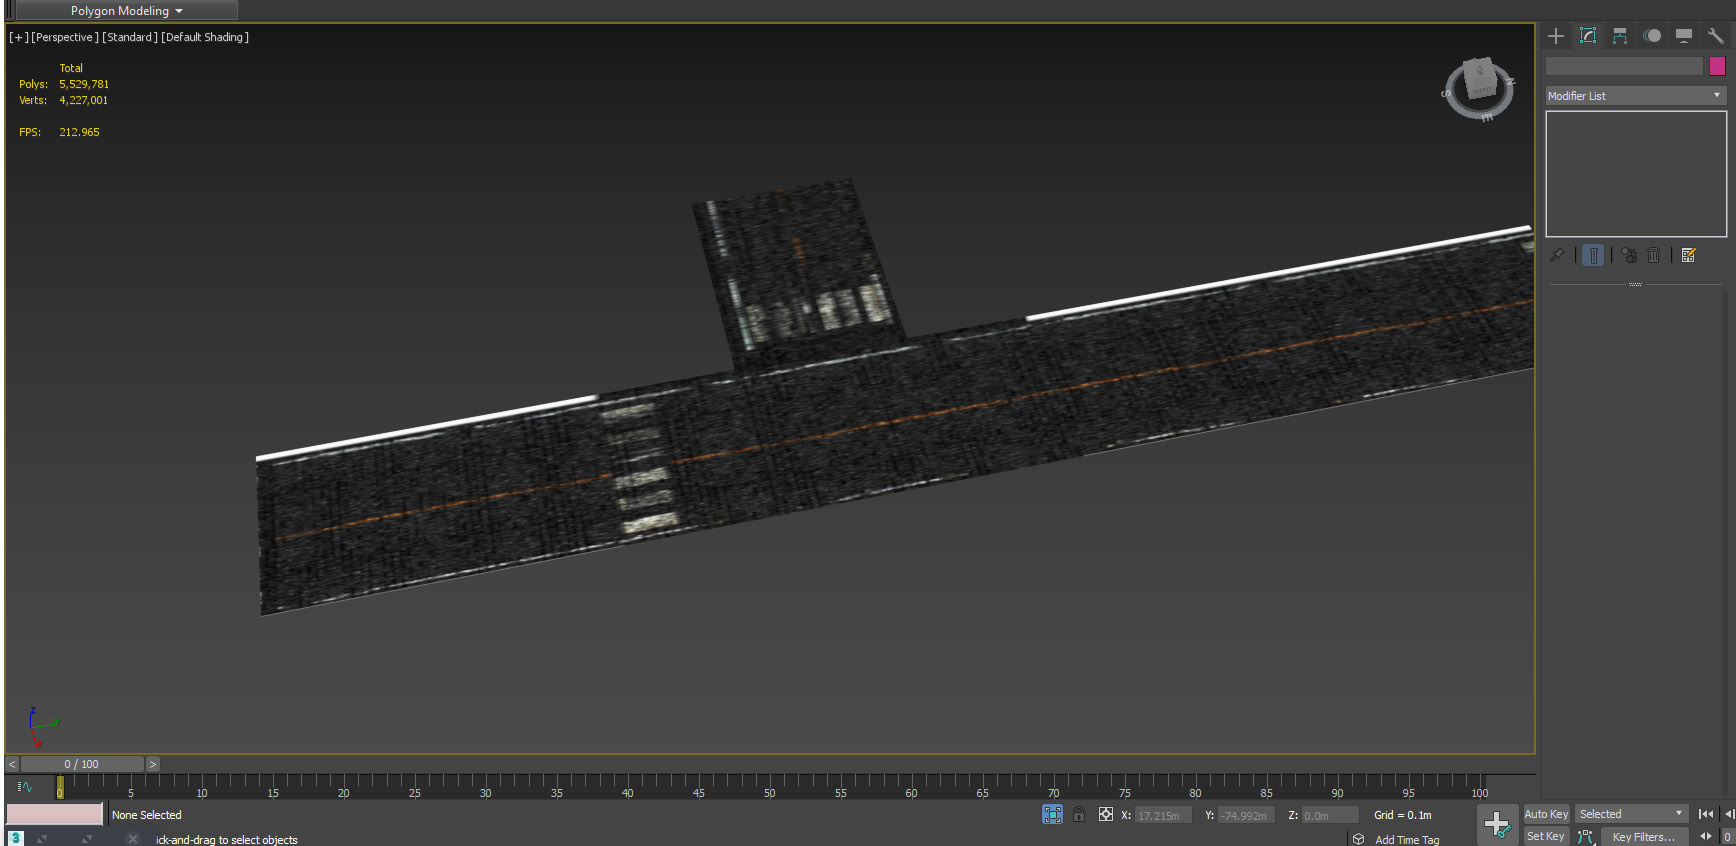
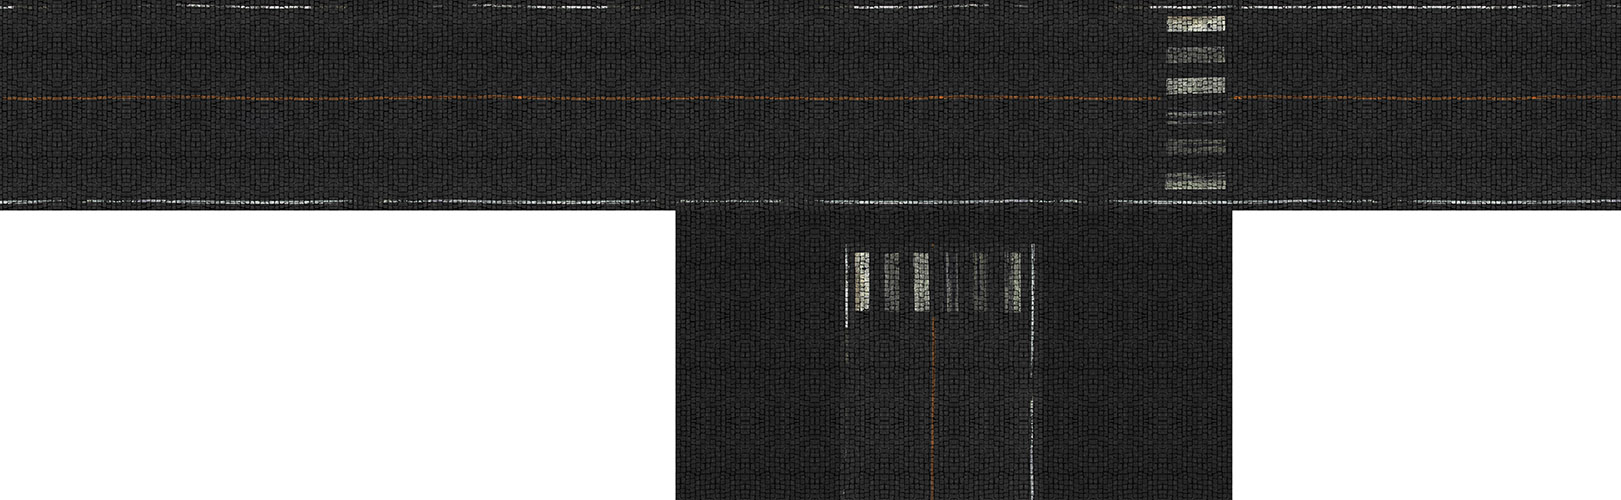
All the details are in the texture, which was 20000 x 6000 to get the fine details:
Here’s a look at the texture map for the road:
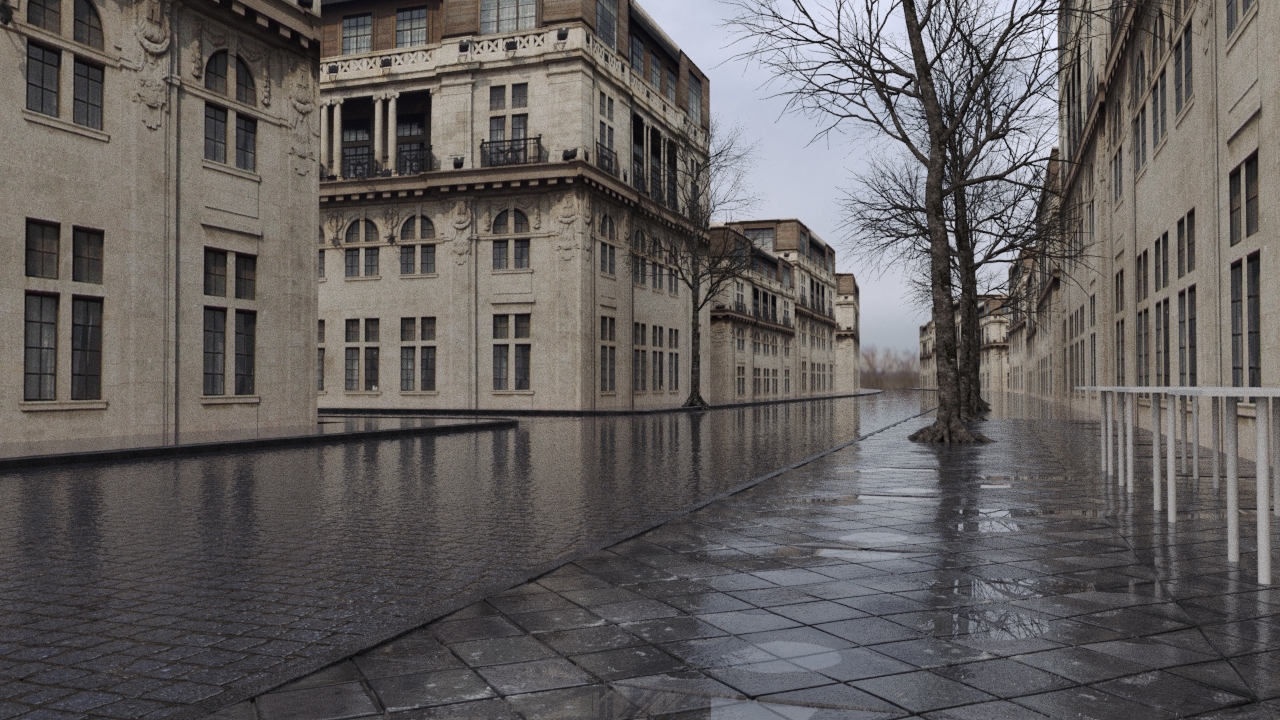
Here is the first test render from this stage, where I also added some trees to get a feel of the atmosphere:
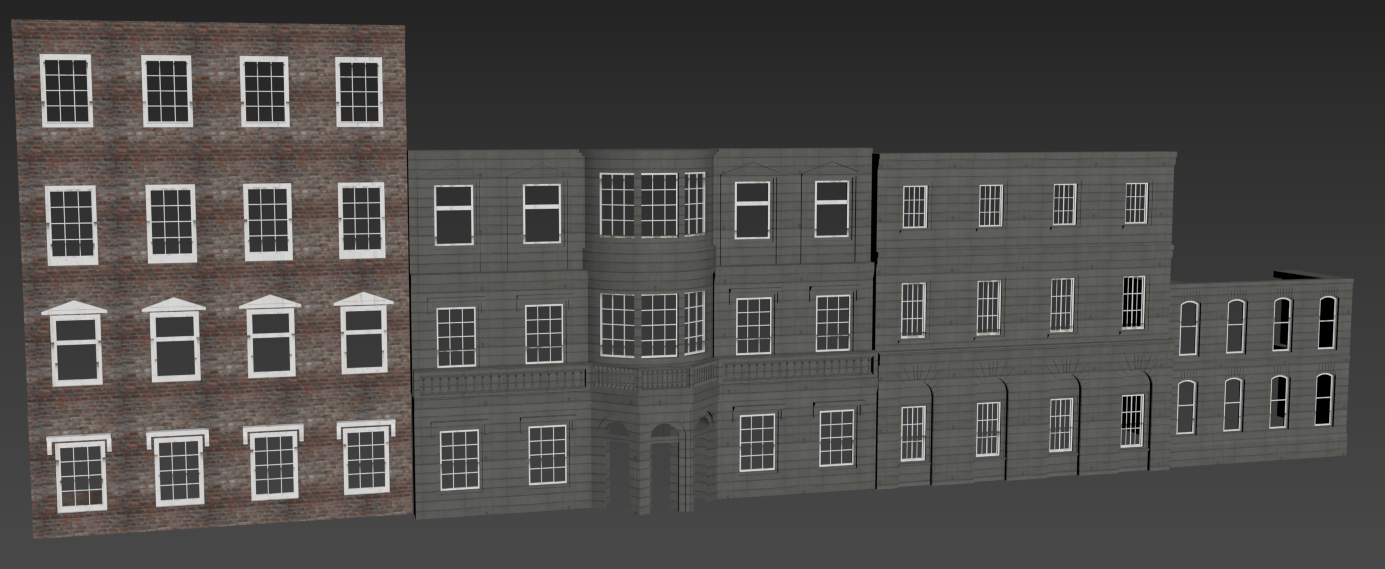
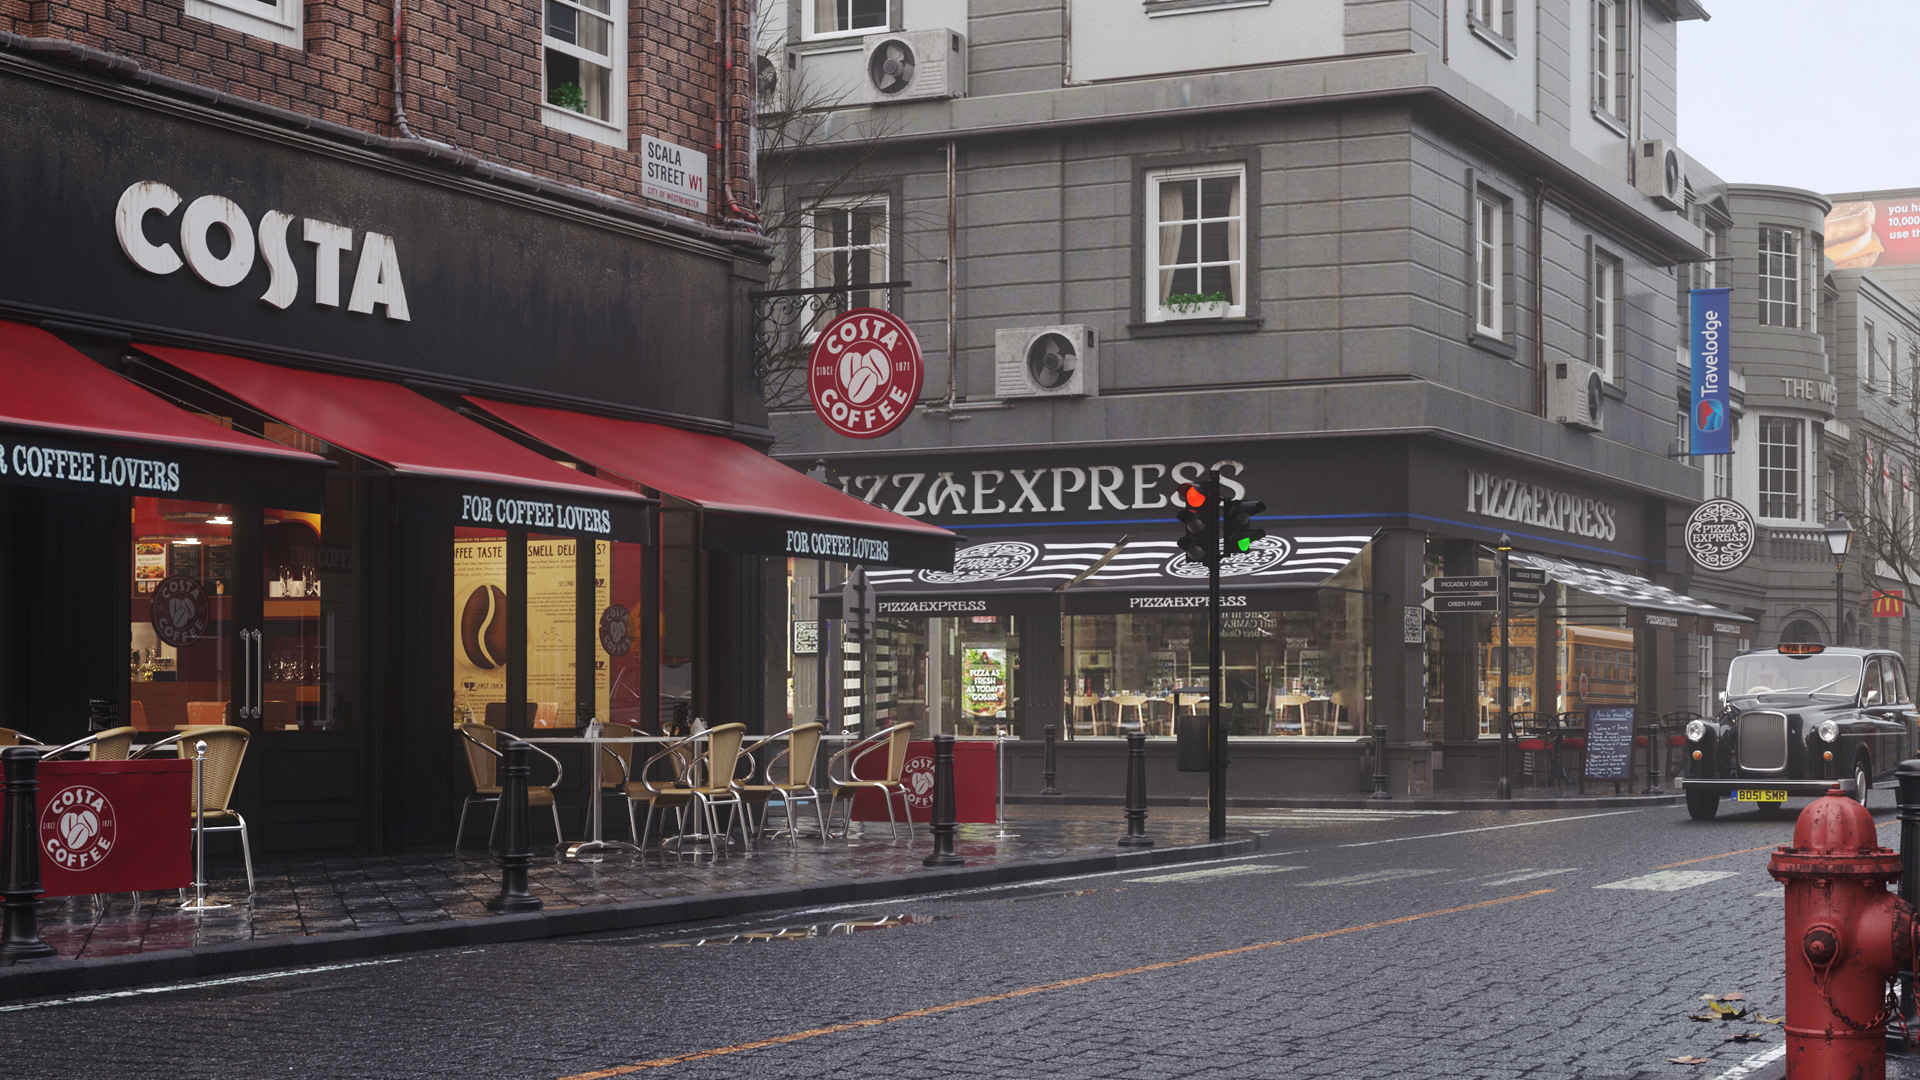
Now it was time to start populate the scene. I started off with the 2 foreground buildings. The Costa store was modeled from a reference, as seen below:

Here was the pizza shop. In this case, the interior is just a texture map on a CoronaLightMtl:
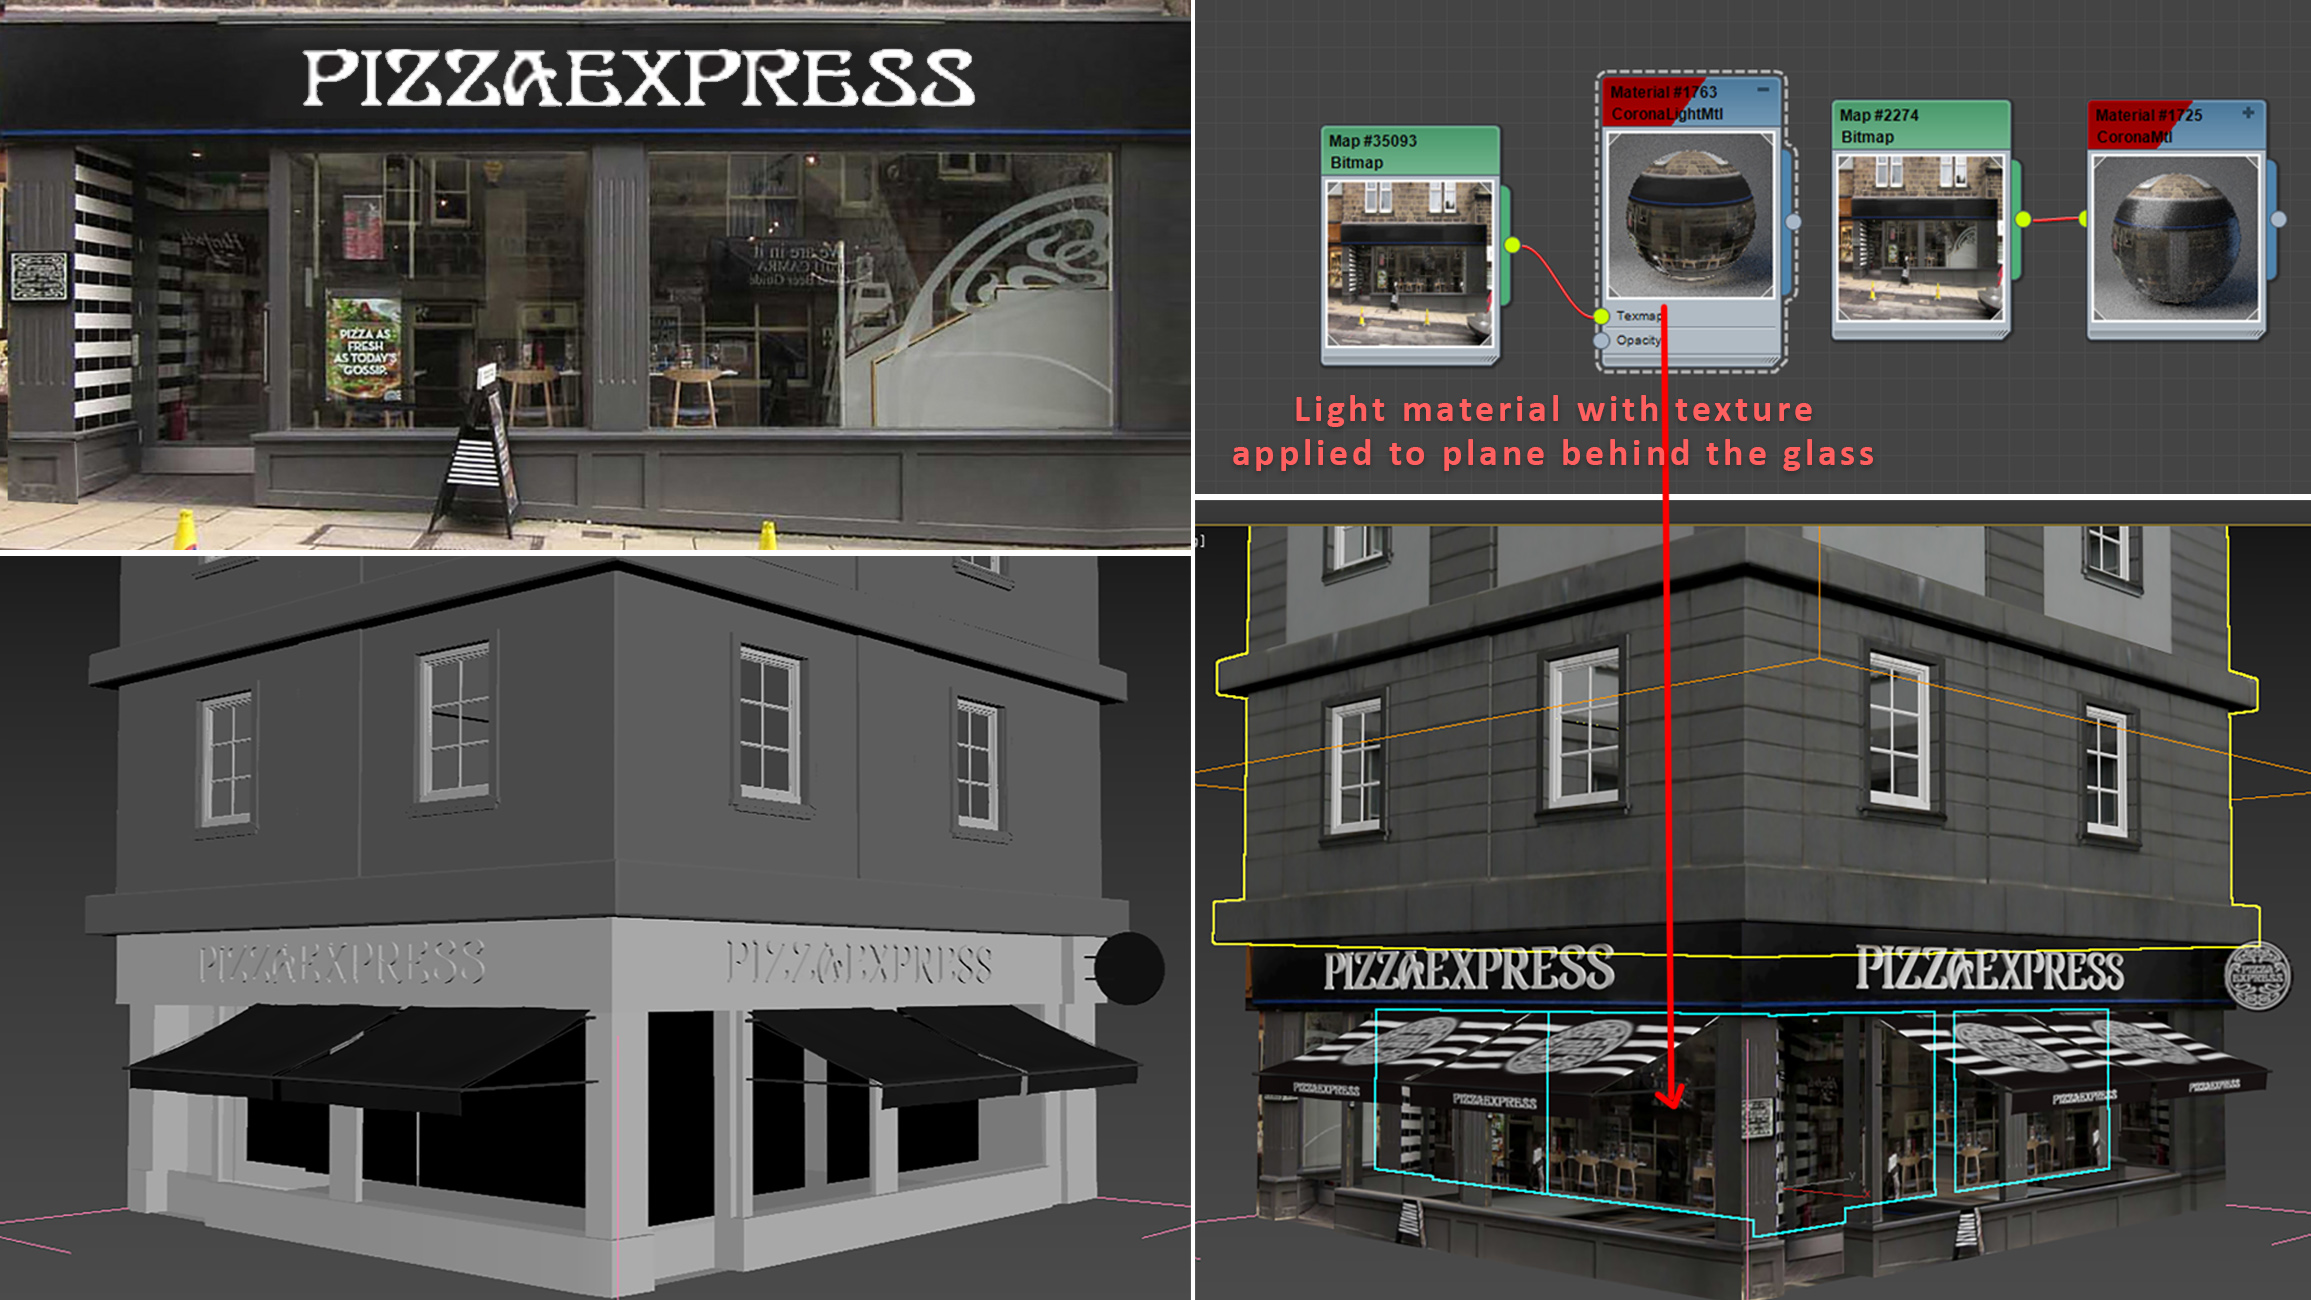
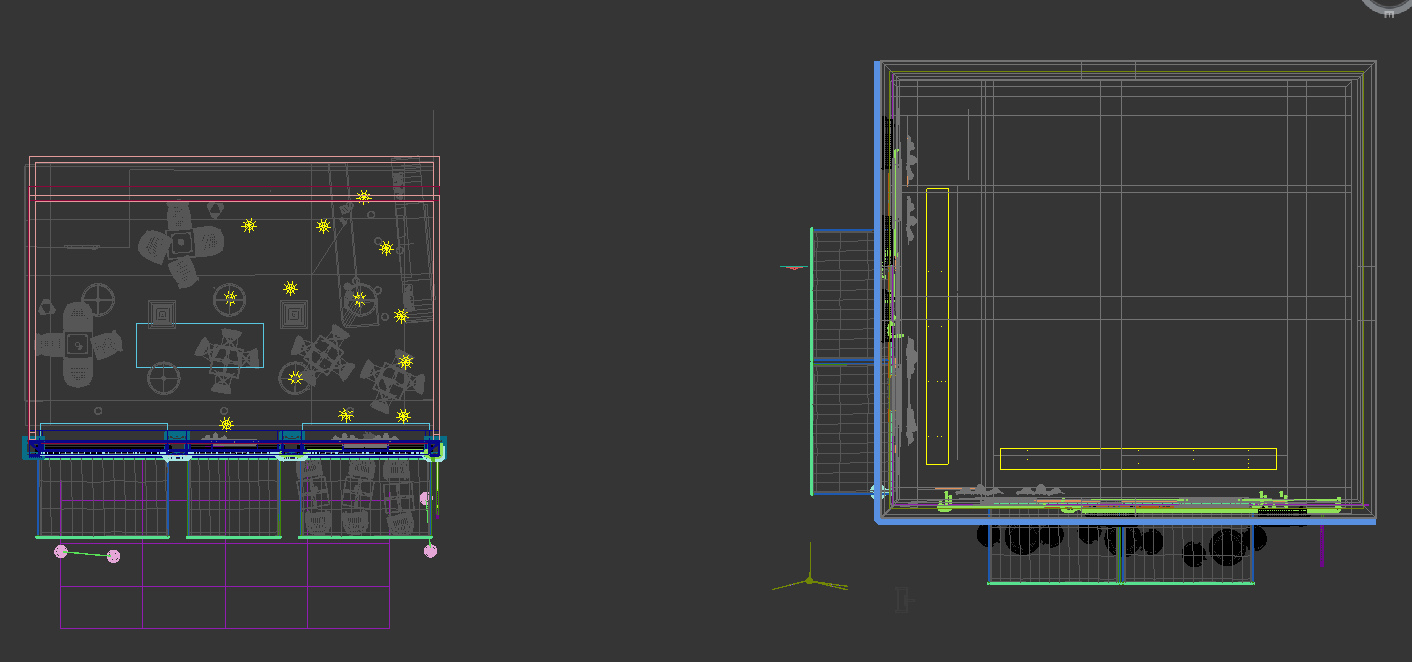
Additional lighting was added inside the buildings to help the water reflections on the street. They are just basic Corona lights:
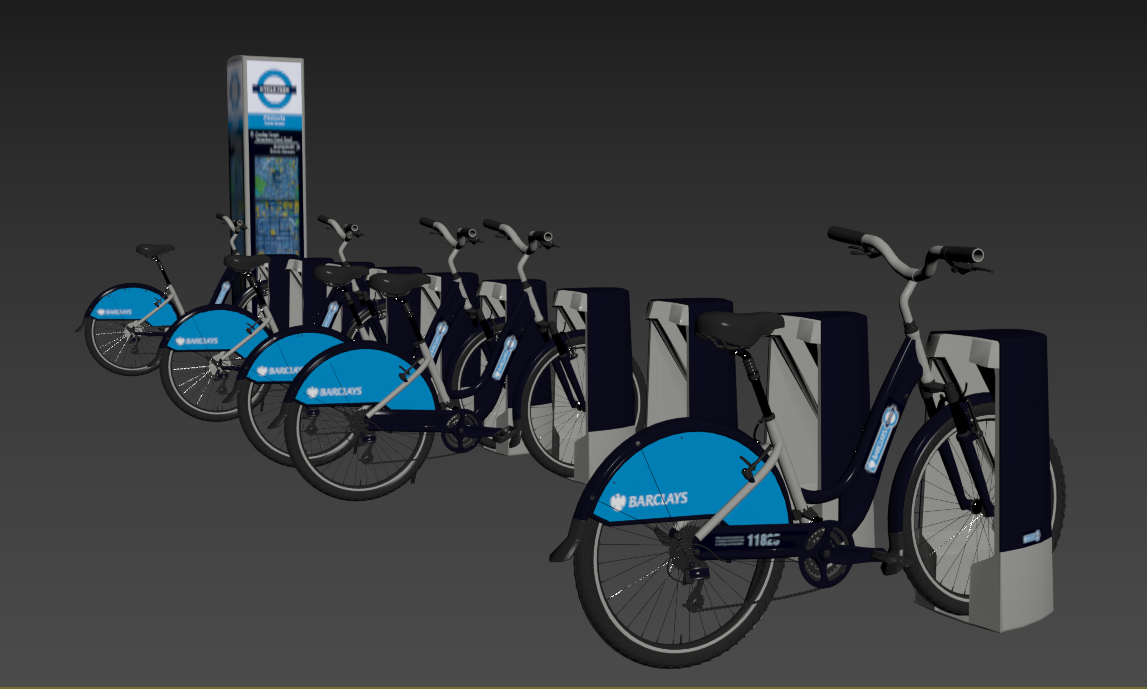
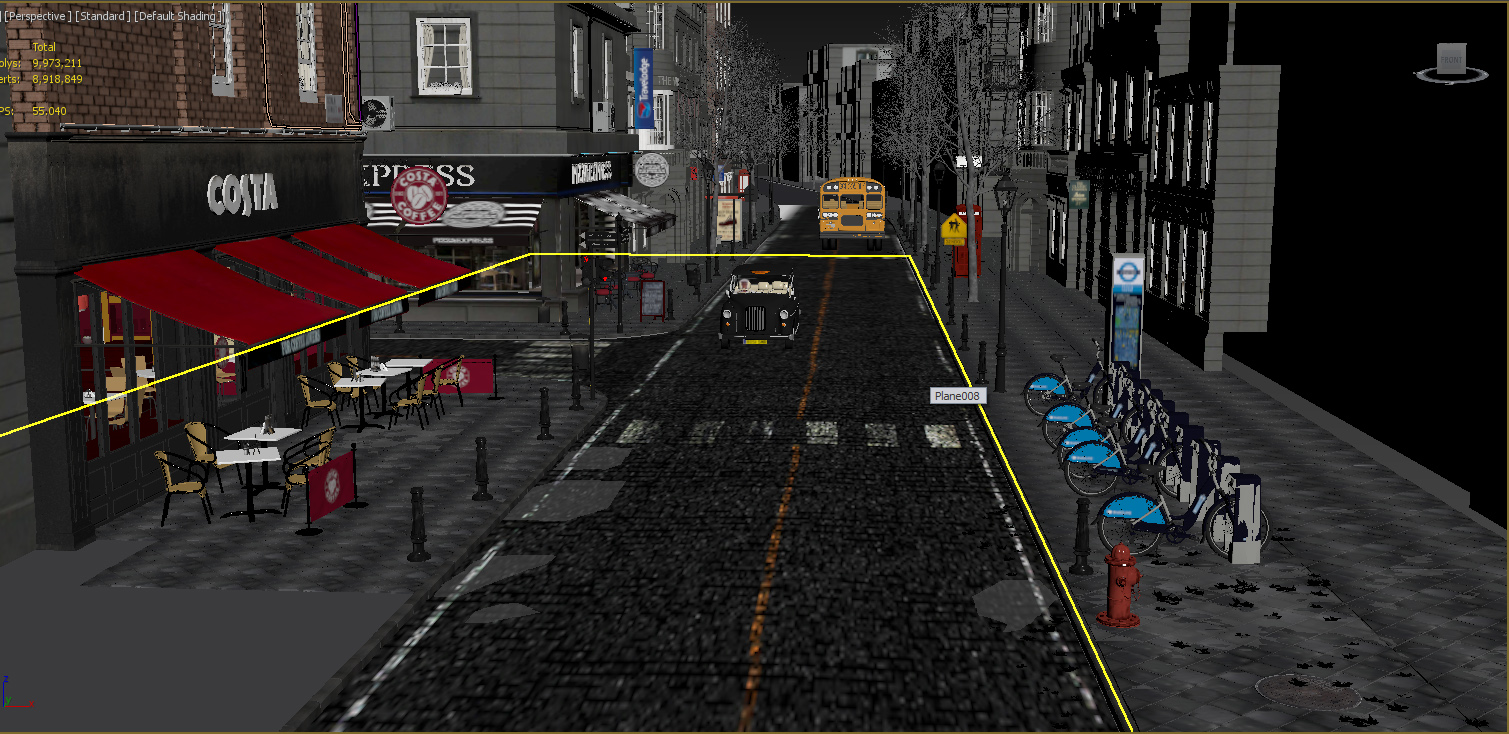
Some street props I modelled myself and others were modified models from various websites that offer free models:
With those props added, it was time for another test render:
It’s almost there! Now time to add more details:
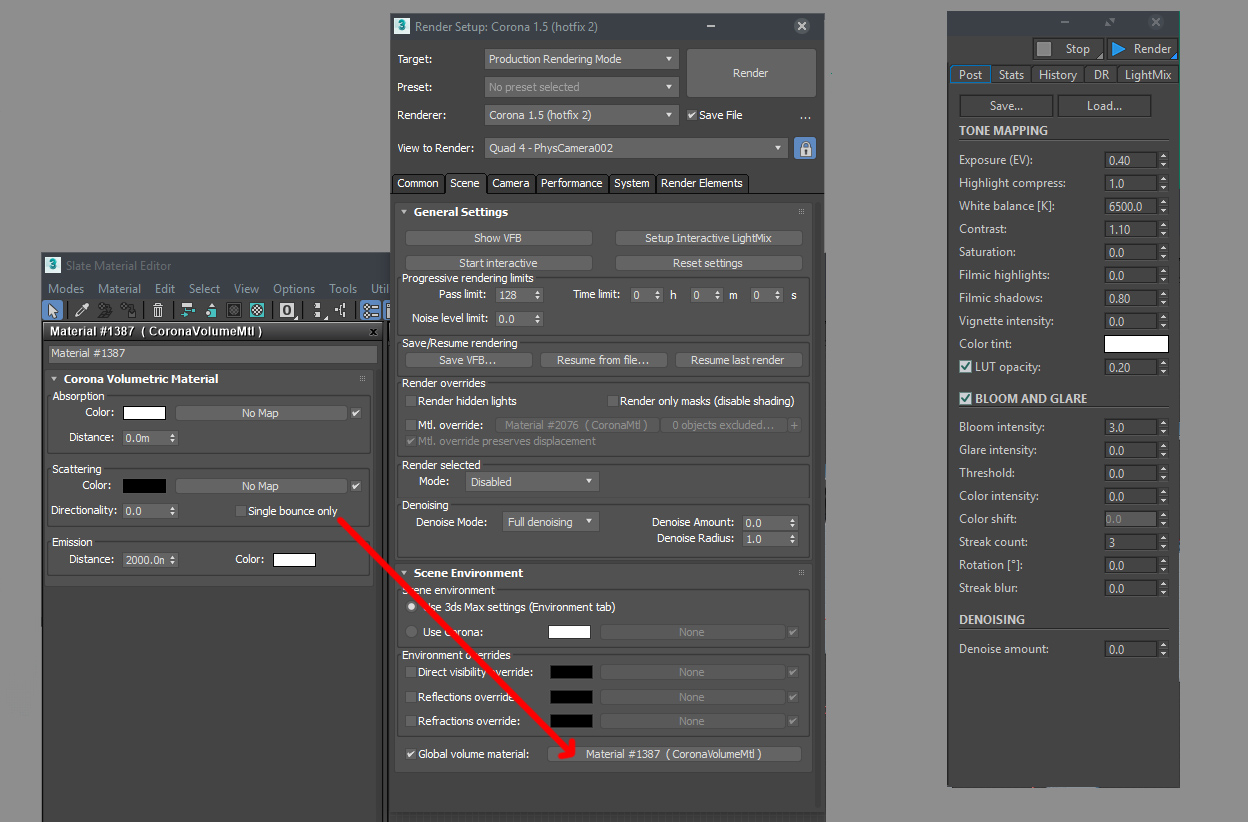
Render Settings
There is nothing to say about the render settings, as nothing is changed from the default Corona settings – goodbye to tweaking material/light/shadows samples!
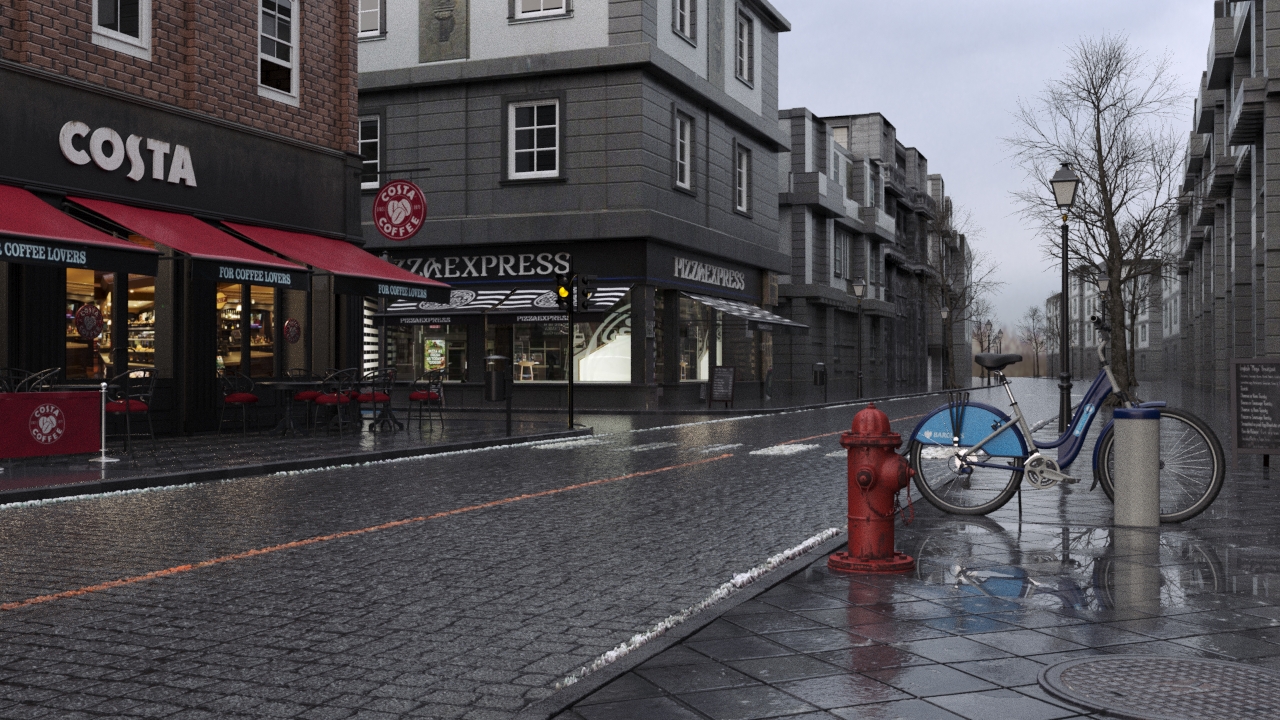
Volumetric fog was added to get the ‘morning’ look, and I applied some LUT & color correction in Corona VFB:
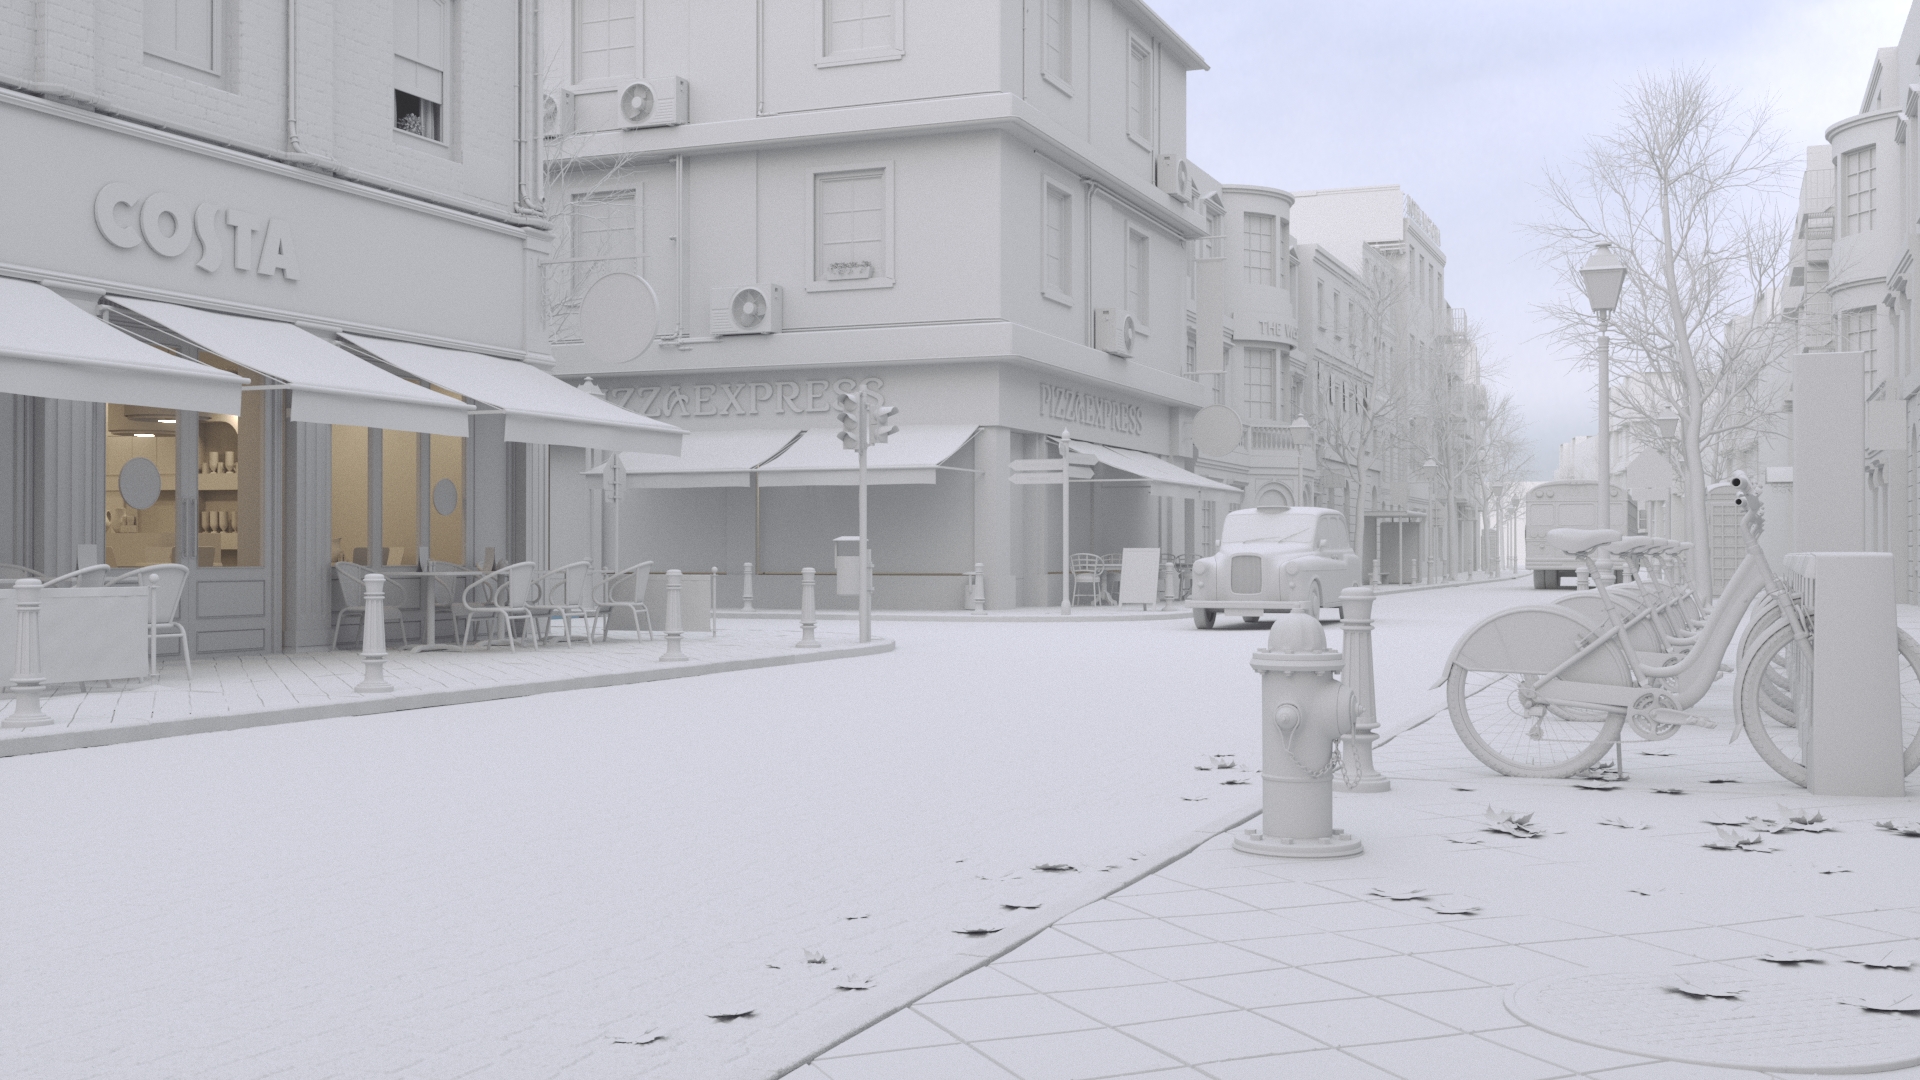
Here is the final clay and raw render:

Then to complete everything, some color correction and grading in Photoshop / After Effects:

About Corona Renderer
I have to say, Corona made a huge difference in my workflow. In this project, the materials & lighting were the real challenge. Corona’s fast and responsive Interactive Rendering dramatically improved the quality of the final output, otherwise it would have been a real pain to tweak the wet materials to get the desired look without it.
And that’s it! I hope you find this making-of helpful in some way. Thanks for reading!
Shabeer
mvshabeer.wixsite.com/3dartist
https://mvshabeer.artstation.com/
Maashaa allaah..awesome broo…
Excelent job!
I believe!
Can you make of “Glass After the Rain”, please. Thanks
Hi, what exactly do you mean by that? What is “Glass After the Rain”?
water drop on glass
A pleasant image. I’m a little distracted by the large American school bus on a London street.
Perhaps a very long distance field trip? Or my favorite, some alternate reality 😉