In this blog we catch up with David Turfitt, David previously wrote a popular article with us all about rendering a whiskey bottle. This is an even more in-depth look into the process of creating not just the bottle, but a whole bar scene.

Introduction
My name is David Turfitt and I am a CGI artist working out of my home studio in the South East of England. I’ve been using Cinema 4D since 2001 and Corona Renderer for the last 4.5 years.
Having been asked to do a project for a range of Jim Beam bottles sitting on top of a barrel back in 2016, things have just taken off in that area and now I pretty much exclusively produce work for the drinks sector, which I absolutely love.
That project nearly never happened as I found it so difficult to achieve what I was being tasked with. I vowed at the time that if I ever managed to find a way to produce it then I would help anyone who needed it as life could have ended up so differently had I said to the client it was beyond my skill set.

Switching to Corona Renderer has made all the difference in the world to what I am able to produce for clients, with the quality of glass materials and displacement being the two most stand out elements I need to rely on for the bottle visuals I generate.
I always say that when you can find a workflow that just allows you to create without getting bogged down with the technical side then that is a thing of joy, and that is where I feel I am now at. I really love the fact that I can have an idea at 3am staring at the ceiling and to know I can boot up at 7am and get right to it without wondering if it is possible.
The Tyrconnell Single Malt Project
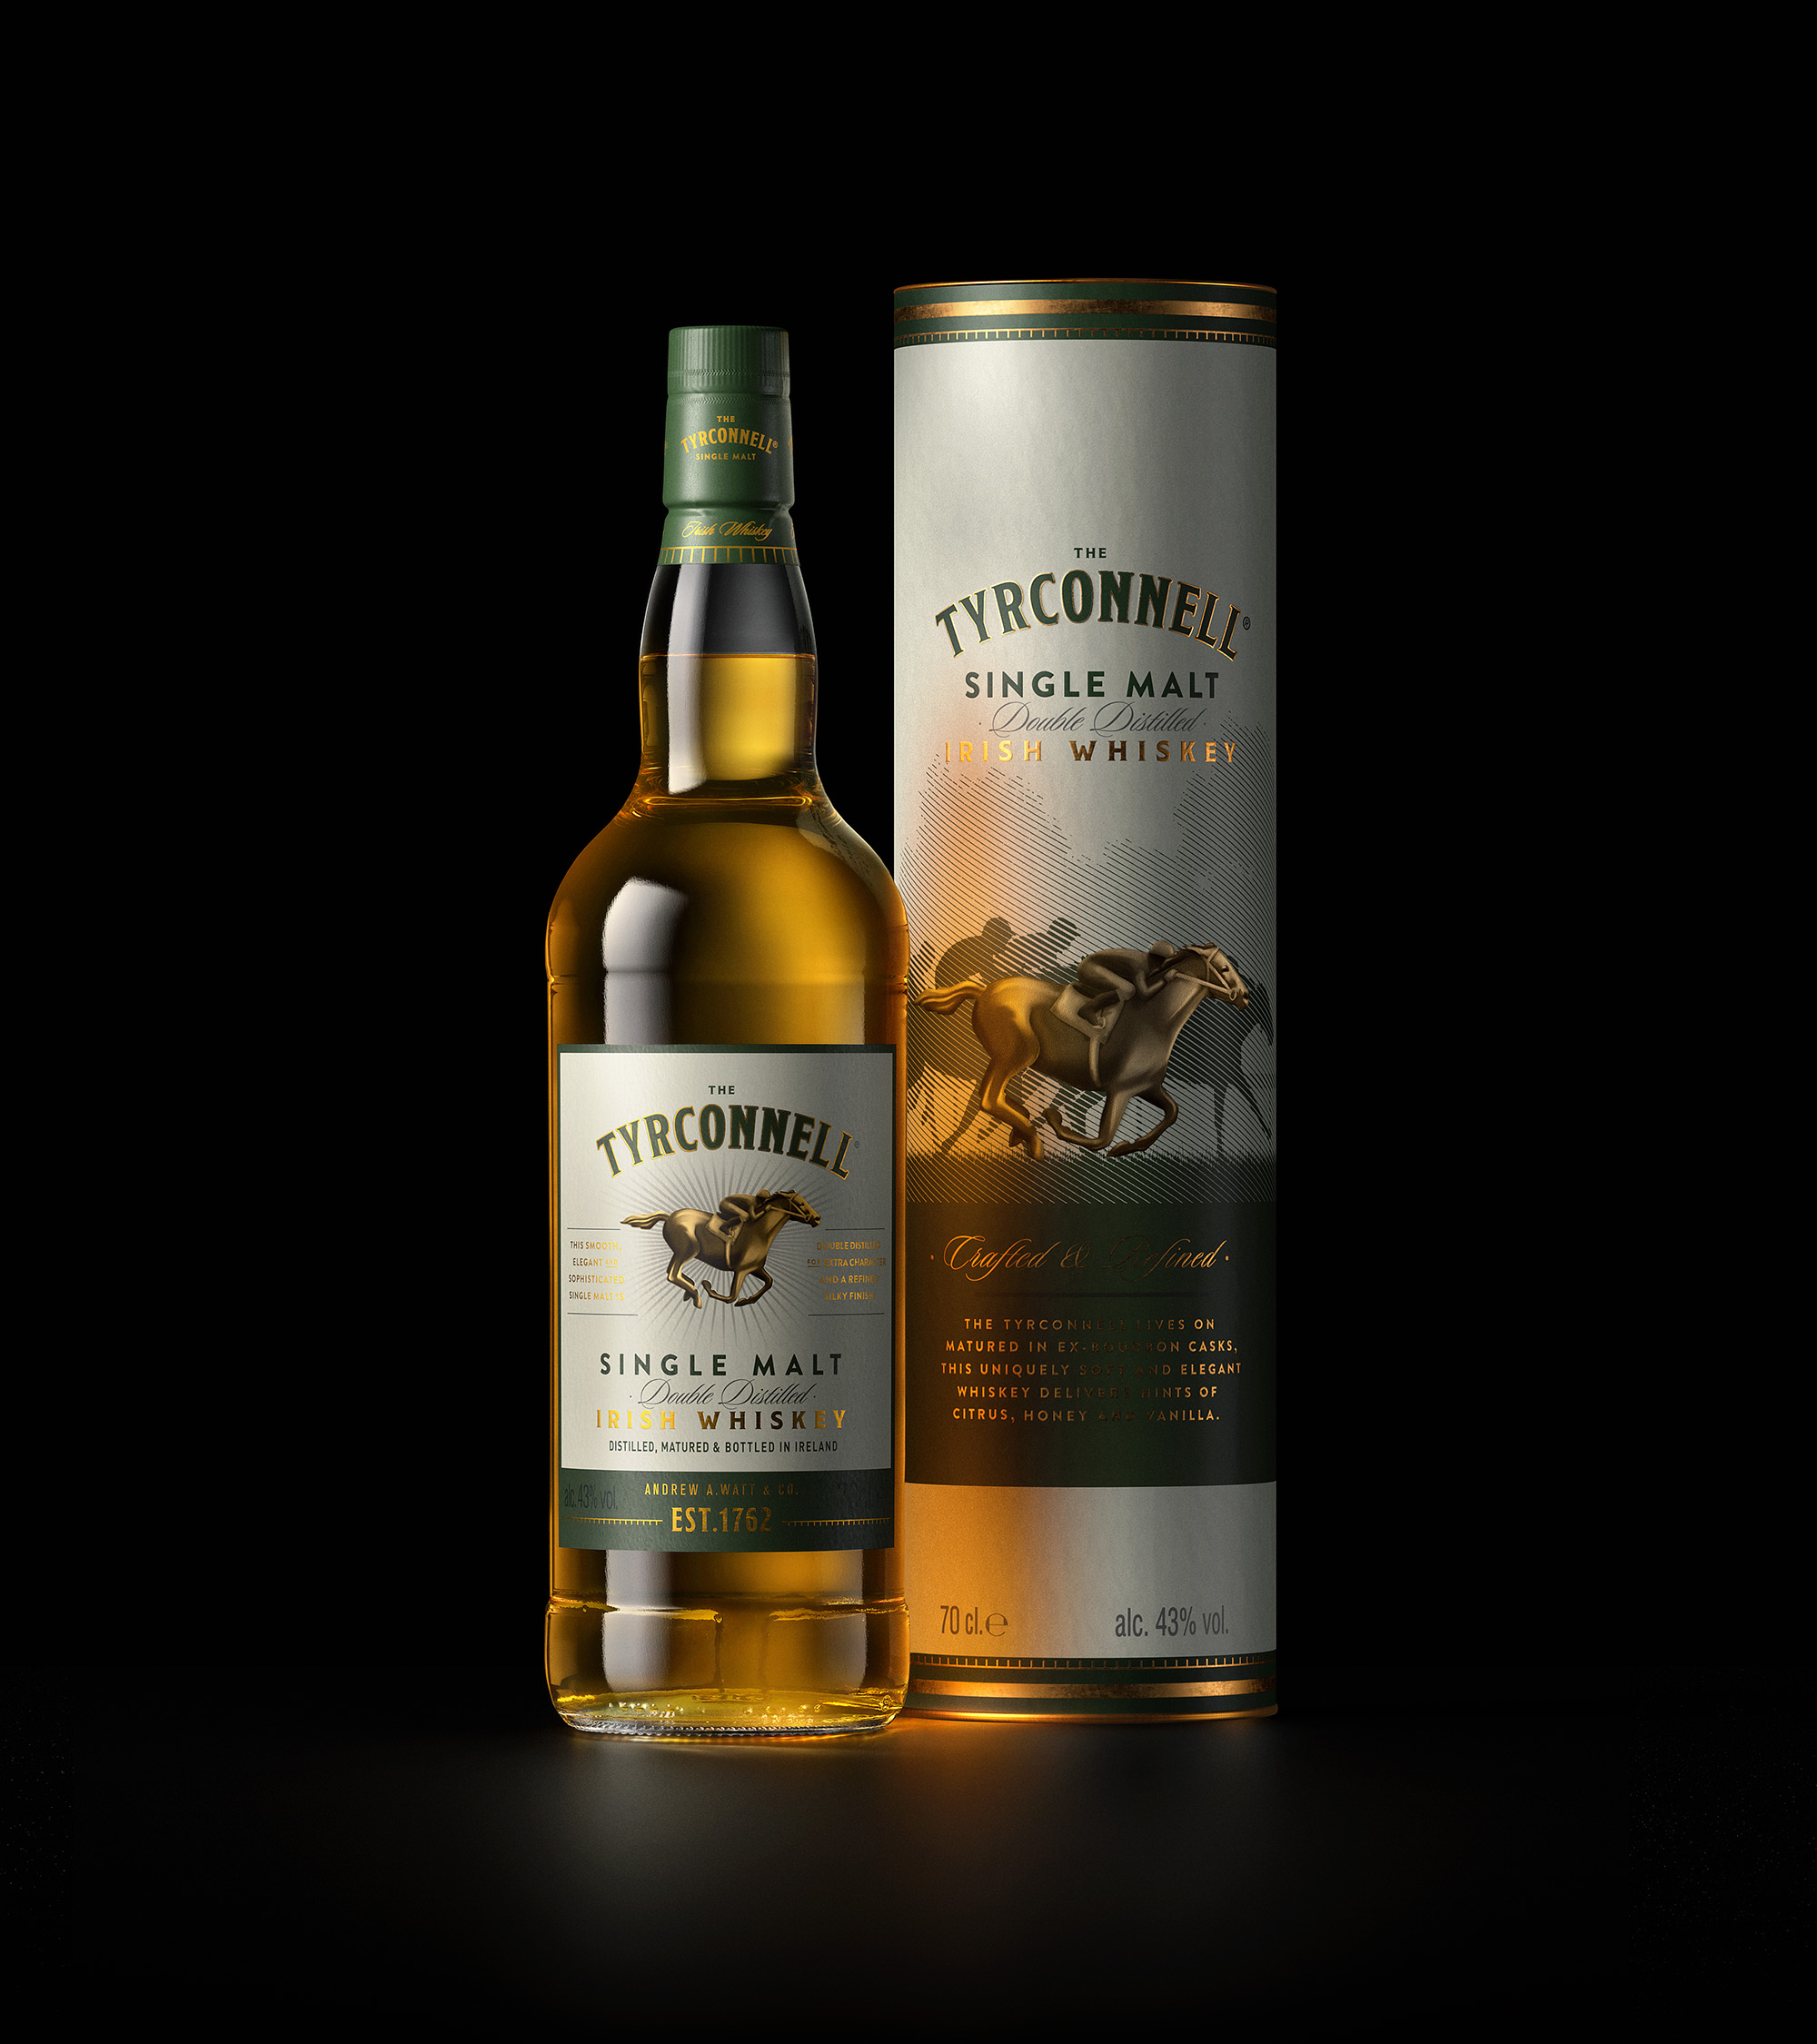
I have a habit of falling in love with certain bottles, their boxes and tubes. Point in case is the amazing Tyrconnell Single Malt Irish Whiskey.
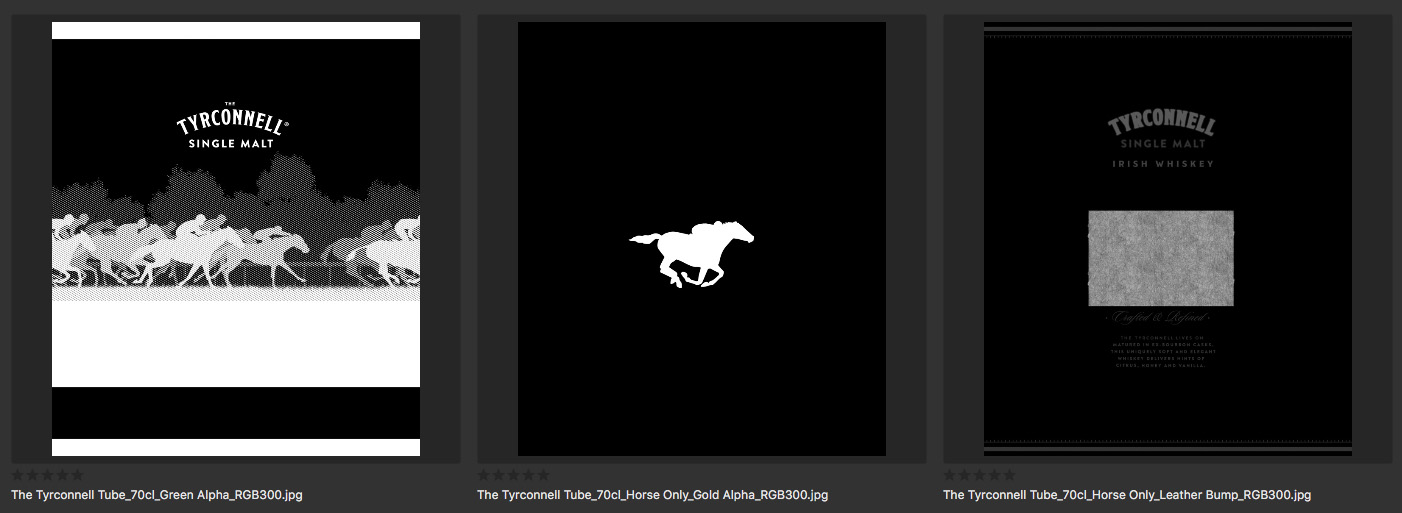
I was given the shipper artwork for a project several years back, fast forward to late 2020 and for some reason I thought I would check out the bottle and tube online. It looked great so I ordered it and when it arrived I was blown away by the gorgeous paper textures, embossing and foils used and decided then and there to make a project out of it.
It was a lot of building labels and items, almost from scratch, but when you have the actual product in front of you it makes life so much easier.

It’s a lot harder building a Japanese Whiskey bottle and box that costs £30,000 as I only have references from Pinterest to use.
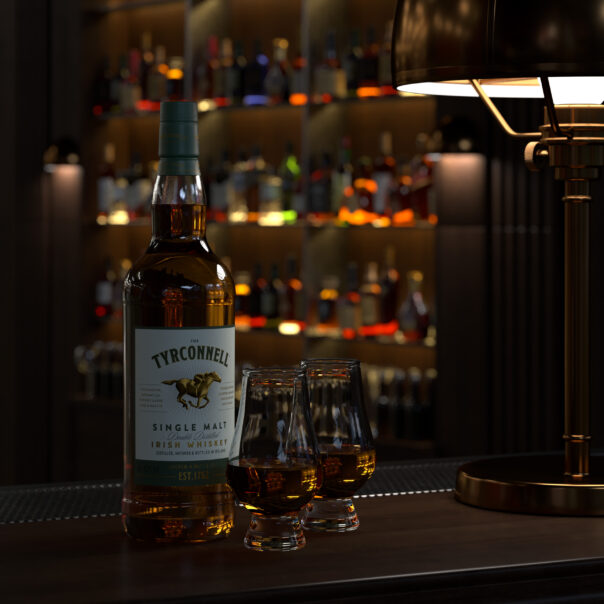
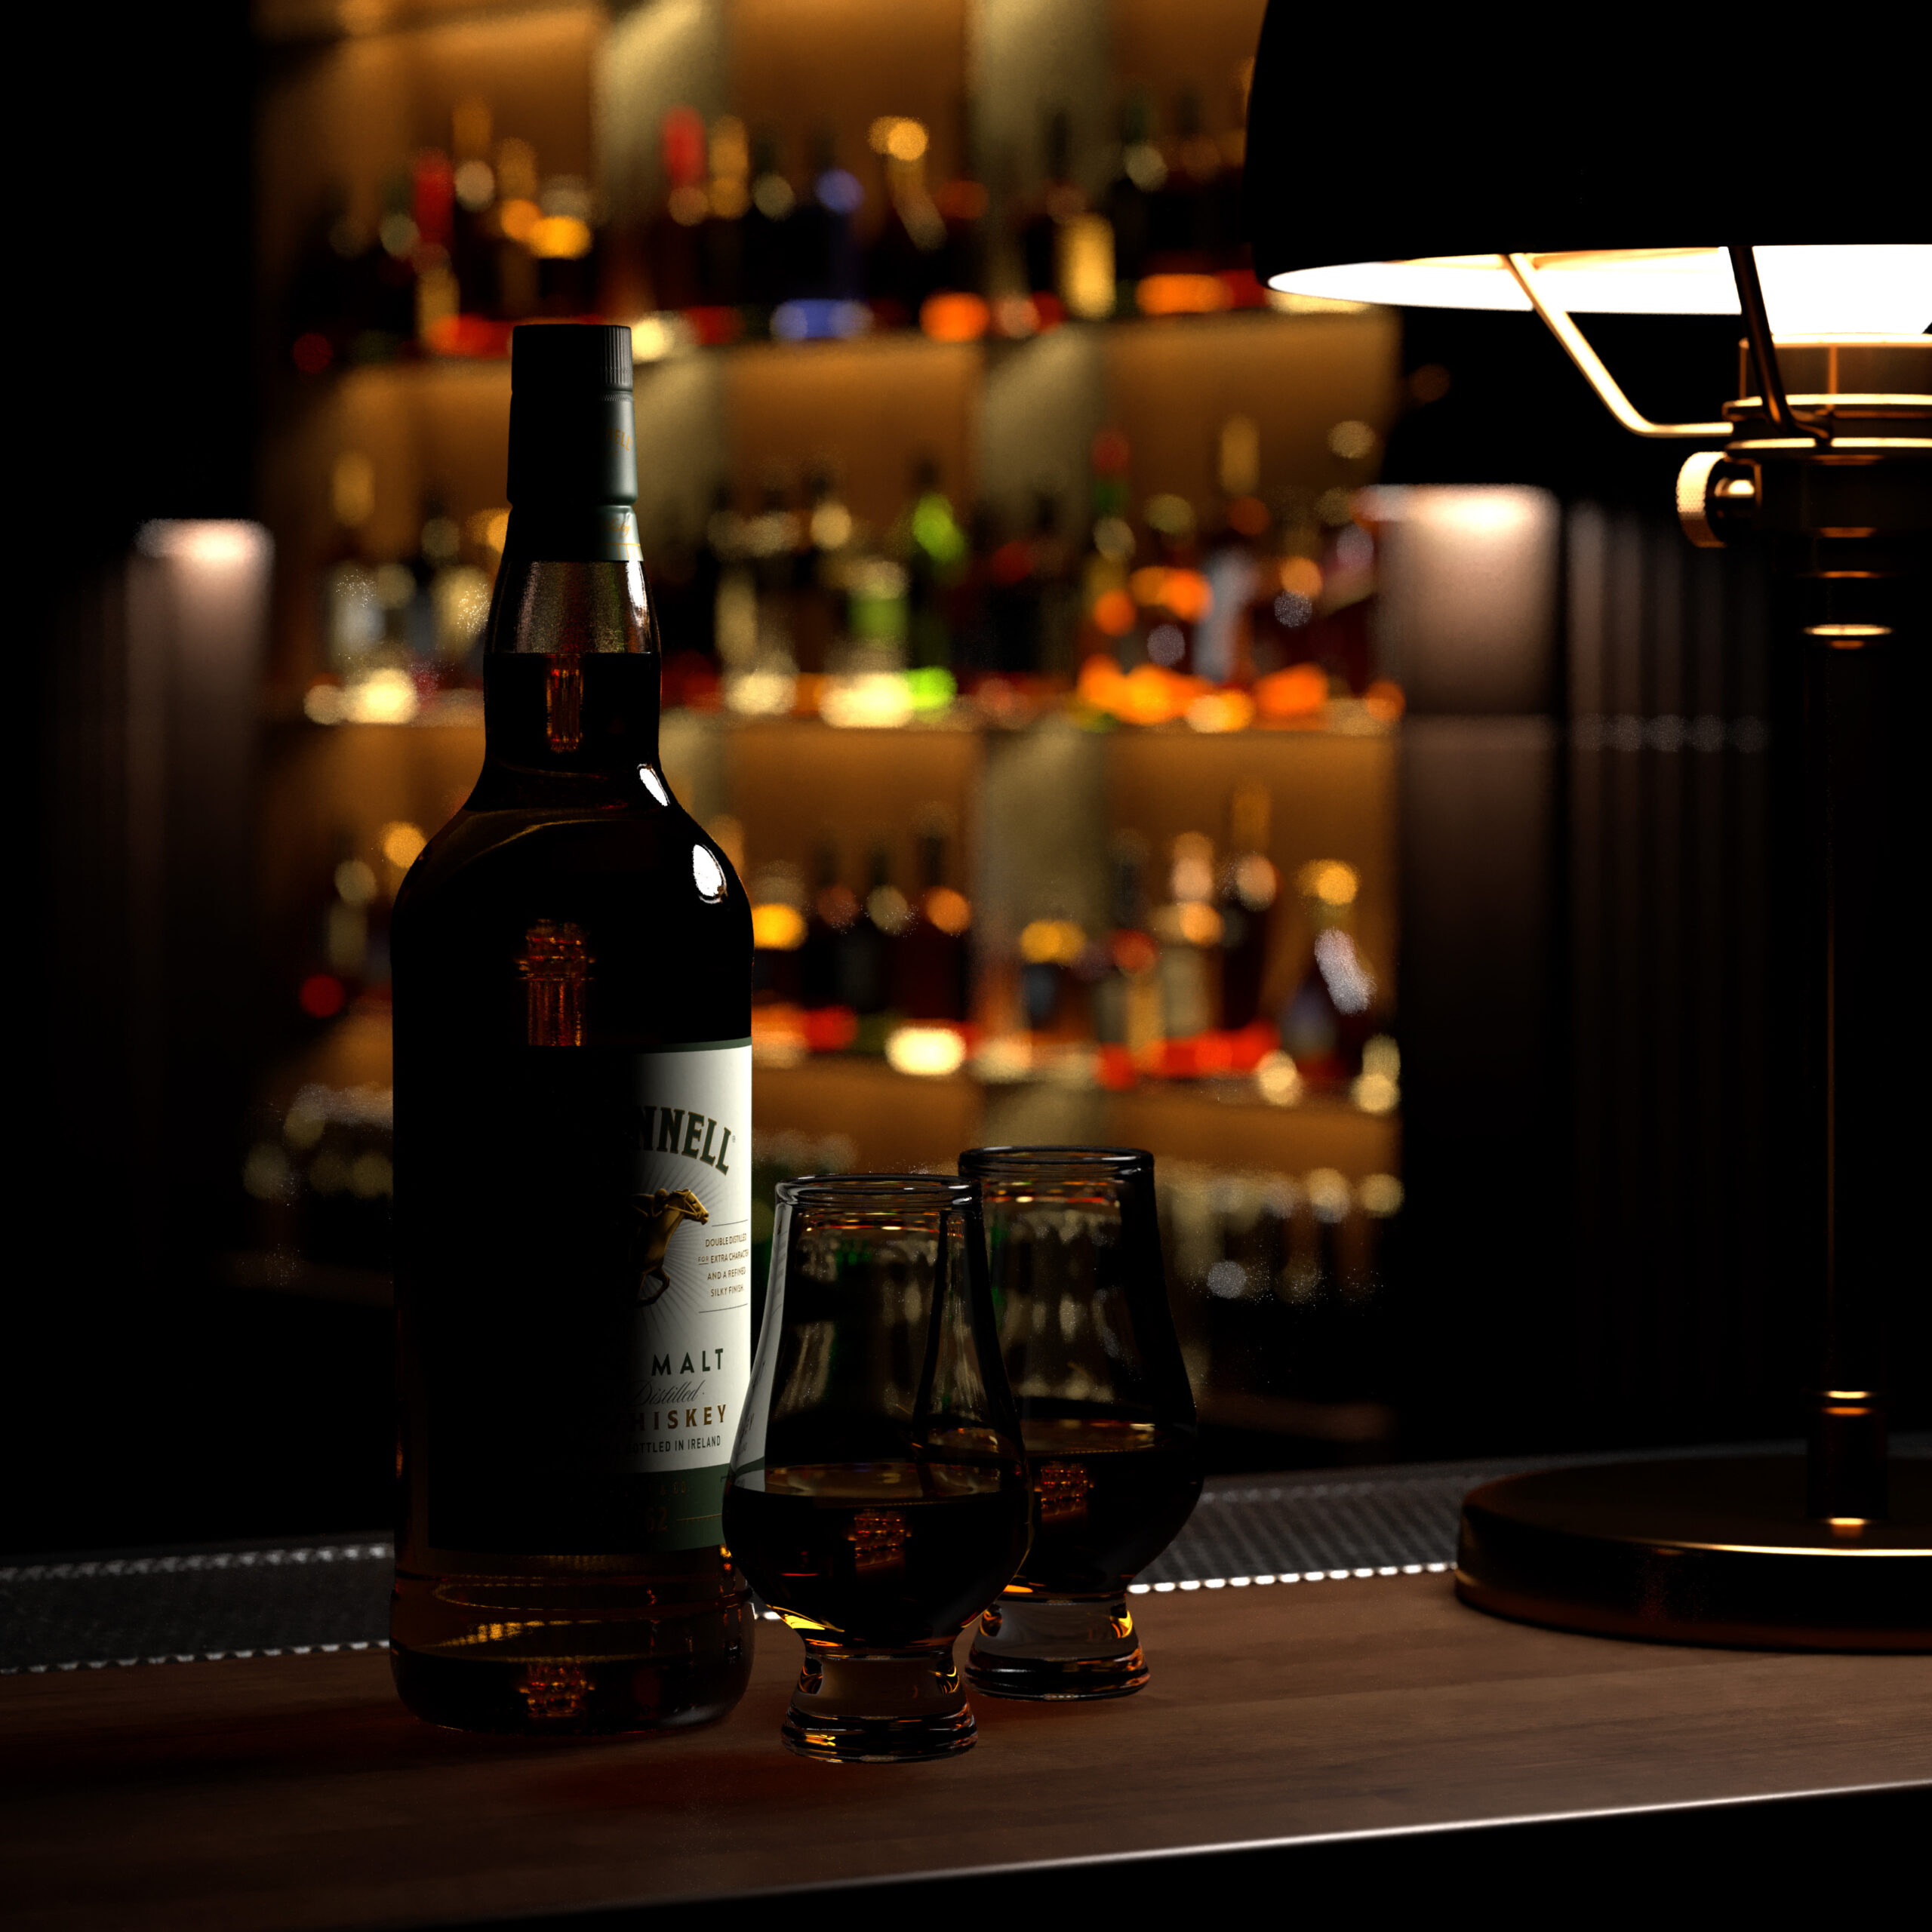
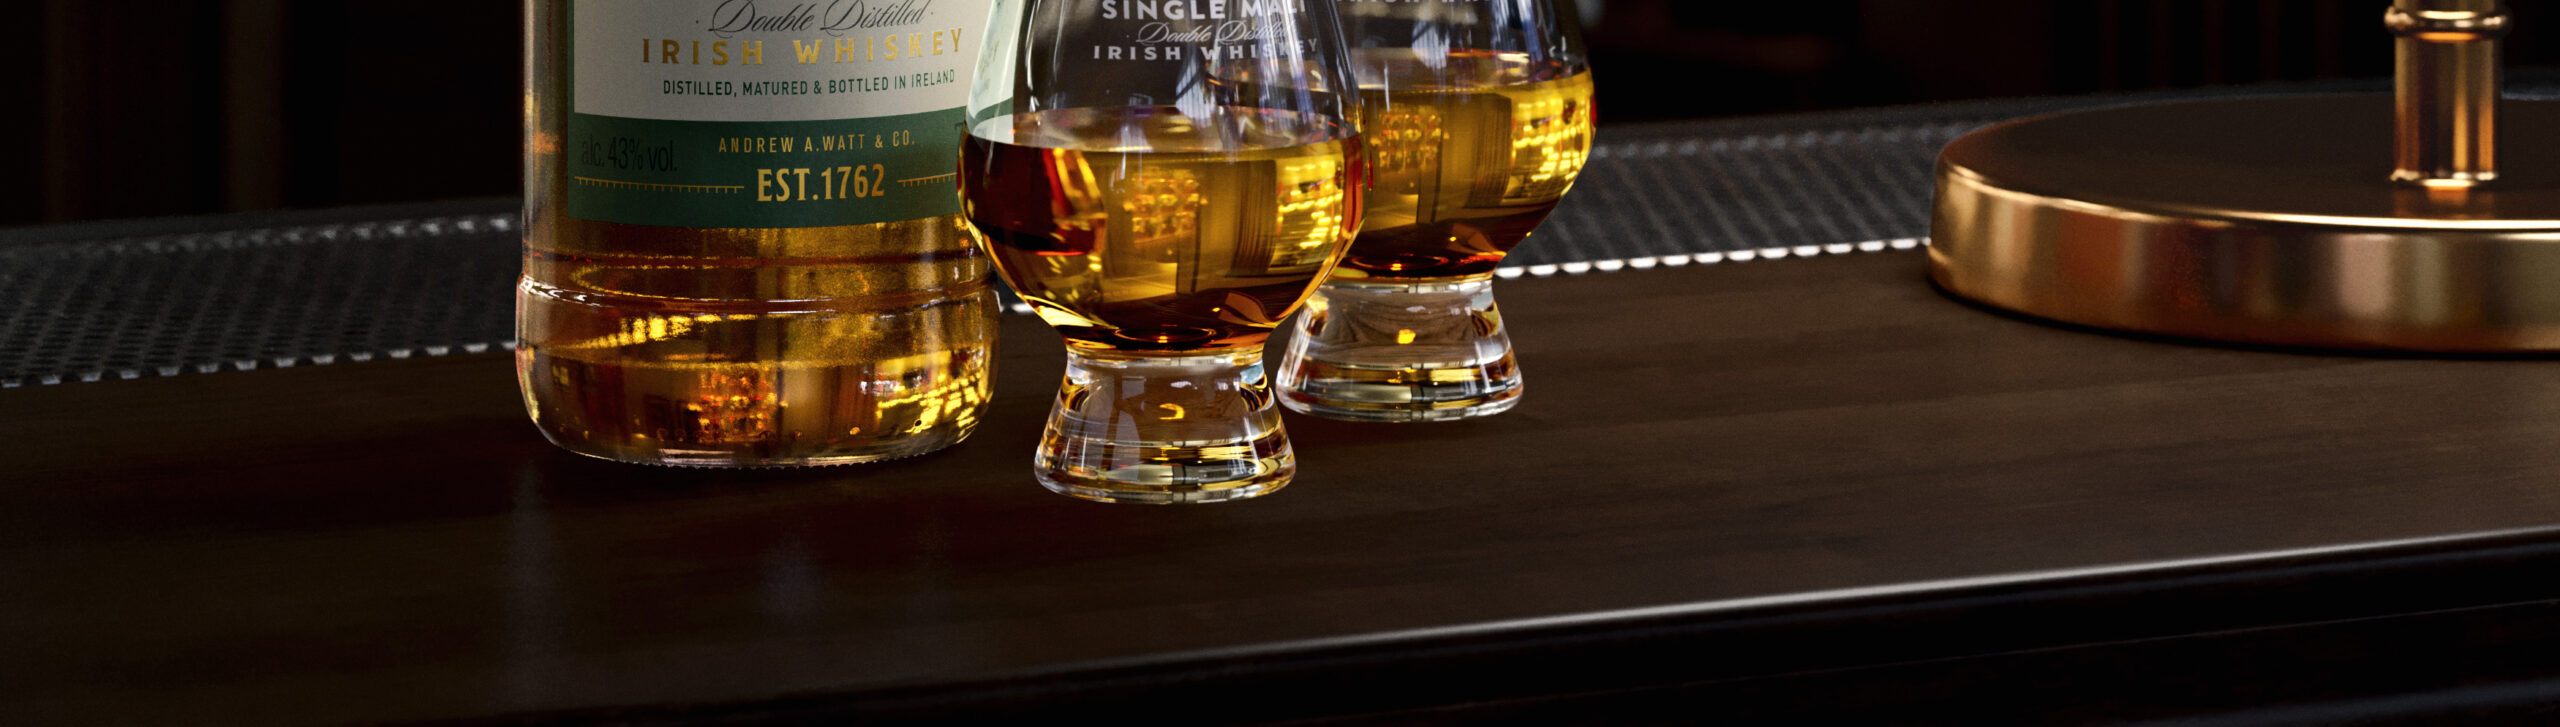
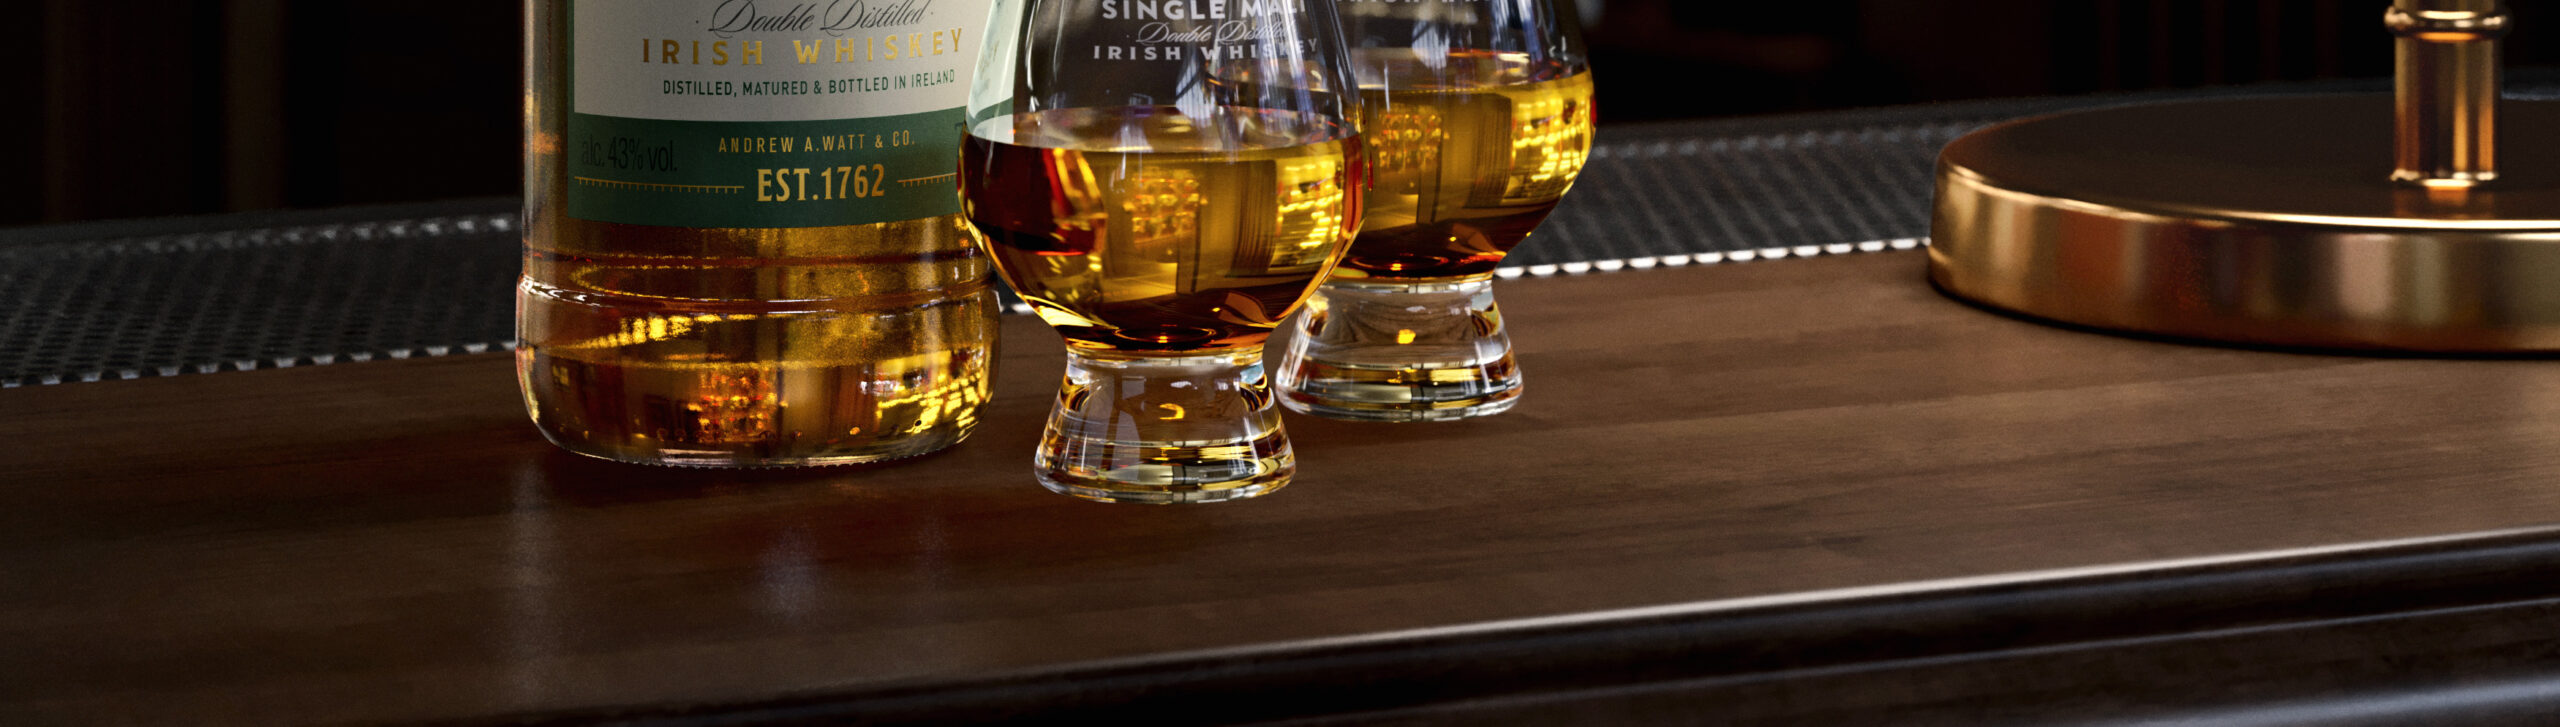
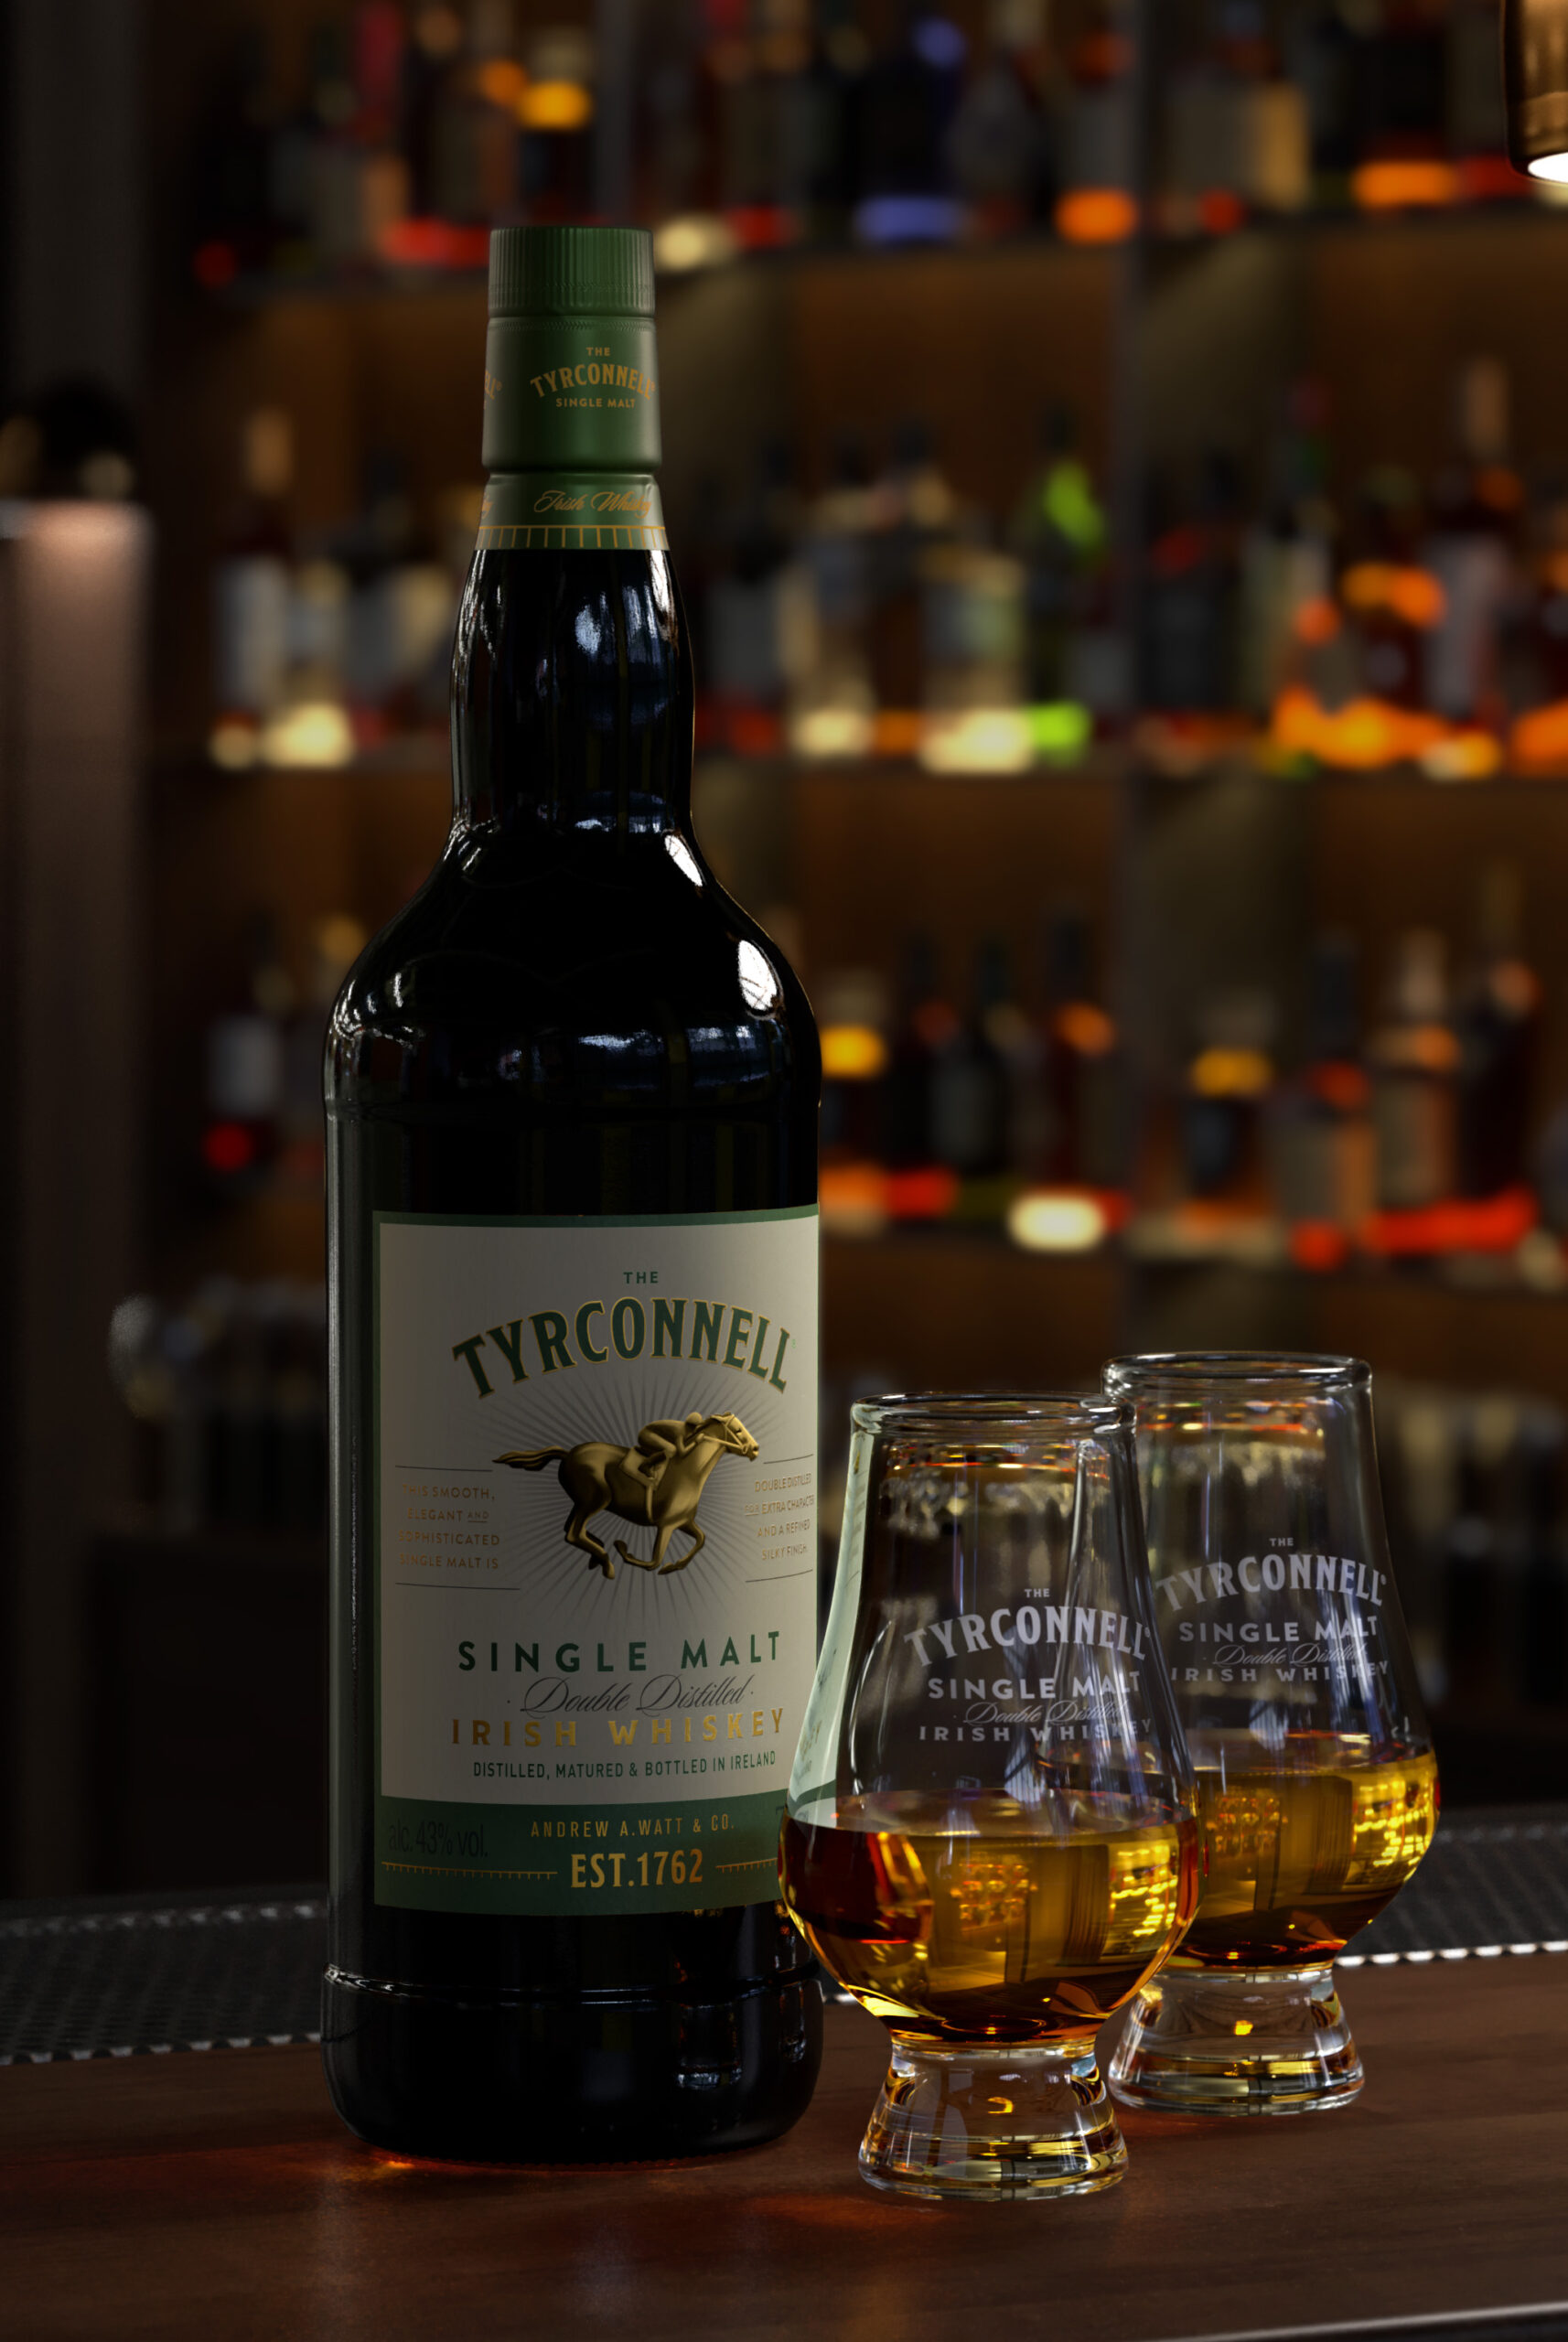
I wanted to do a lifestyle image for the series, in particular to have it situated in an Irish Bar with dark woods and moody lighting with a couple of drinks all served up ready to be tried.
Yes, the cap is still on the bottle and that was a tough choice to make – do you go for reality or something in between, as the cap has a really great design on it that is integral to it all?
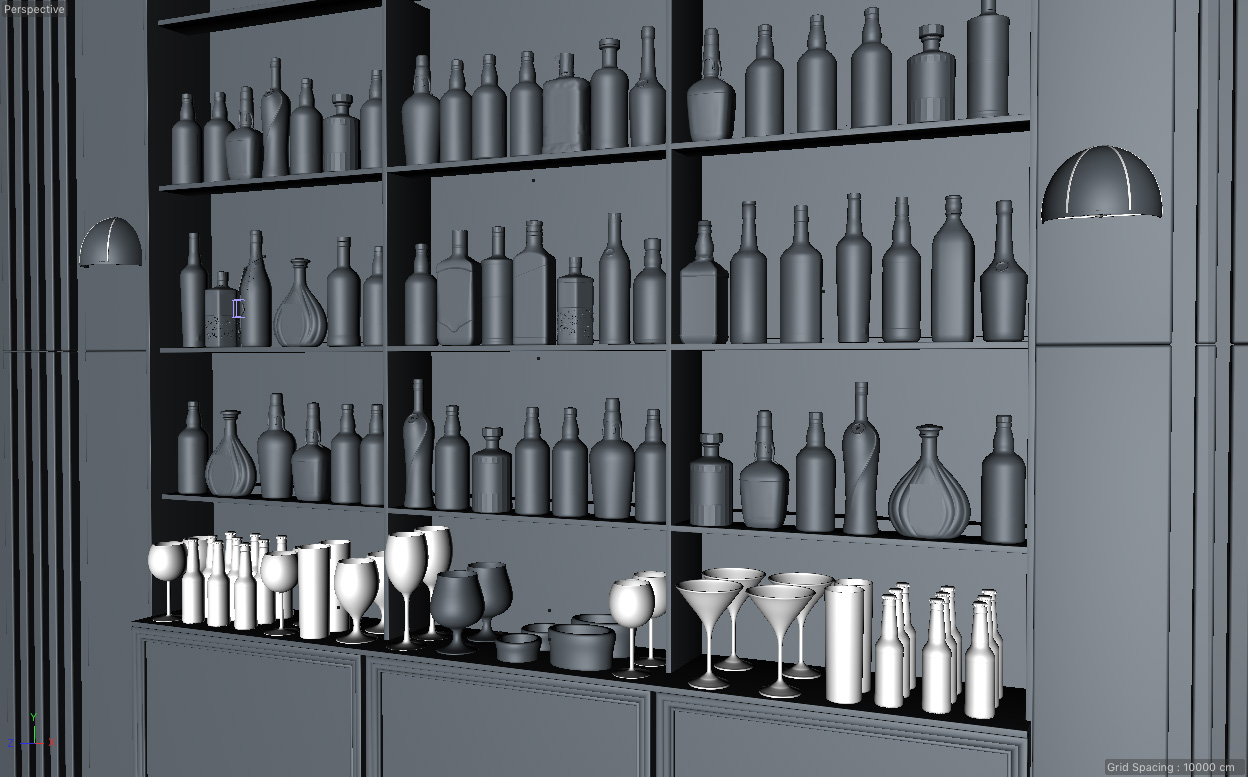
I also set myself the brief of having it all made in CGI and not resort to a stock image for the bar backdrop. So the image contains nearly every bottle I’ve ever made in 1 scene which as you can imagine leads to a hefty amount of textures with the tex folder coming in at 60GB!
Working Methods
I would love to say that I am a 3D purist and am able to get my final image out of the Corona Renderer VFB with perhaps a slight S-curve in Photoshop to finish it off but that is just not the case. This is for various reasons.
The first is I like to retouch all of my images and animations and have control over as many parts as possible. With the wonders of the Corona Renderer Multipass I am able to get Object Buffer Alpha Masks for each object which for bottle work is normally the cap closure, neck wrap, main front label and then the bottle glass.
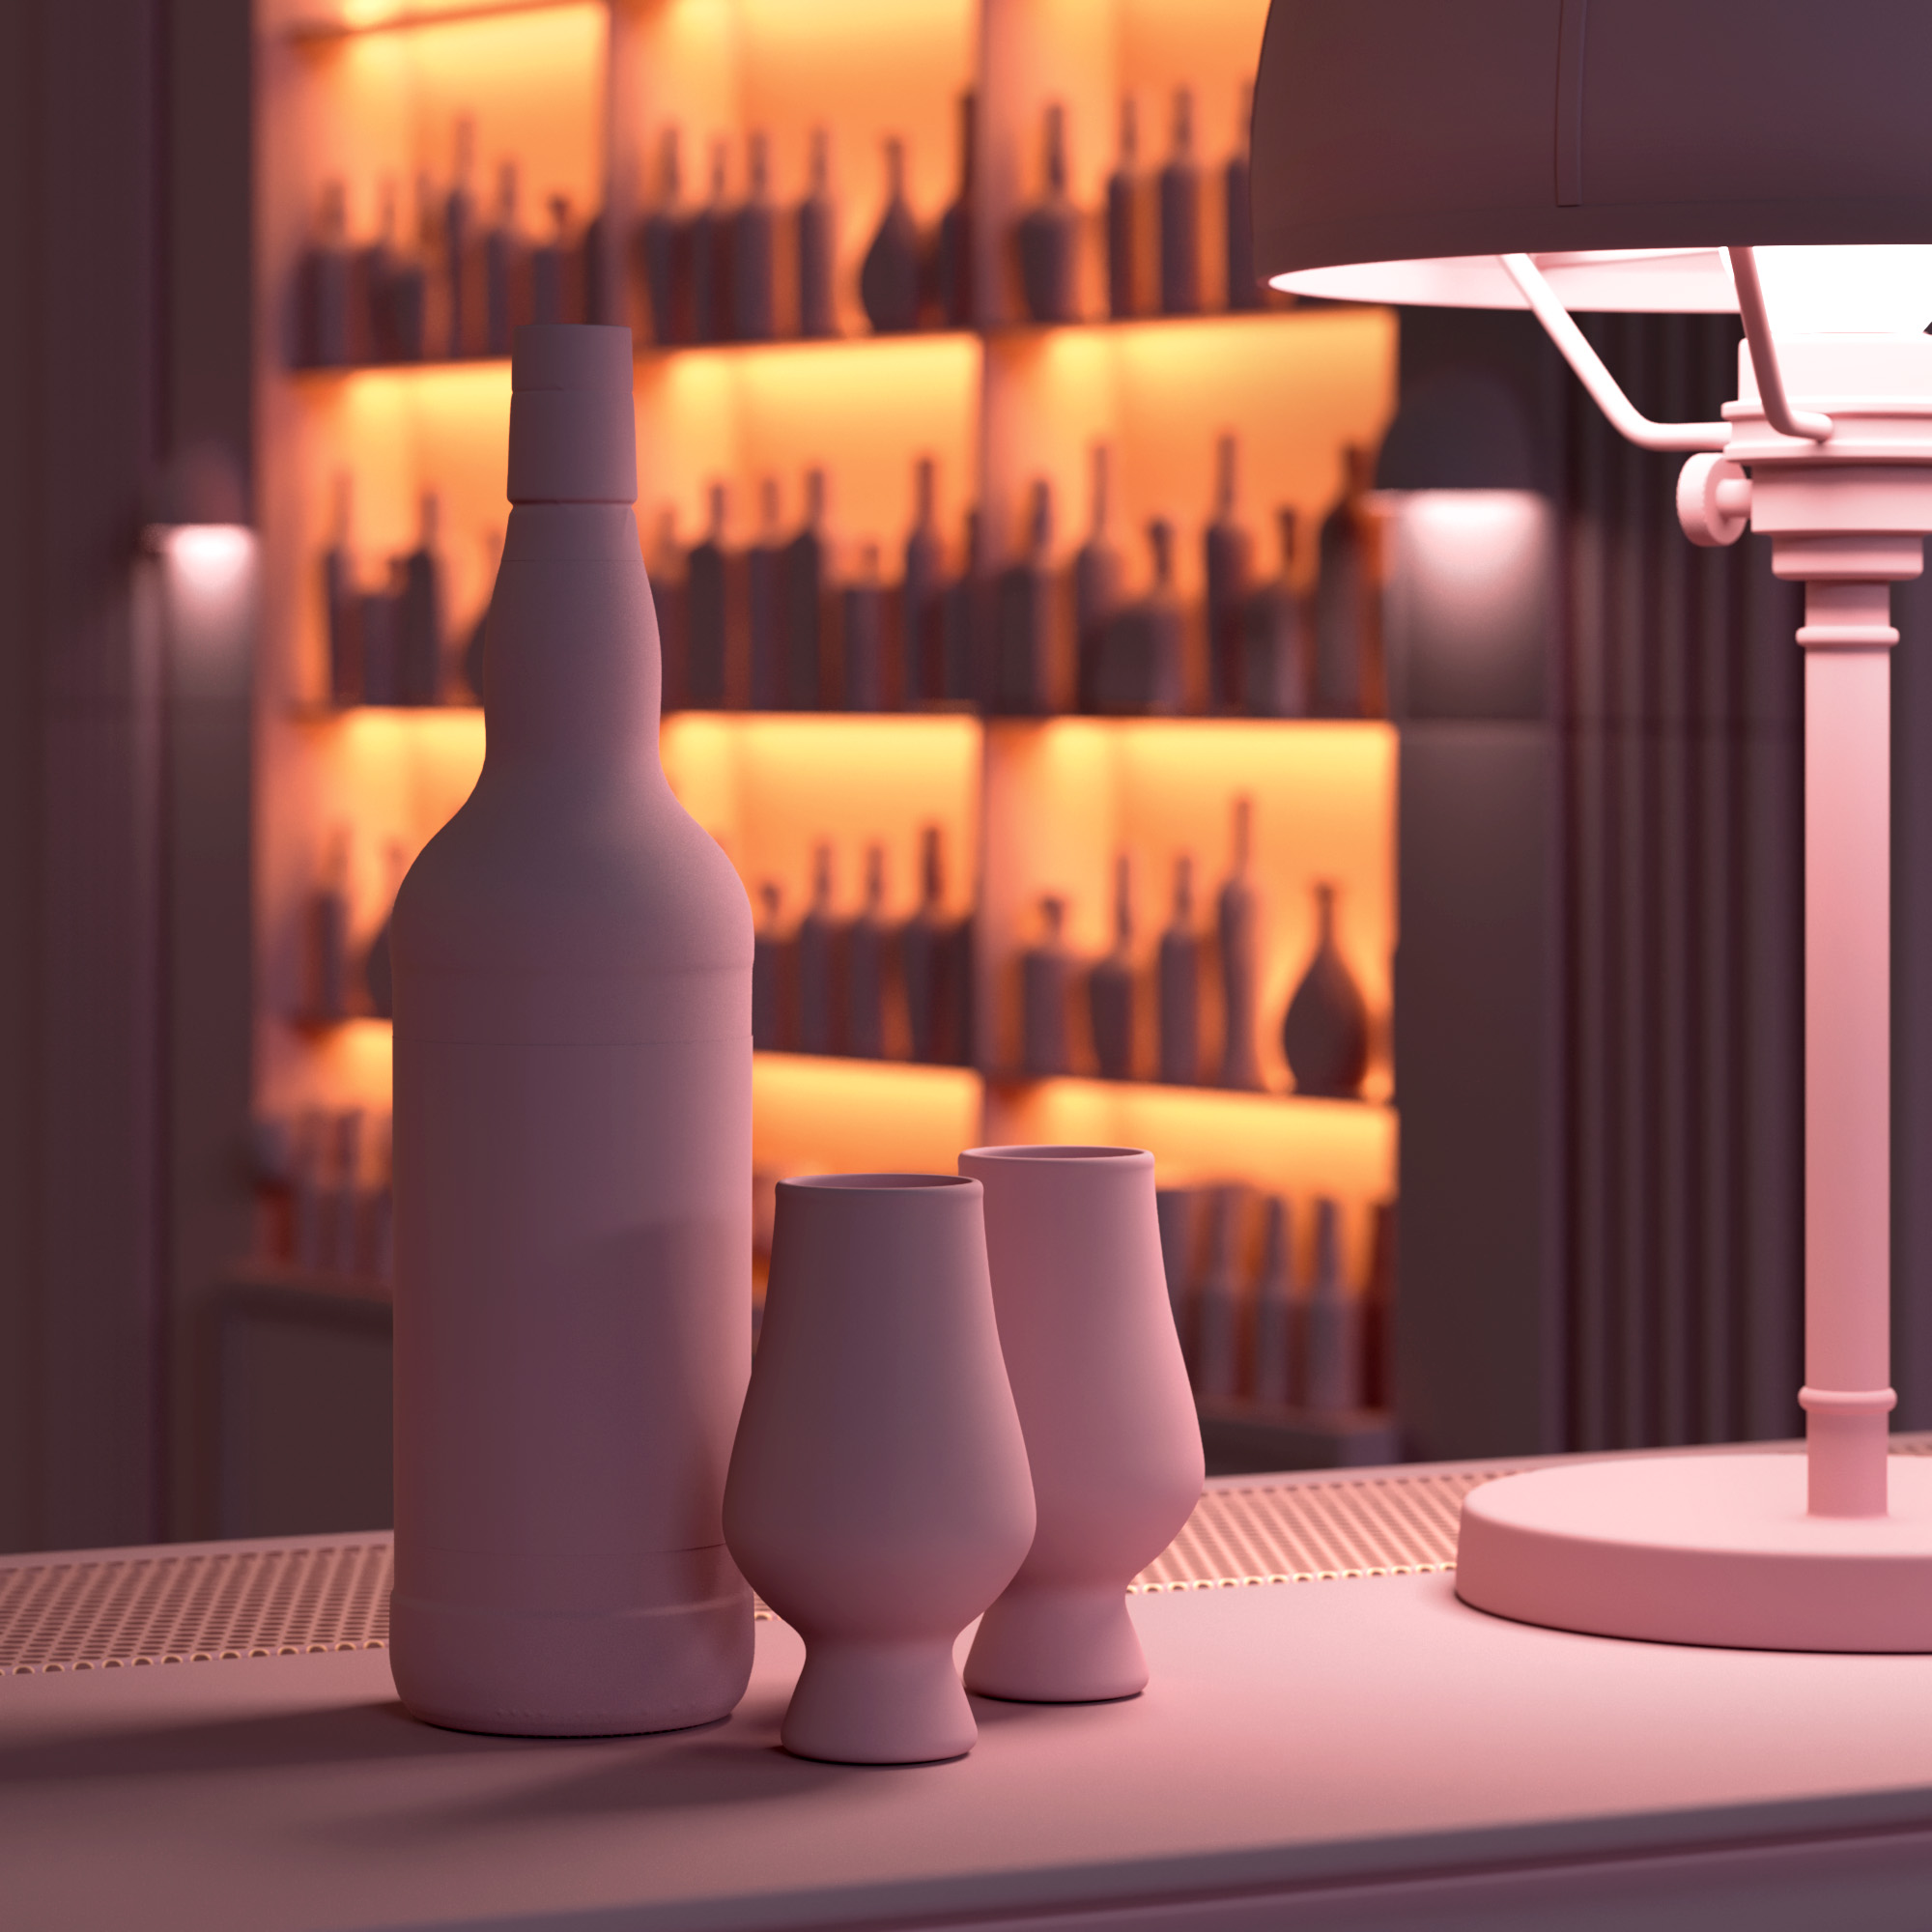
The Tyrconnell bar scene – Clay image
The second is for client changes. These are normally requests to change the liquid colour but can extend to colours and roughness of labels as well as the colour and saturation of foiling.
To have to go back and re-render patches for each aspect can be time-consuming with a lot of testing, whereas if everything is split into its own group with an alpha mask in Photoshop it makes the process so much quicker with ability to fine tune elements without disturbing any others that the client is happy with.
Some may argue this method is not to their liking and that it involves too much work after the initial render, but learning how I go about things may add 1 or 2 extra effects to your own style and approach. This could add a further 5 to 10% to the look of your images and take only minutes to achieve.
Scene Setup
It really is a game of two halves with this scene as there are two distinct groups. All of the elements on the front wooden bar top are in the foreground group, and then all of those on the back wall occupy the background group.
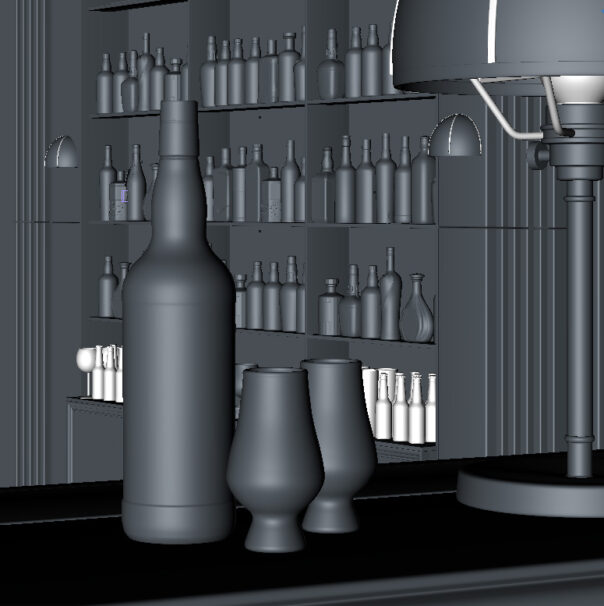
Even though the final image may look visually correct there is in fact some trickery with how things are seen.
The back wall is rotated an extra 10 degrees inwards to give a less dramatic perspective fall off and is actually quite far away from the front bar – much more so than would be in reality. This affords the Depth of Field to be relatively even on the back area and not have such a falloff.
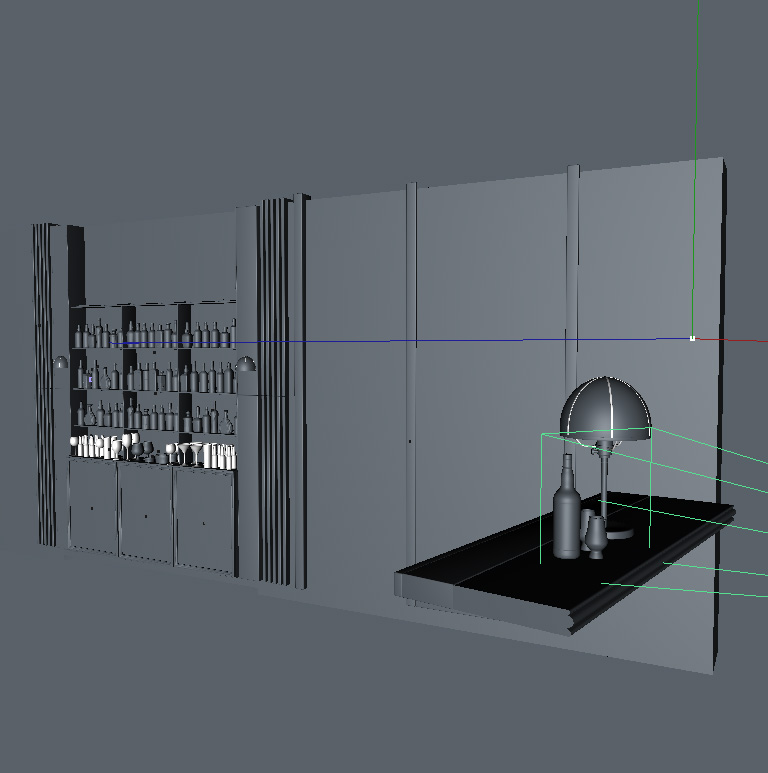
The back bar contains duplicates of some of my bottles but with the amount of Depth of Field used you won’t be able to notice it and it also saved time in populating it all.
The camera’s focal point is positioned just behind the front label. This allows for the cap of the bottle to still retain an amount of sharpness as it has key design features that would like to be highly visible.
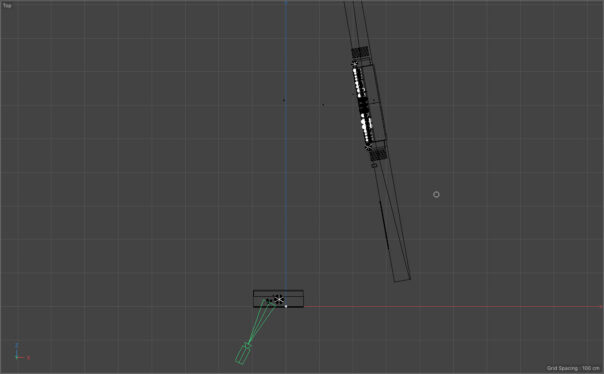
Top view of the scene 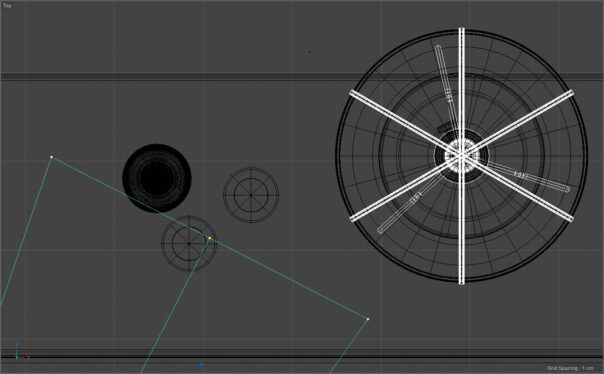
Top view of camera focal point


Camera – 2 Point Perspective
As with all great architectural visuals, having a 2 point perspective whereby verticals stay vertical and do not curve upwards is a really great move with scenes like this.
In days of old Cinema used to provide what was known as a ‘Tilt Camera’ in the Content Browser which comes from a cinematographic technique called ‘Tilting’ in which the camera stays in a fixed position but rotates up/down in a vertical plane.
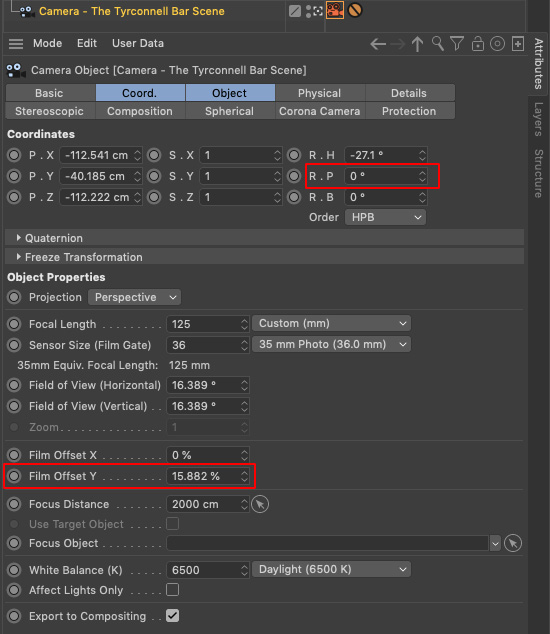
It means that the bottle, lamp stand and back bar will all retain a proper sense of vertical and your eye will be left to look for beauty, light and detail and not be concerned about the converging lines.
The way to make it work these days is to start off with a Corona Camera and then make the P setting in Coord to Zero. Then use the Film Offset Y to alter the position of objects in the vertical view.
Camera Settings
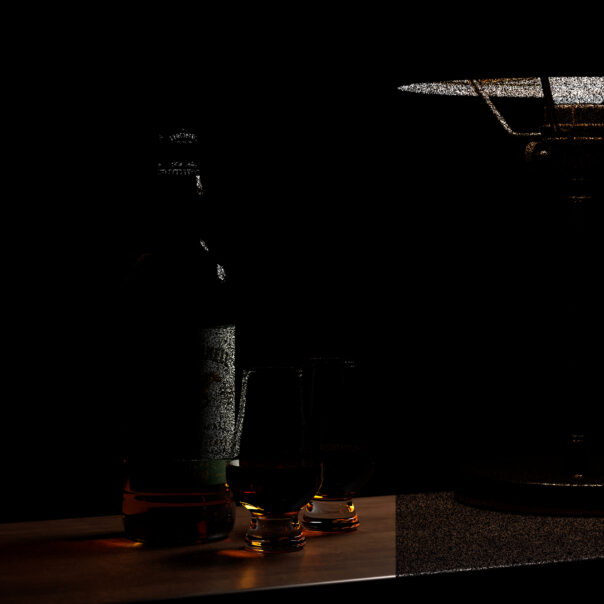
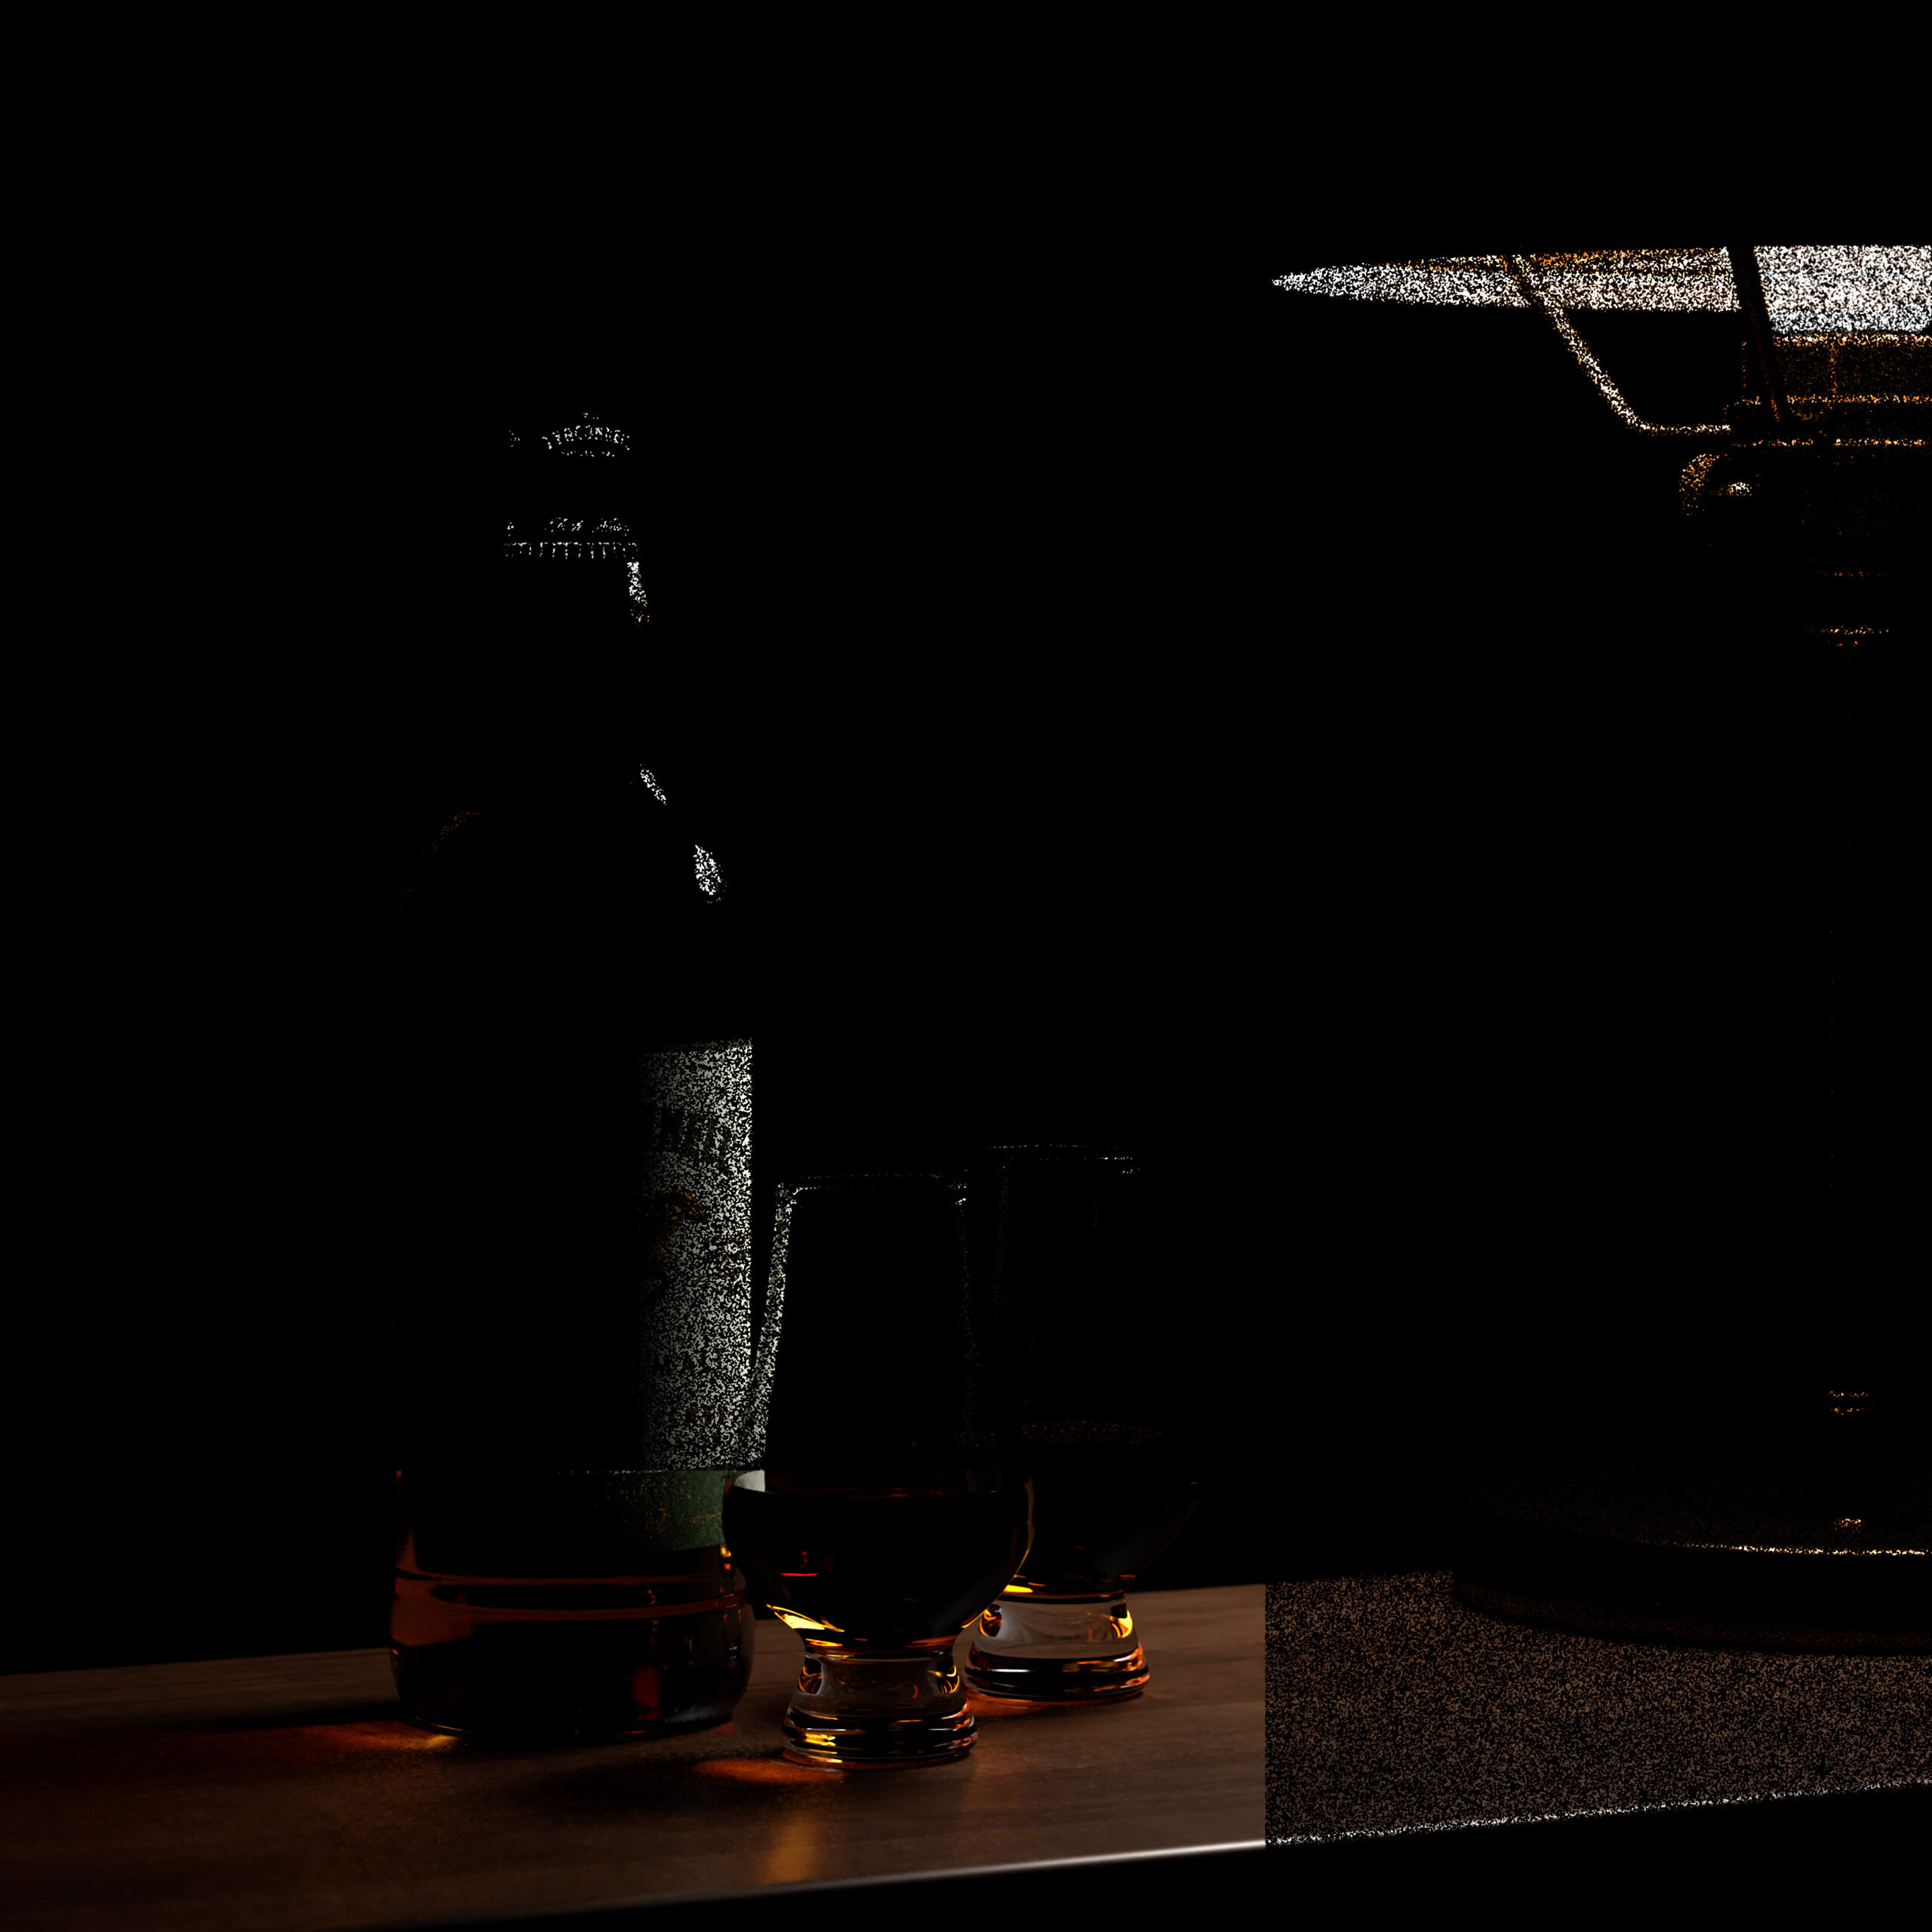
As this is a low light scene I changed my normal Corona Camera Settings of 500, 50, 5, to 1000 30, 17, and an Exposure Increase of 1. When you see the initial renders later on you may still think they are too dark, but because I use the Multipass so much and I take advantage of the power that has to transform an image, you will see quickly why these levels are just fine.
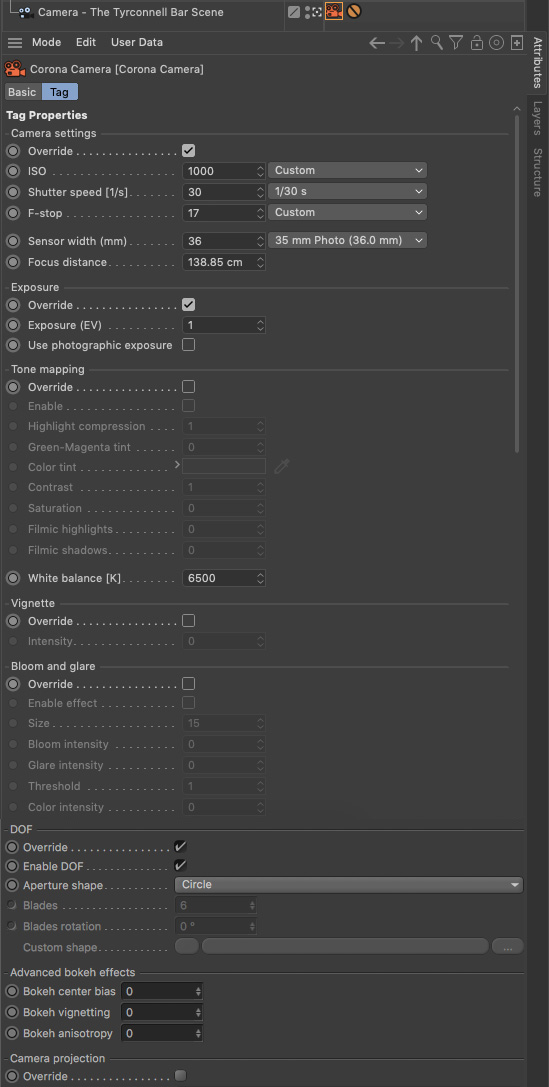
The F-Stop controls the amount of Depth of Field shown. Lower numbers equal greater blurriness and higher numbers mean less. I began with a number of 7 but eventually ended up after several stages of 11 and 13 with 17.
I left the Tone Mapping, Vignette and Bloom & Glare off so as to not let all the glassware and bottles shine too much as they are in the backdrop and not the main point of this whole image.
HDRI Light Combinations
Ideally what I was looking for was an interior night time HDRI which had multiple, small light sources like you would find in a bar to give me as much natural lighting as possible.
After much searching and no luck it became apparent that I would have to be a bit more creative – in the end I went for two different ones, then combined the renders in Photoshop.
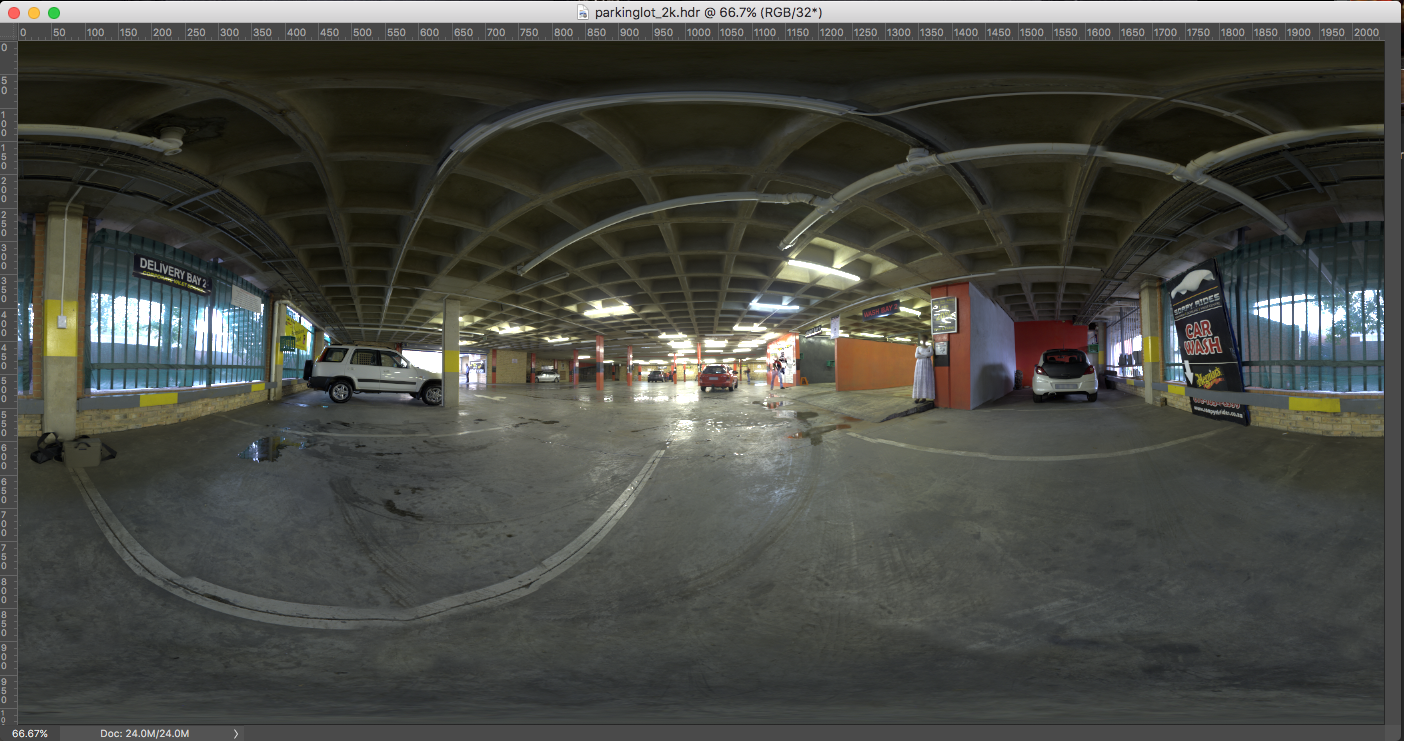
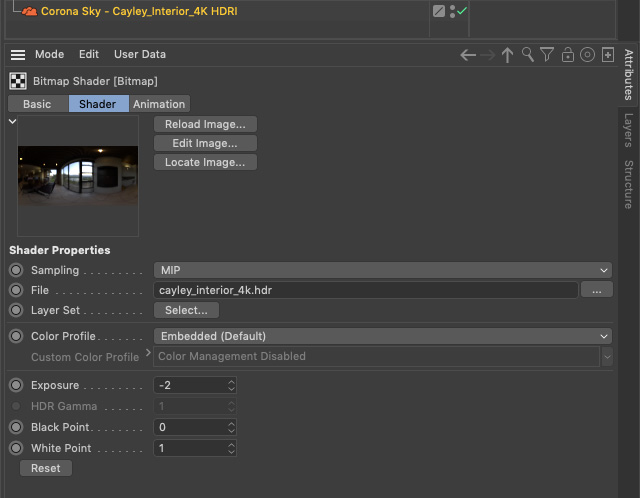
There’s a day time interior one which has some large windows but also still has the smaller, multiple light sources that I was after. Then there’s a Parking Lot with lots of diverse light all over it for interest.
In the end the Parking Lot render was used the most, with the Cayley Interior utilized to break up areas where the concrete beams were too obvious. Even the main concrete roof supports looked like a beam above the bar, so it all worked out well in the end.

These were applied using a Corona Sky and tested with different rotations to get a natural feel for where the main light source would be. In the case of the Cayley Interior the Exposure was taken down to -2.
Other Light Sources
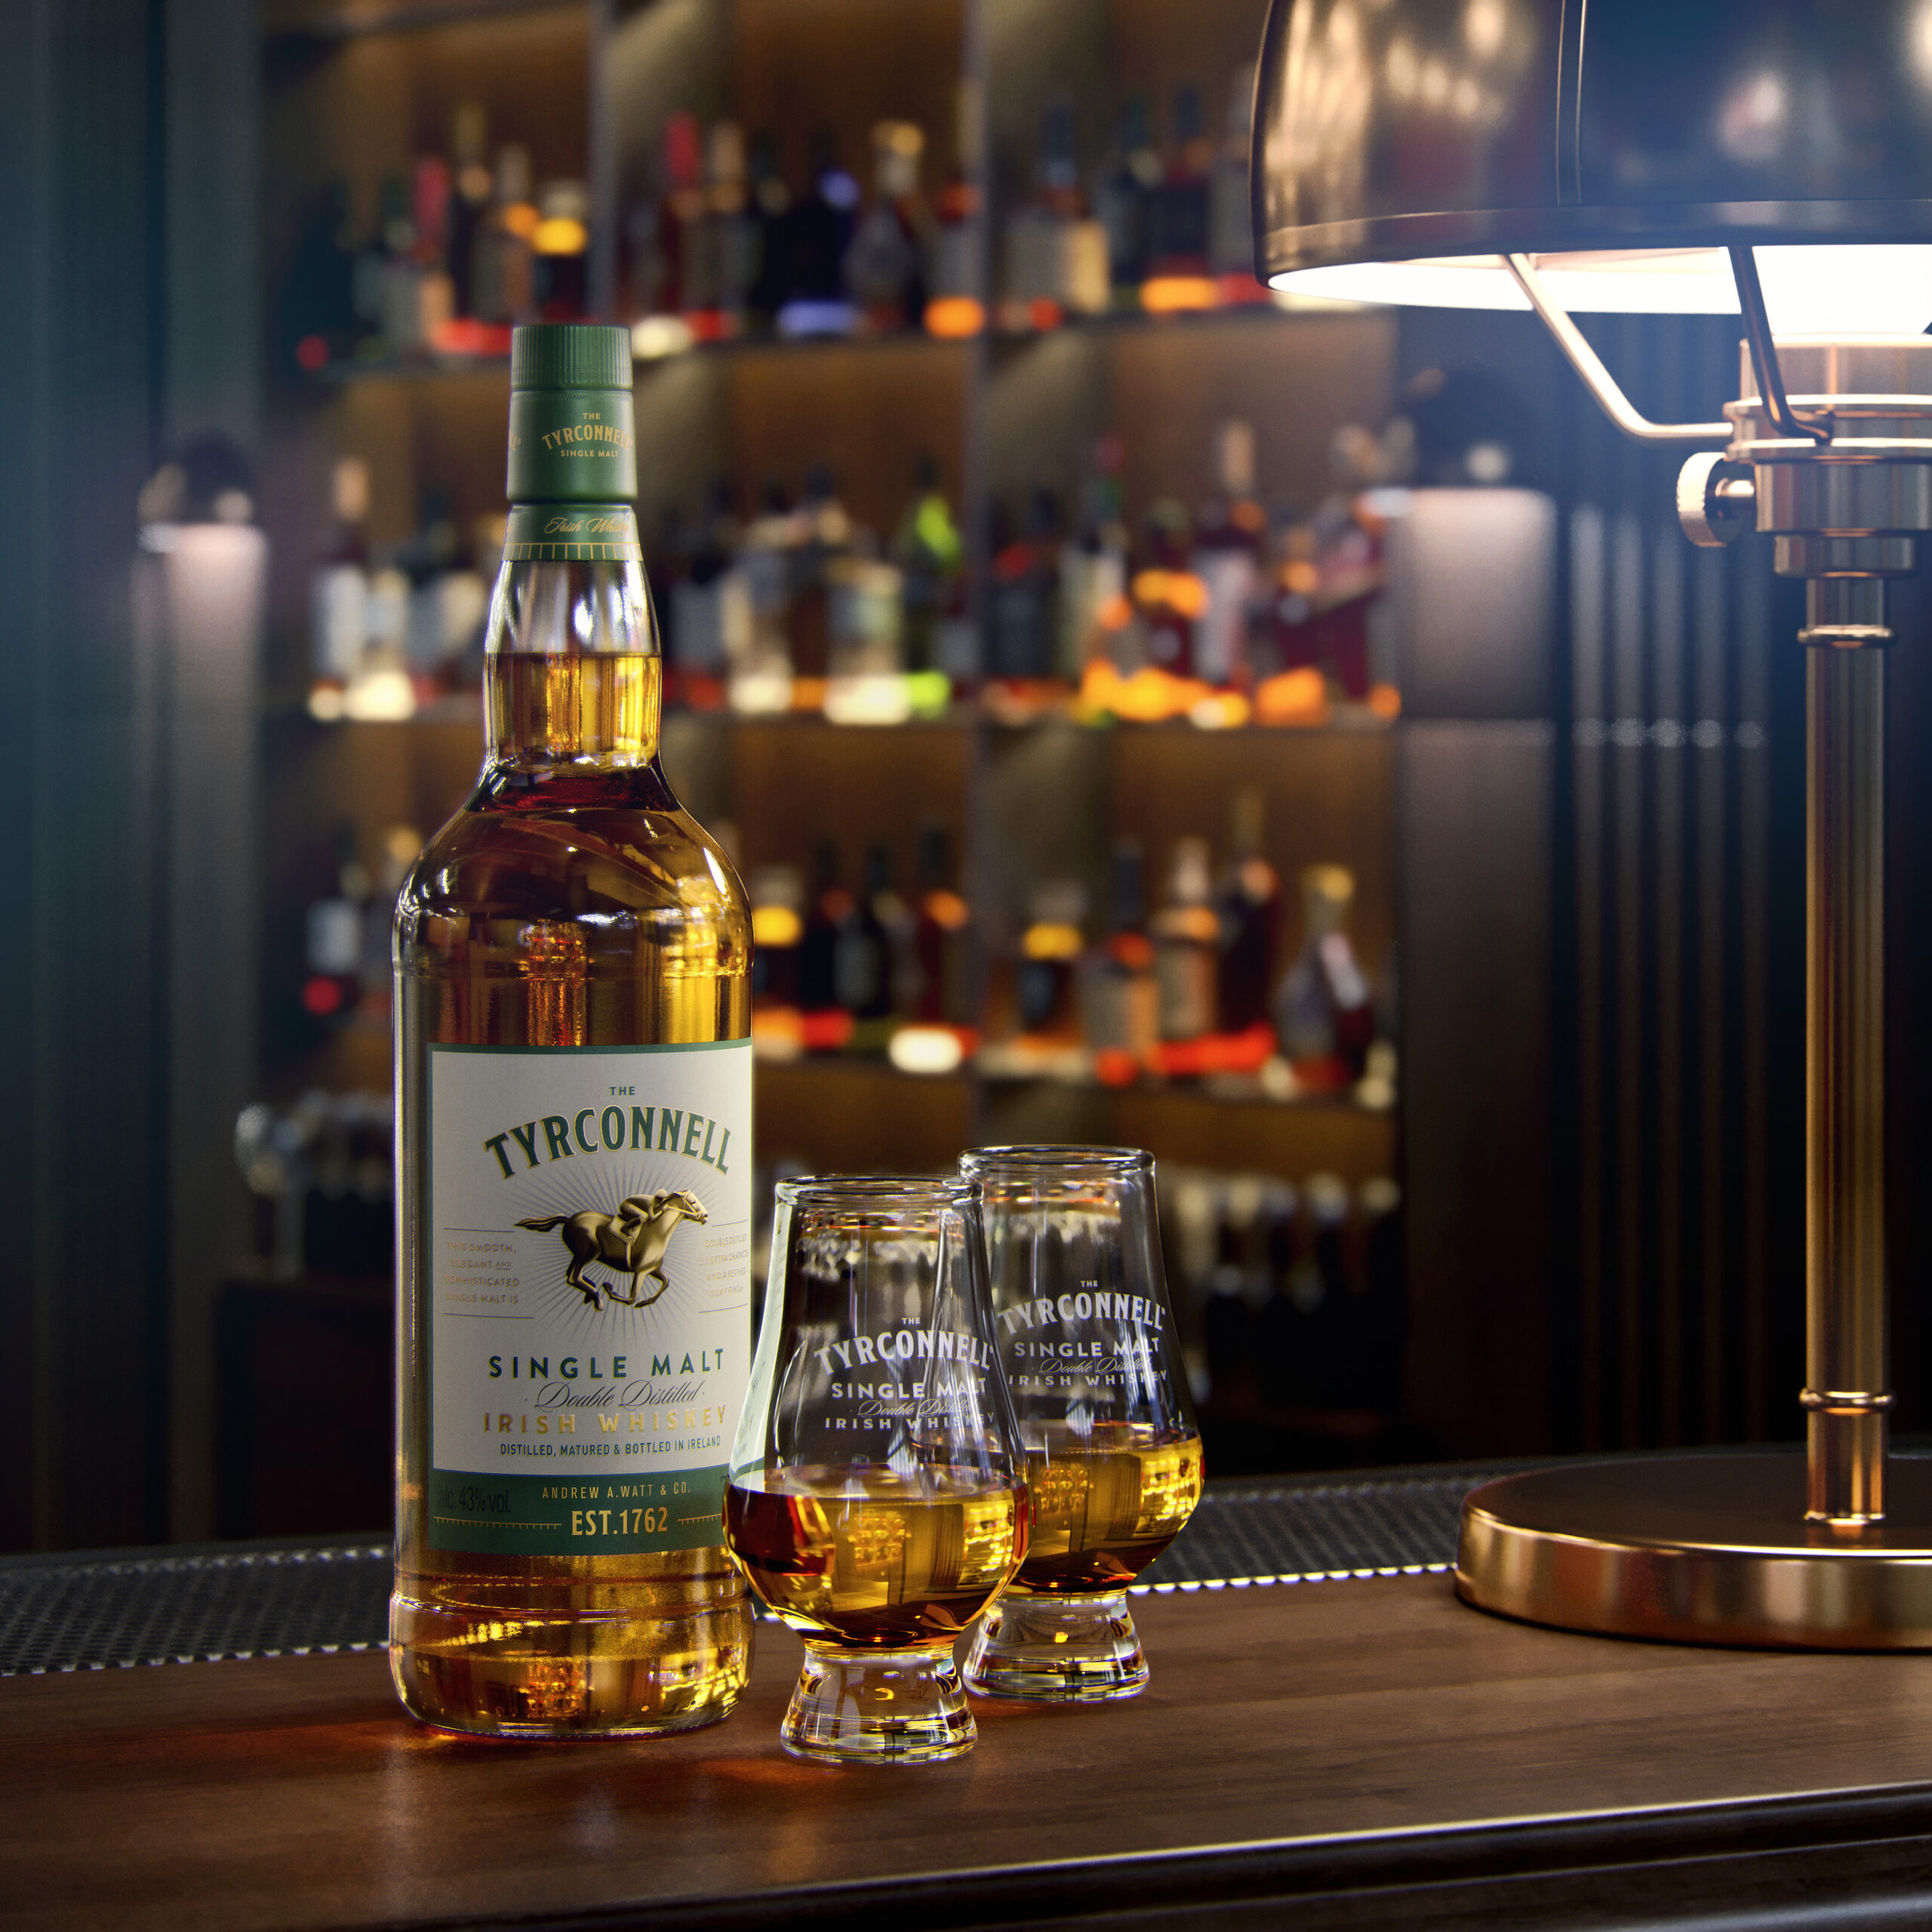
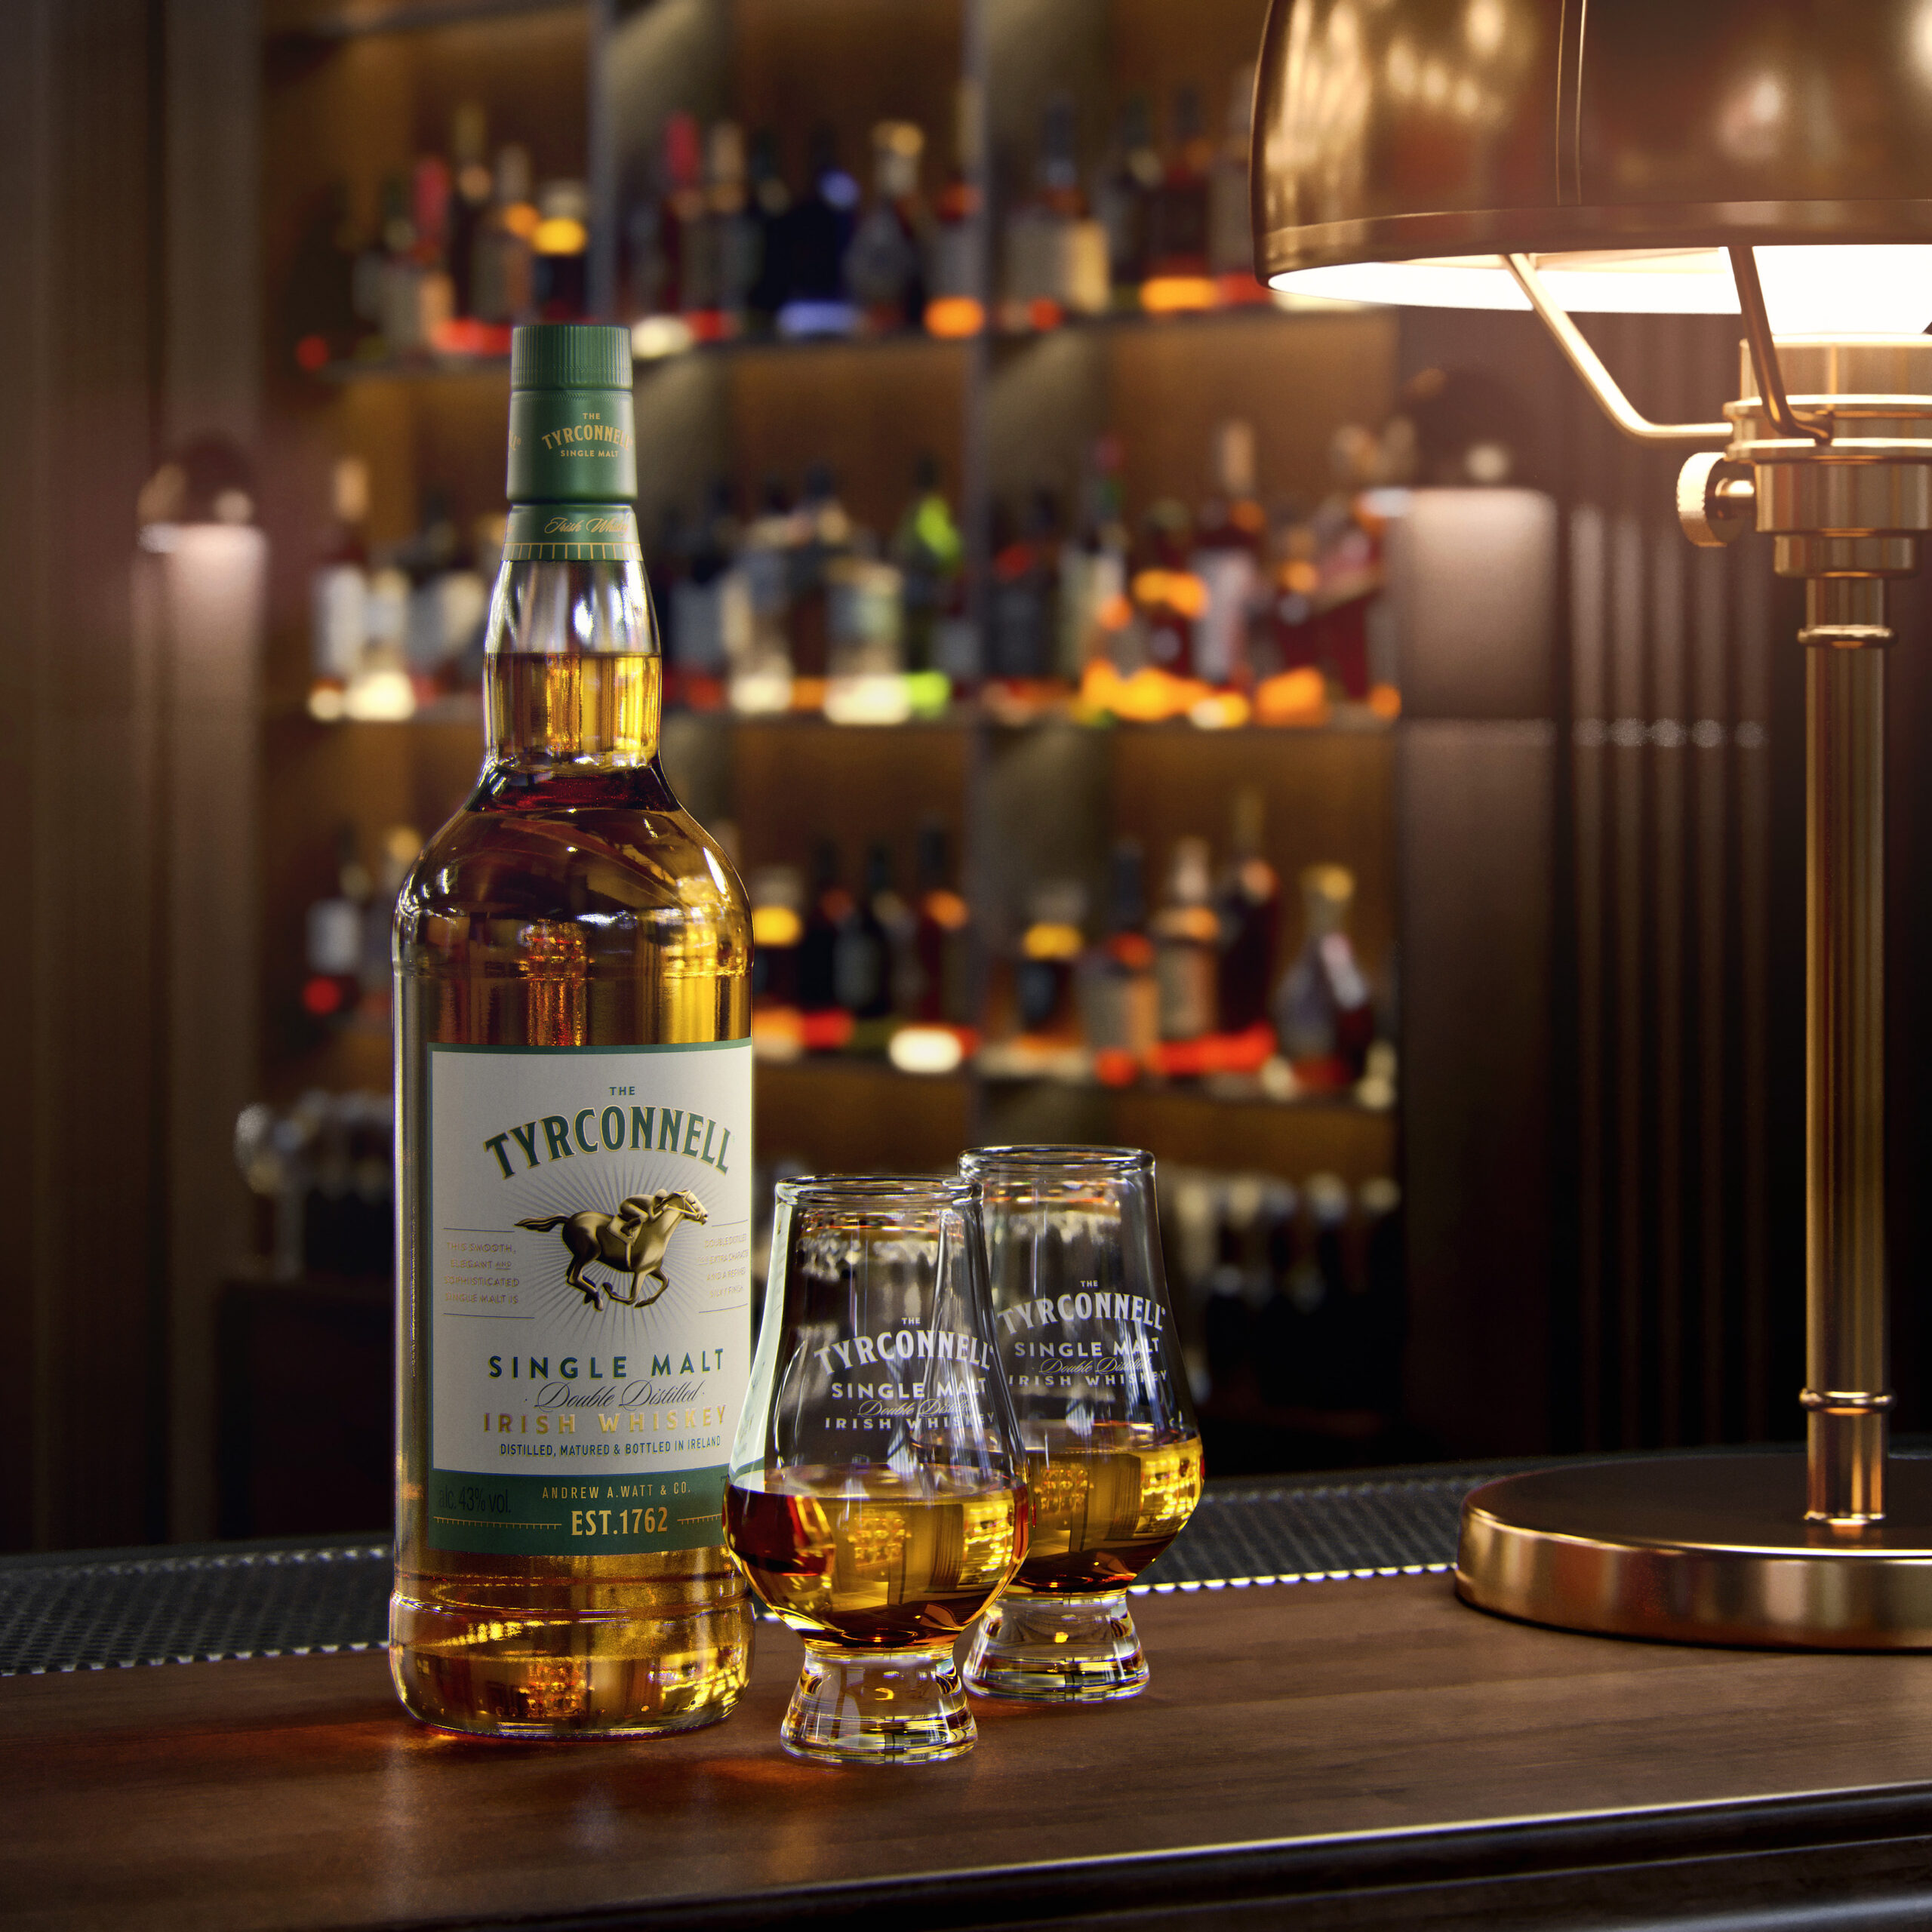
Aside from the two HDRI Lights there are three art deco lamps in the scene, each of which has a Corona Area Light as a circle set to an intensity of 7 and not visible. There’s also a candle bulb with a Corona Light Material applied with an intensity of 2.

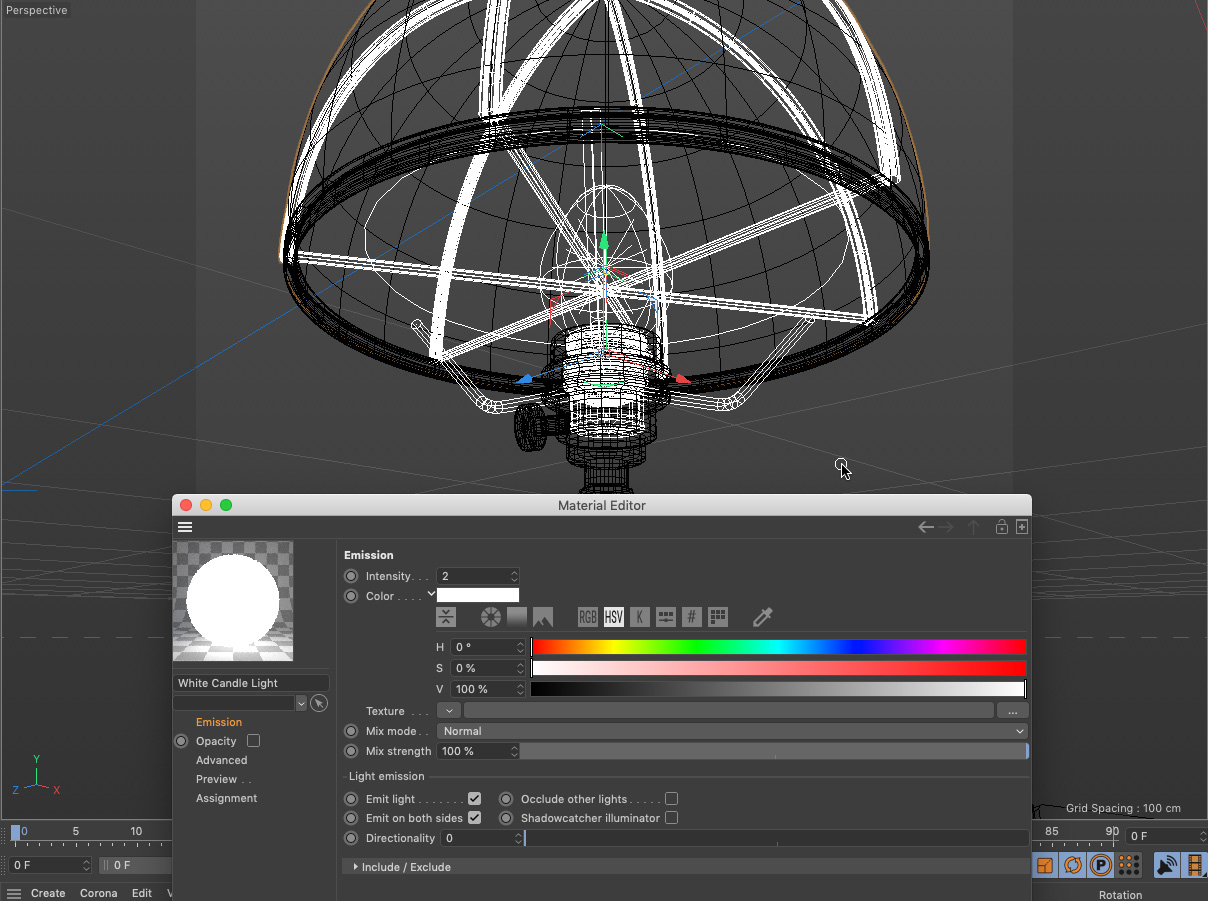
Last but not least, there are extended cube shapes on top of every shelf at the back of the bar, behind the bottles.
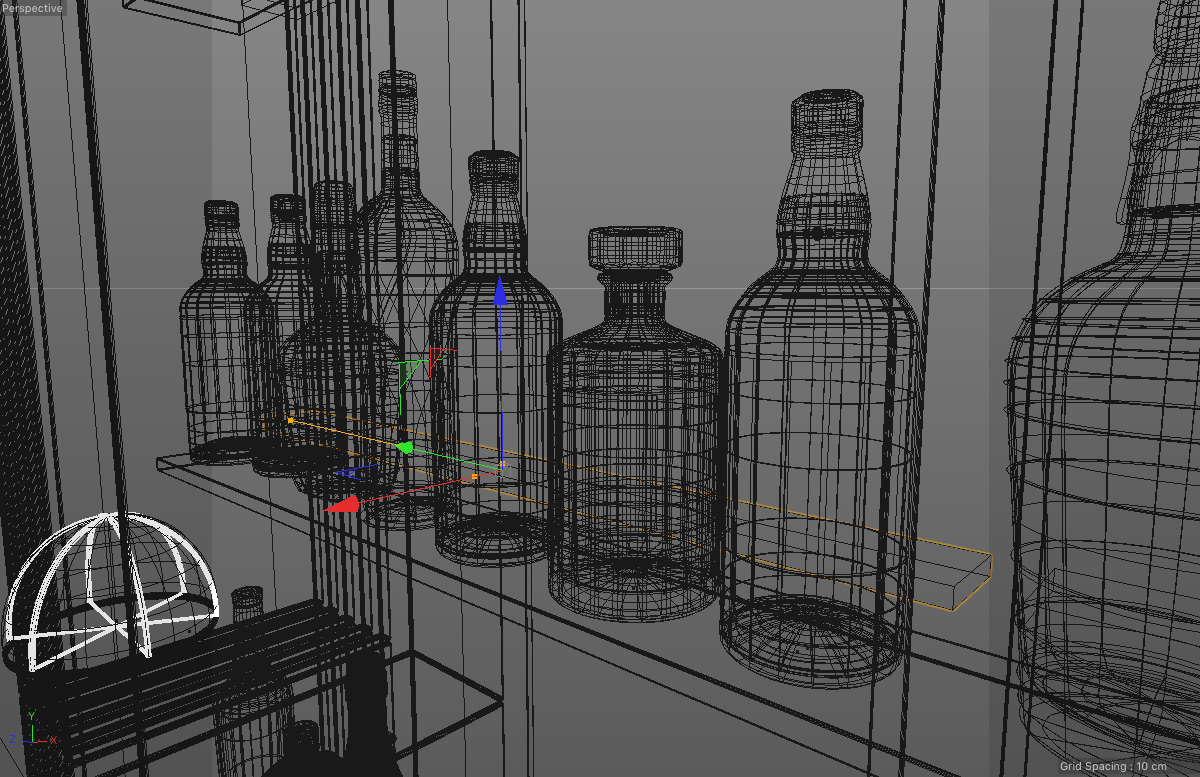
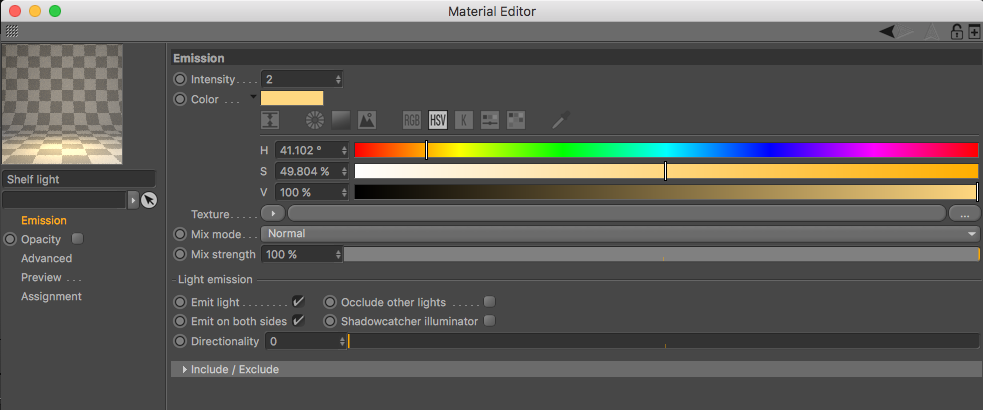
These have a Corona Light Material applied to them which has an orange hue, an intensity of 2 and is not visible to the camera.
Object Buffers with Multipass
I use Corona Object Buffers and the Corona Multipass with every still and animation I do. It has to be about the most useful aspect in my workflow and one that I thoroughly recommend getting to grips with.
It allows me to have all the objects I need selected with their own alphas, as well as all the beauty passes that I retouch heavily, all sorted into each of these object groups within Photoshop or After Effects.
This is where the magic really happens and it can be so fine tuned and detailed that it just really suits my way of working and gives me the ability to enhance every aspect of an image or animation.
Imagine having the best possible image out of the Corona VFB only for the client to say ‘it is all wonderful but could you just change the liquid colour and also bring out the gold foiling on the front label to twice the strength!’
Without the Corona Object Buffers you’d have to go back into Cinema and tweak with lots of tests, which then also potentially upset other areas the client may be happy with. To me, it makes more sense to be able to go into a Photoshop group and make some Layer Adjustments in a fraction of the time.
Quite often a liquid colour can change 4 to 5 times until everyone is happy with it, and to be able to alter that without affecting the highlights on the bottle is another issue which I’ll touch on a bit later, but again with the wonders of the Multipass is very possible to achieve.
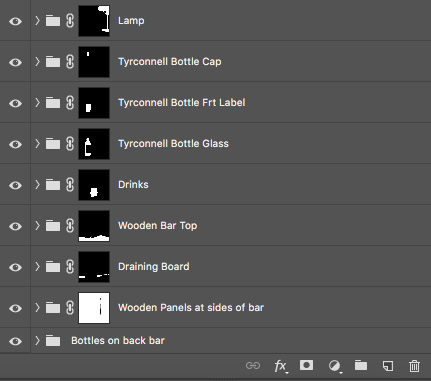
I set up Corona Object Buffers using the Corona Compositing Tag for each object I want to have control over. In the bar scene the foreground elements are the most important as the back bar only really needs the wood, bottles as a whole, glass shelves and lights.

So for instance there are Corona Object Buffers for the bottle cap, bottle glass, main front label, drink glass, bar top, bar top drainer and then several for the lamp. You can have as many Object Buffers as you like – once you reach 8 just type over that for a new, higher number.
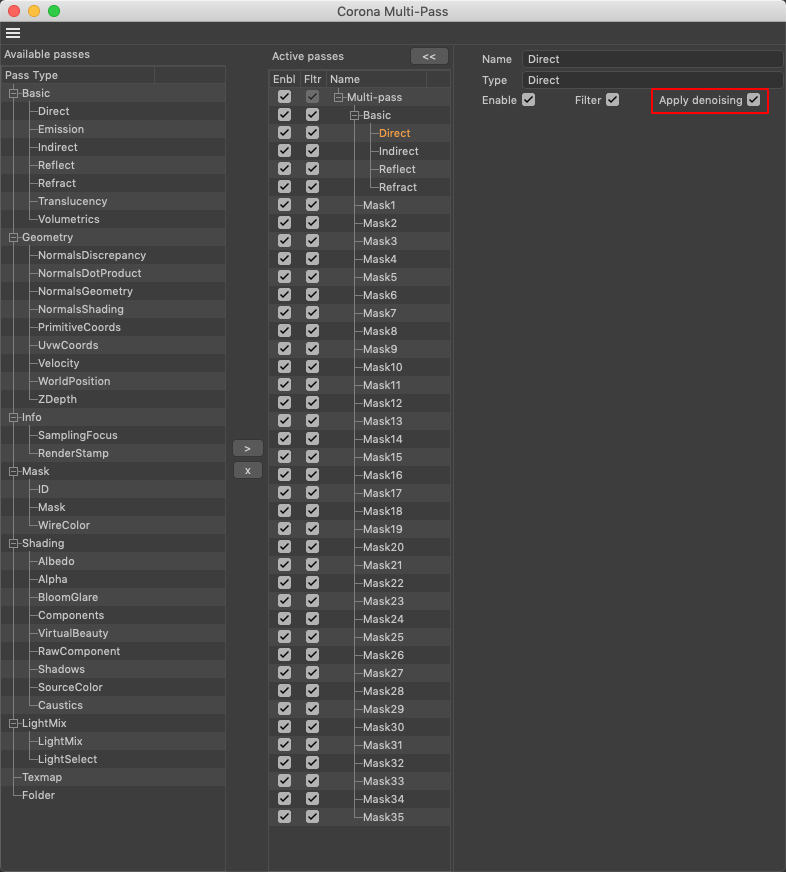
In the Multipass Settings I’ve added Direct, Indirect, Reflect and Refract ‘Basic’ passes. Just remember to tick the Apply Denoising box to each of these as it is off by default. In total I set up 35 different Masks for the Corona Object Buffer just in case I needed them. In the end I only required 8 but it is well worthwhile having as it takes no longer to render 1 as it does 35 of them.
Five Main Renders
The hardest aspect with this scene was the amount of time to properly render the back bar with all of the bottle glass and liquids present. This was also needed to refract in the main Tyrconnell bottle and drinks on the bar top.
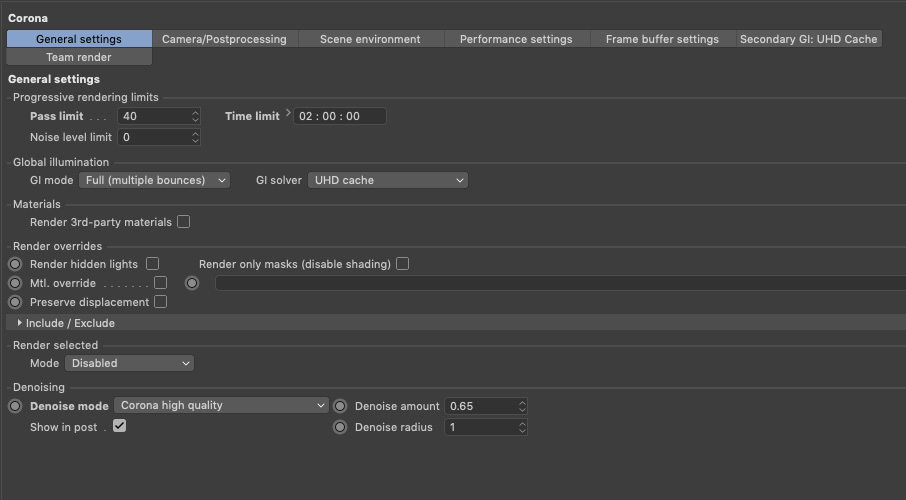
A Pass Limit of 40 was set or 2 hours, whichever came first. Any imperfections or speckles were removed in Photoshop using Filter / Noise / Dust & Scratches and a radius of 1 pixel, applied on the main render and the basic Passes.
Caustics as well were turned off for every render until just a specific one to capture that aspect, with the main art deco lamp turned on.
Parking lot HDRI 
Cayley Interior HDRI 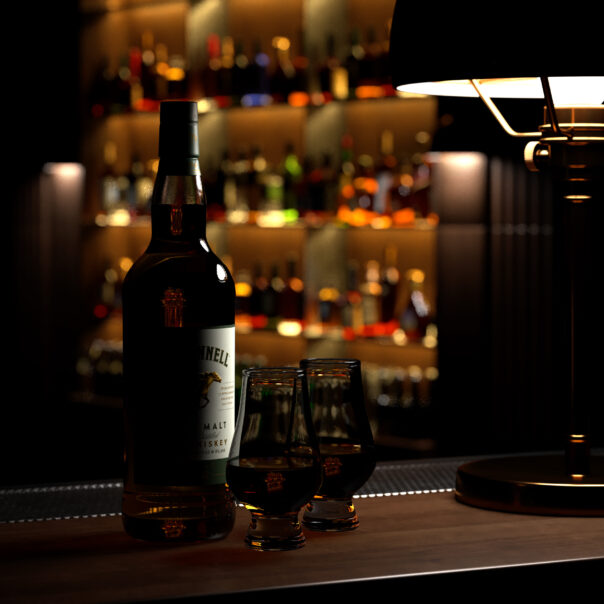
HDRI lighting turned off

Caustics render 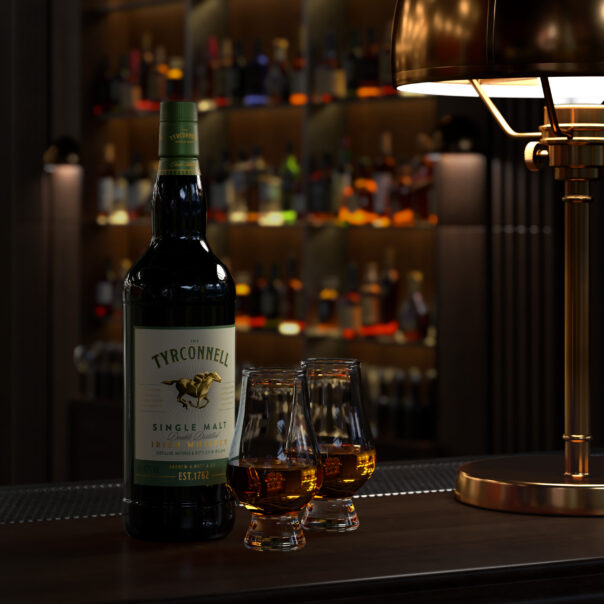
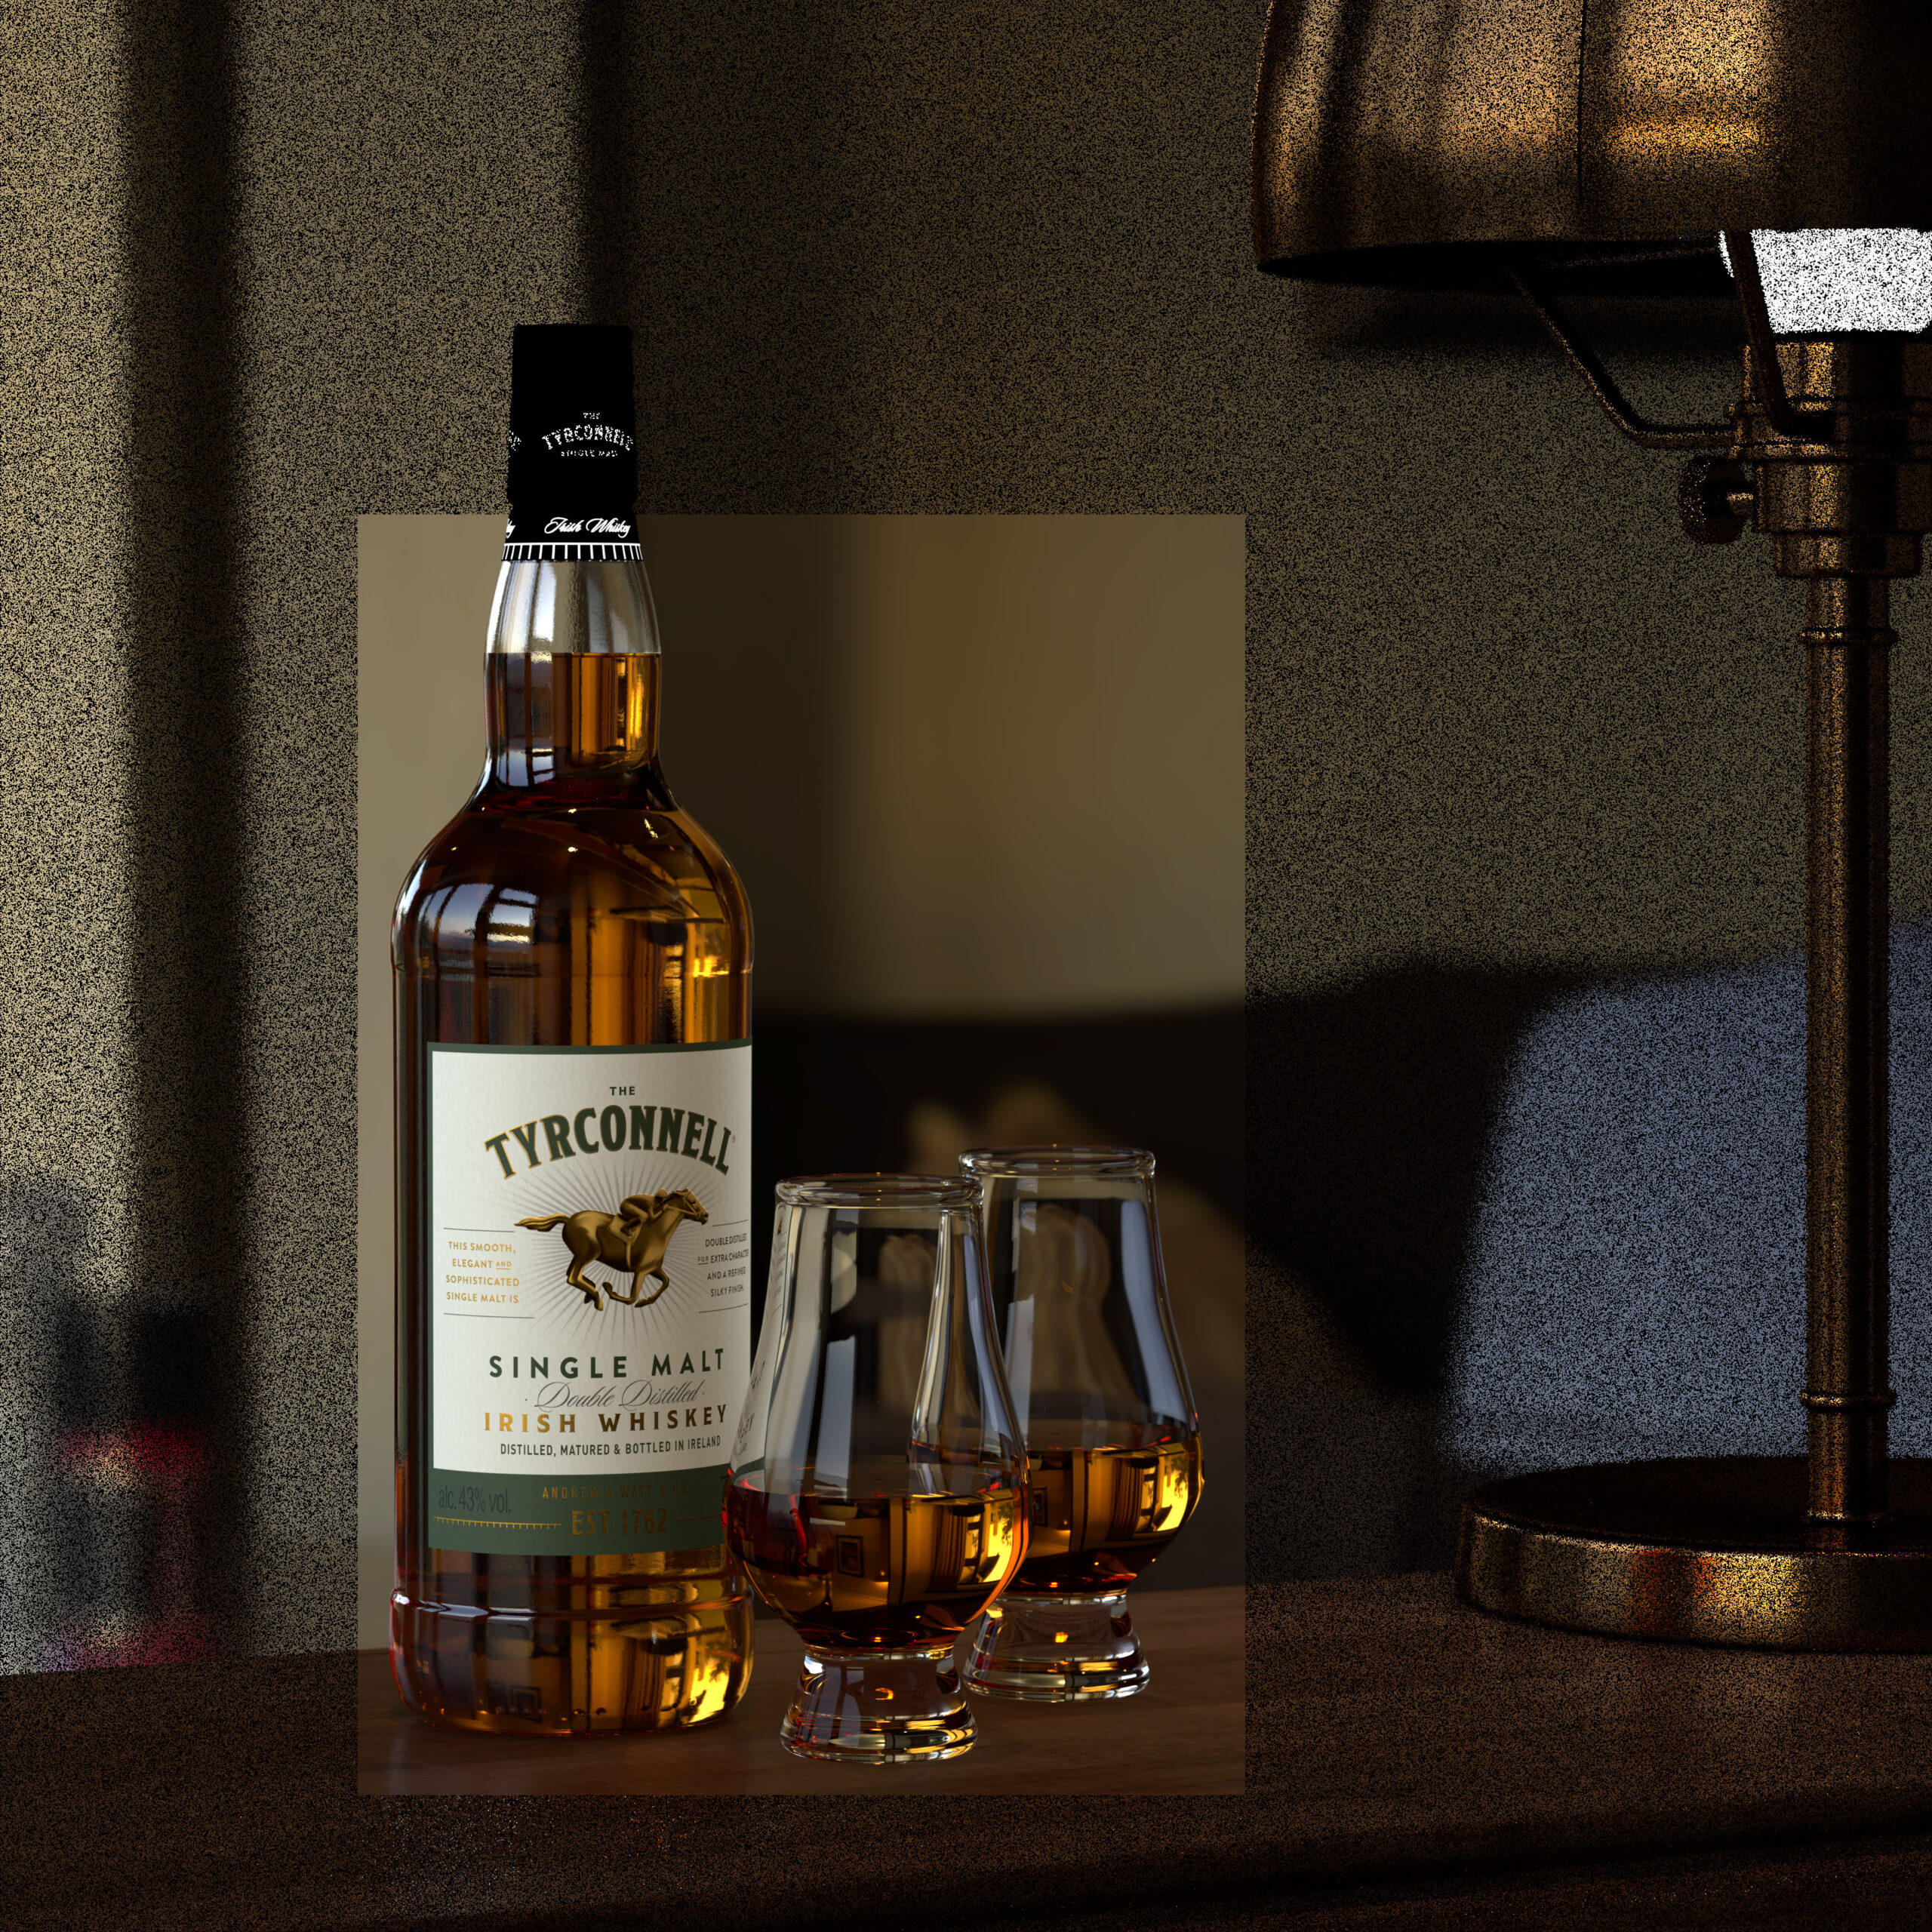
Bottle with black, glossy material

Using the Multipass in Photoshop
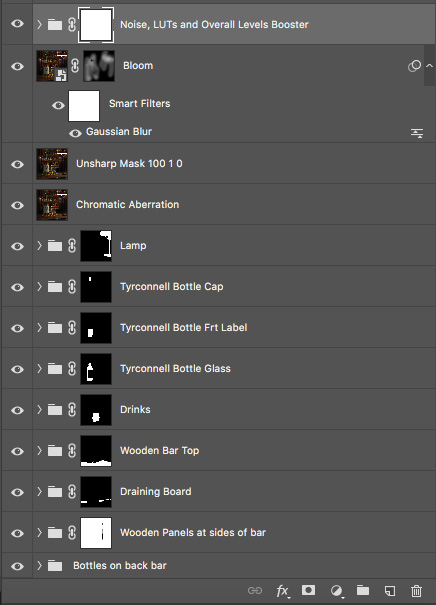
Upon opening the first main render PSD you will see all the Object Buffer masks, then the basic passes and then a Background layer at the bottom.
From here alt click the eye of the background layer to make that the only visible layer and then double click the background layer to make it editable.
Then alt drag this layer to make a copy. Select the first Object Buffer by hitting the eye next to it to reveal and select all and copy. Turn off this Object Buffer layer. Add a layer mask to the copied background layer and alt click the mask and paste in this copied first Object Buffer.
This now creates a self-contained Group whereby you can retouch that Object as much you like without affecting anything else around it. Repeat the process for all the other Object Buffers you would like, naming each Group as you go so you know which is which.
Object Buffers used to make layer masks
Object Buffers used to make layer masks
Before I retouch any of the Groups, now made with the Object Buffer masks, I add various effects on top to begin with by adding in either new layers or adjustment layers so everything can be altered and turned on/off to see the comparison:
Noise
Fill a new layer with 50% grey / Set the layer mode to Soft Light at 100%. Zoom in to 100% view size and Go to Filter / Noise / Add noise and select Gaussian and Monochromatic.
The reason you need to view at 100% is now when you alter the amount from around 2 to 5% you can see exactly what it looks like. At any other viewing size you get a distorted result.
LUTs x 2
‘Bleach Bypass’ Color Lookup Table set to 20% Opacity.
‘Fuji Eterna 250D Fuji 3510’ Color Lookup Table set to 20% Opacity.
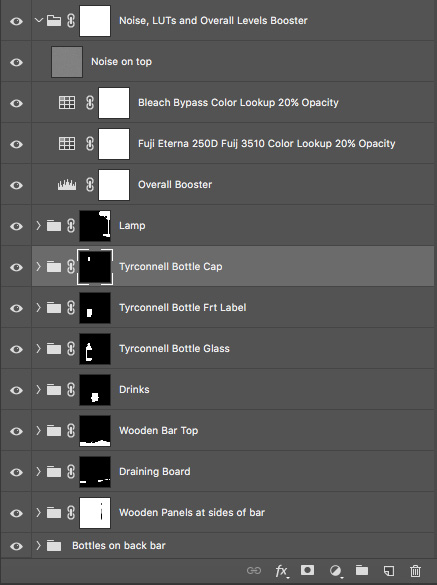
Overall Levels Booster
Levels adjustment layer with the top left slider brought in a touch and the top right slider brought in a lot more. The amounts depend on each image and what the Histogram chart is showing you. The overall effect you are after is a real boost to the brightness but with deeper darks.
Using the Multipass Basic Passes in Photoshop
Now the fun can really begin and this is this part of the whole process I enjoy the most. Just by having the 4 Basic Passes of Refract, Reflect, Direct and Indirect you can enhance and change your image in astounding ways.
I keep these 4 basic passes above all the Groups and Post Effects and begin seeing what effect each has by turning it on and off with an eye on a particular Object.
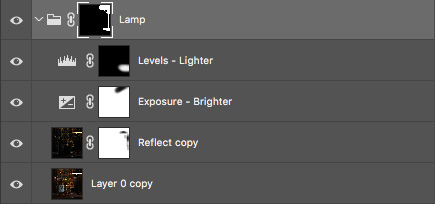
So for instance with the lamp, the Reflect pass makes the most difference. Alt drag the Reflect pass into the Lamp group and see if the Opacity needs lowering as sometimes 100% is too strong.
In this case it is fine but I don’t want it all over the Lamp so I apply a layer mask and brush out some areas I don’t want touched by it. You can now also add Levels, Curves, Selective Color and Exposure to fine tune it – all the while not disturbing anything else around it.
Here’s another example with the Wooden Bar Top showing the original render and then with the Reflect and Direct passes brushed in to areas before the Caustics are added. It brings it life and the ability to control the amount of each Basic Pass on top is incredible.
You can see why I get so excited about this aspect as it is a retoucher’s dream to have so much beauty given to you that you can just use your eye and judgement to brush in.
This process is repeated for each object including the glass objects where the Refract and Reflect passes really bring everything out. For the bottle highlights I mentioned earlier I change the glass material in Cinema 4D to a solid, black Diffuse and turn off Refraction. This gives a material with all of the Reflection, Bump and Displacement used on the regular glass but with a massive advantage.
We can take the Reflect basic pass produced and set this to a layer mode of Screen and NOT Linear Dodge as per default on top of the normal renders of the glass.
This then allows us to boost up the highlights by say copying this Black Glossy Reflect pass and brushing in more in certain areas, it also allows us to change the colour of the liquid if we apply adjustment layers of Hue/Saturation and Selective colour beneath it. So you can control the highlights and liquid colour independently within that same Photoshop group without disturbing the other.
This is a method I came up with a couple of years ago and has served me so well with the amount of control I have over everything, but also the time saved with sometimes 4 or 5 rounds of the clients all agreeing on what the liquid colour should look like.
Light Glows
Now we can move on to enhancing the glow from the lights. For this I created a 5,000 pixel square blank document and on a new layer with a large, soft brush created a one hit of blue. This is then dragged across to the main document and set to a layer mode of Screen and an opacity of 40%.

From here it can be squashed, stretched, scaled down for almost any use. I have used it three times in this image with the 3 lamps on show. The real benefit of this is that a Hue/Saturation adjustment layer can be clipped to it and this can alter the colour of this glow dramatically from warm to cool depending on the look you are after.
With various tests carried out in the end I went for a slight pink glow to the lights which seemed to fit well with the dark wooden bar feel. Again it is something that takes just a few minutes to setup but has massive amounts of control and alteration possible from size, strength and colour.
Once happy with the overall look I TURN OFF the Noise, LUTs and Overall Levels Booster Group (so that I can still play with those if needed at a later date) and then take a layer state copy of the whole image with Select All / Command + Shift + C / Paste as a new layer on top of all the Object Groups.
Then I add various effects which take the shape of:
Chromatic Aberration
Go the Channels Palette and select only the Blue channel. Go to Filter / Camera Raw Filter / Lens Correction / Distortion / Amount -1. Go back to Channels Palette and select RGB.
Unsharp Mask
Copy the Chromatic Aberration layer and Go to Filter / Sharpen / Unsharp Mask / Use parameters 100 1 0.
Bloom
Copy the Unsharp Mask layer and make it into a Smart Object. Go to Filter / Blur / Gaussian Blur / 5px and then set the layer mode to Screen. Add a layer mask and then with a large, soft brush set to 20% opacity brush over the highlight areas that you wish to bring out just a bit more.
This can be on the main objects where the light hits and also on light sources themselves. You may wonder if this stage is worth it but after brushing in some areas just turn it on and off to see the difference and you will see it is well worth it.
Moving Forward
Having managed to complete this visual it has made me realise more than ever that having a bottle in-situ within a well-built scene is such a great way to show off a product and its fabulous design elements. To this end I have an idea over the next year to collaborate with some amazing arch viz specialists in placing my bottles in their scenes.
Think of it as arch viz meets product viz. Yes, I will very much be standing on the shoulders of their genius but the natural light afforded by these scenes will really bring about some incredible results with reflections and refractions, and of course some good old caustics as well. This will be in lounges, kitchens and hotel bars with each scene lending itself to a different style of bottle from whiskey to vodka and from gin to rum.
Close-in angles with shallow depth of field will be the icing on the cake, and I am very excited to see where this will all go and to collaborate with some incredibly talented people along the way.
Thank you so much for taking the time to read this article, and I hope it has been of some use to you in your quest for better visuals and to enjoying and having fun with the process as you go.
Cheers!
David Turfitt
Thankyou David for taking the time to talk to us about this fantastic project. We’ll look forward to seeing people using this advice going forth when creating their own scenes, as well as looking forward to seeing the exciting collaborations you have planned for the future!
Links:
Website: davidturfitt.com
Behance: behance.net/davidturfitt
David !!!!!, what do I say ? speechless………….
The details, the observations he does, the amount of time he spends just to put the camera, creating all those passes to be comped in photoshop, wow…
He is a legend beyond any doubt…………..
Love his work.