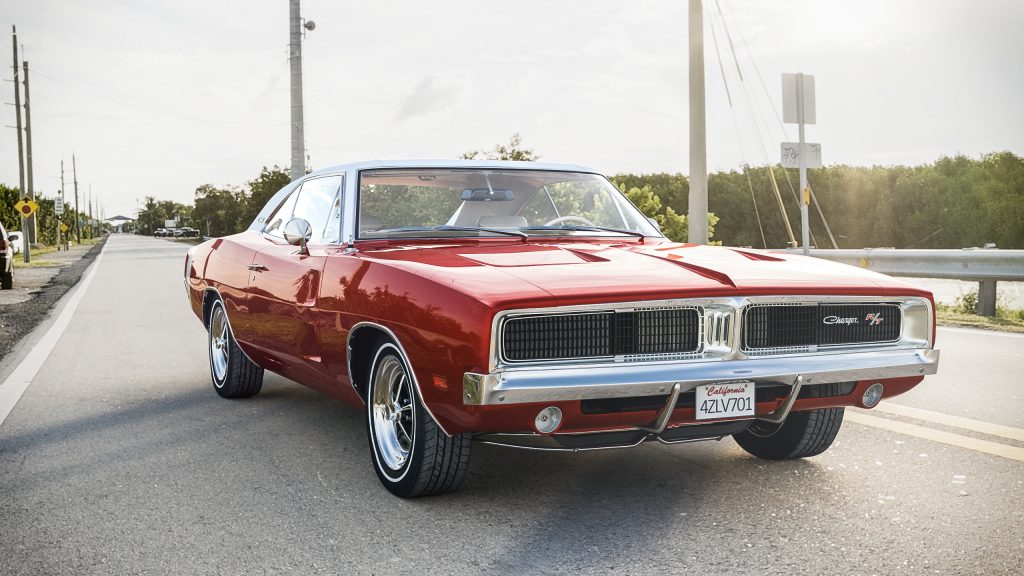
This beautiful image of a ’69 Dodge Charger was chosen by a few sites to accompany the news of the release of Corona 1.4. In this article, artist Dmytrenko Igor takes us through how the image was set up, rendered and post production applied, all in under 3 hours!
Read more on how this image was created
Hi guys! My name is Igor, and I am 25 years old and from the Ukraine. I work as a freelance CG artist, currently at Lunar Animation studios.
I always wanted to work on an image featuring American muscle cars, and I got the chance with this personal project. I spent about three hours from start to finish, on top of a full working day, and that meant I had no time to do the car modeling myself. Instead, I took a car model from my friend (thank you Narek Gabazyan for the excellent model!) which was initially set up with V-Ray materials.
Conversion
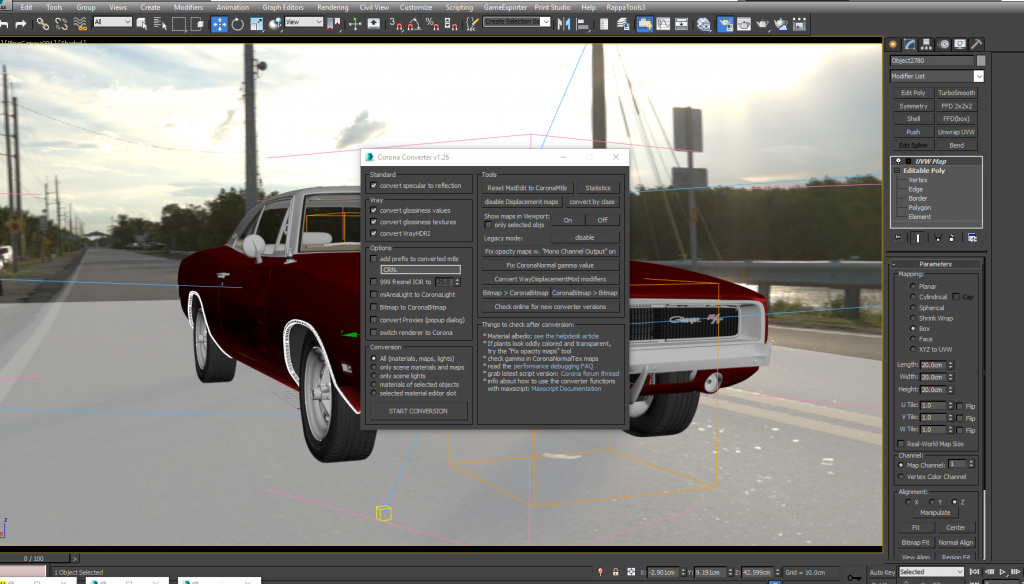
To begin, I used the Corona Converter to convert all the materials into coronaMtl format -after running that, all I had to do was add the IOR value of some materials, and the scene was ready for Corona:
Lighting
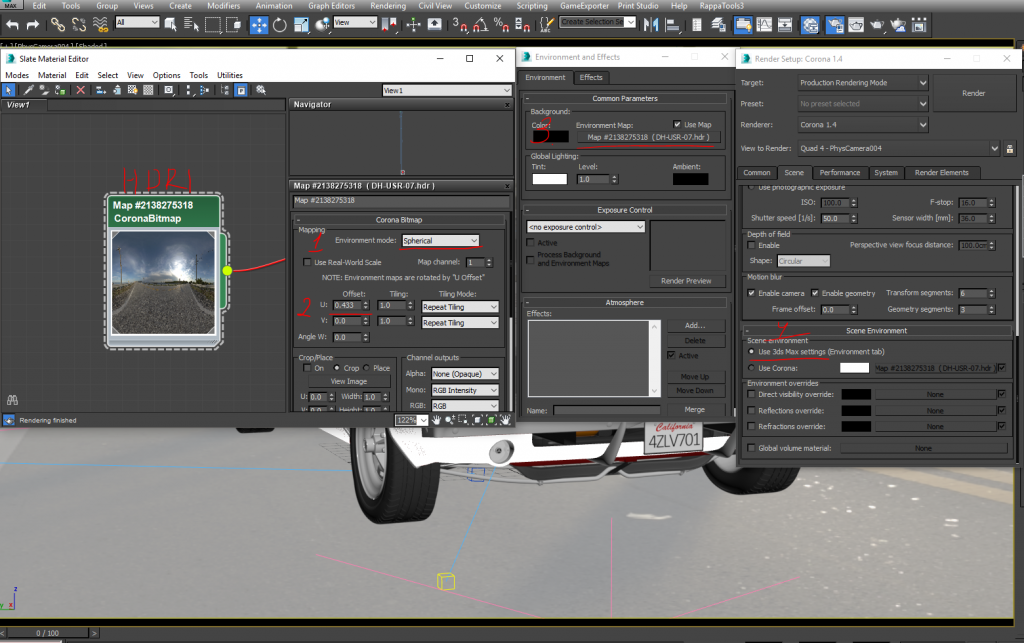
Next, I set up my HDRI, to be used both for lighting and as a background.
1. I chose the spherical projection in a Corona Bitmap
2. I found a suitable position by rotating the image horizontally (the U offset in Corona Bitmap)
3. I added the Corona Bitmap in the 3ds Max environment settings which will work as lighting and background
4. Lastly, I left the the Corona render settings as default, using the 3ds Max Environment settings (which would use my HDRI in the Environment Map slot):
Shadows
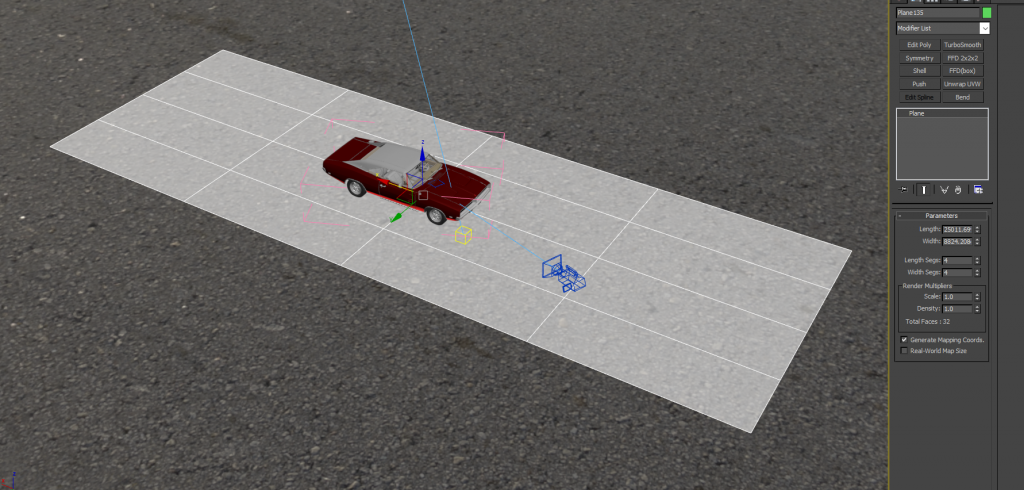
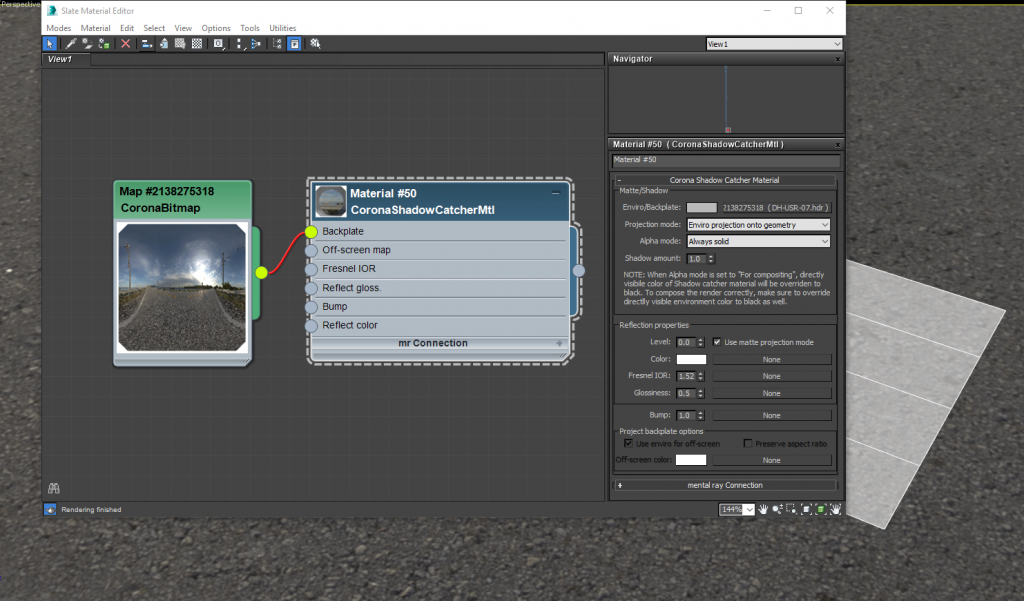
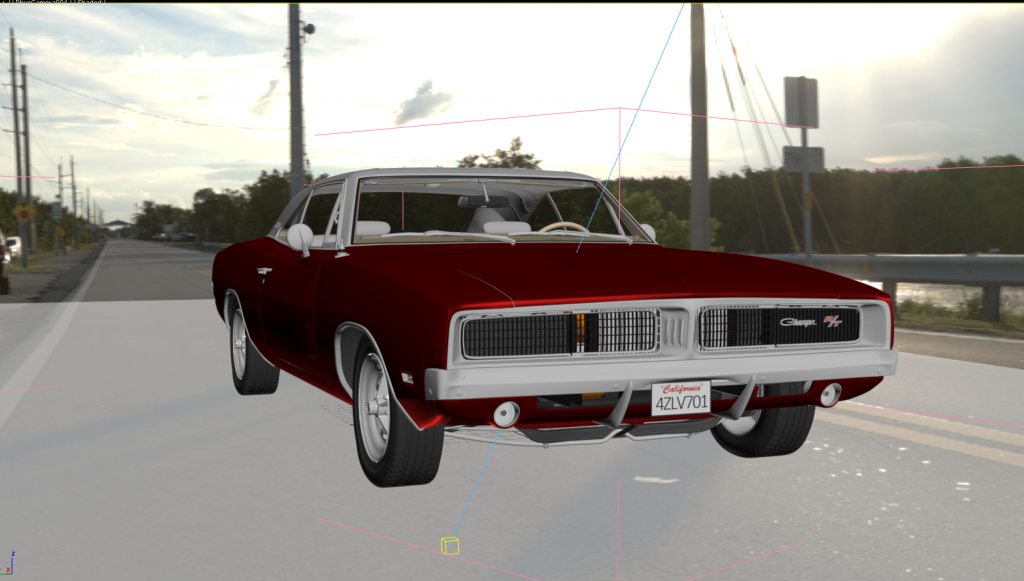
After this setup, I created a plane to capture the shadows from the car:
Onto that plane, I applied the Corona Shadow Catcher material, to which I added our HDRI – all this is very simple to set up:
Car Paint Material
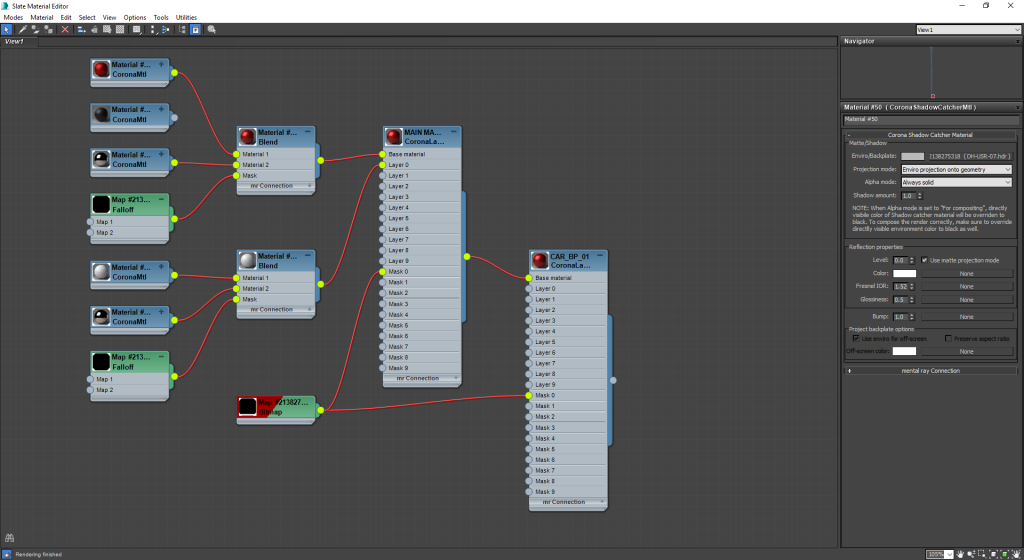
Next, I placed my camera and went to create the car paint settings. This is the only material that I adjusted myself, all the others were left as converted from V-Ray materials into Corona materials:
Below is the structure of the paint material:
Good lessons on the settings for such materials can be found on the official Corona YouTube channel – the video is also embedded below:
Rendering
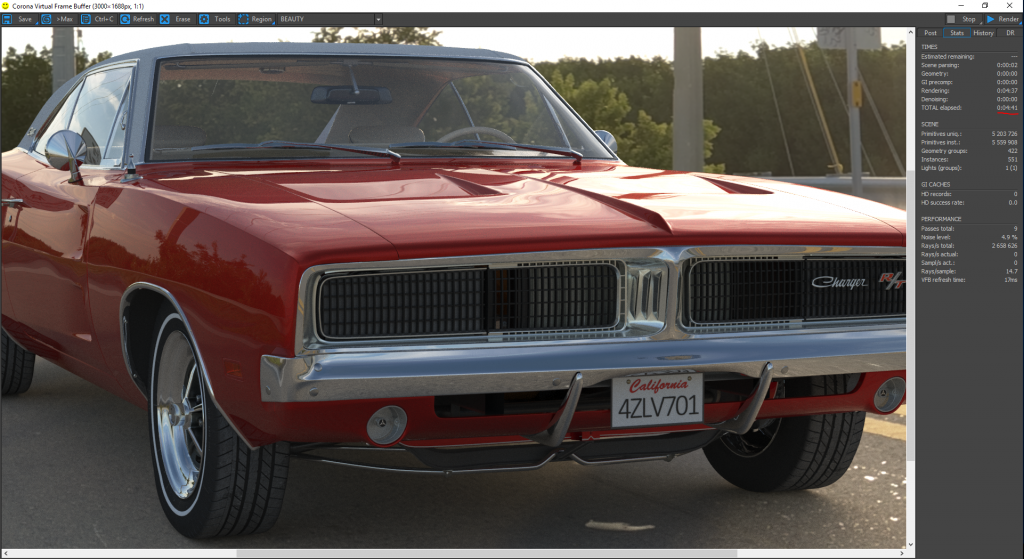
With the above set up, it was time to start rendering. As expected, it only took about 15 minutes of render time until the noise was gone – but I can say that on a 4-minute test the render was already clear on my CPU i7-6700k.
Post Production
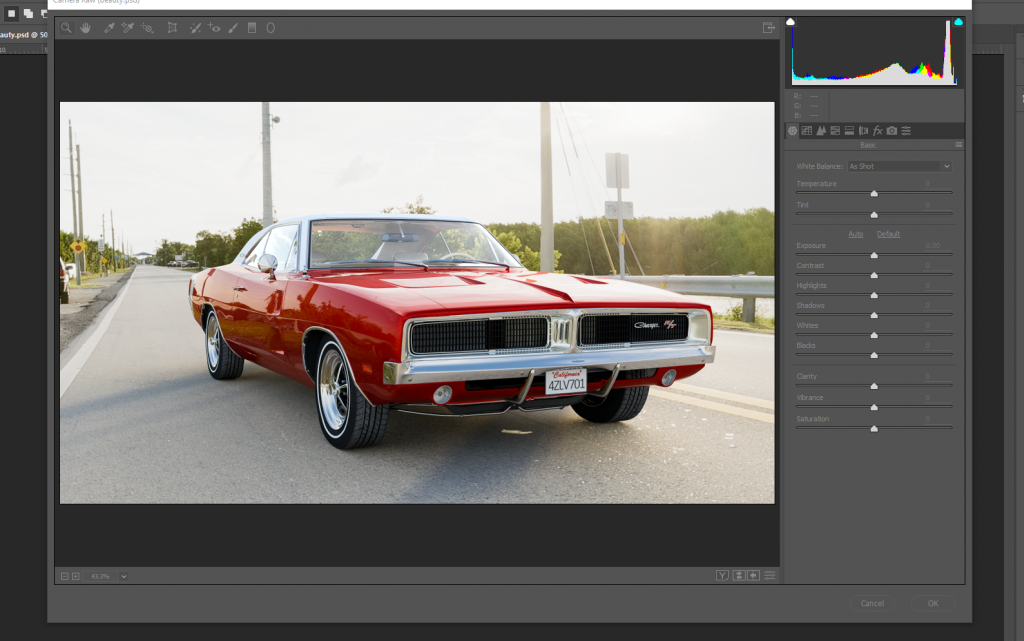
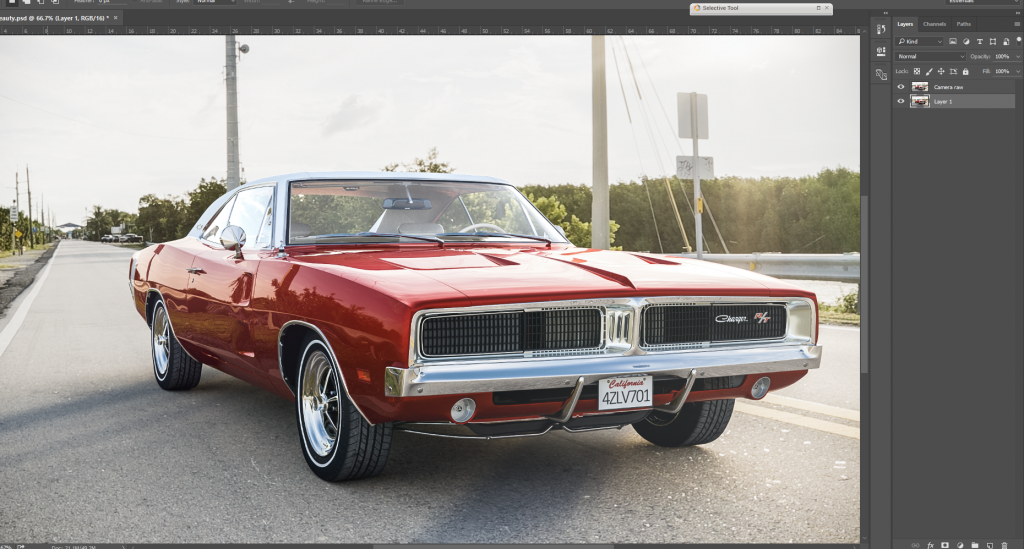
To complete the image, I added a little post processing to the raw render using Photoshop. For quick correction, I used Camera Raw:
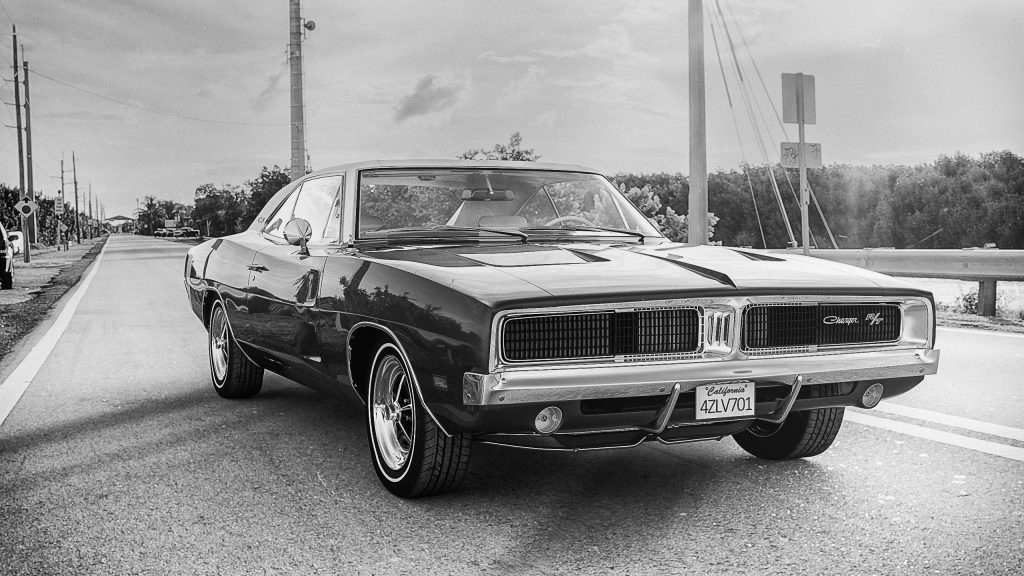
And I couldn’t resist creating a black and white version too!
In Conclusion
As I noted earlier, the total time from start to finish that I spent on this project was no more than three hours, including conversion, lighting, materials, rendering and post production changes.
For me, Corona Renderer is my favorite render engine at the moment. I can say that I was very impressed by both the speed of operation and the ease of use, and most importantly it gave the most realistic picture!
The development team at Corona Renderer are doing an amazing job!
Dmytrenko Igor
Facebook: https://www.facebook.com/dr.Klints
Behance: https://www.behance.net/Klints
It’s a great render on the first glance, but what bugs me are two things:
1) The car is much sharper than the road
2) The car does not follow the same DoF pattern as the rest of the backplate.
Otherwise – great work! 🙂