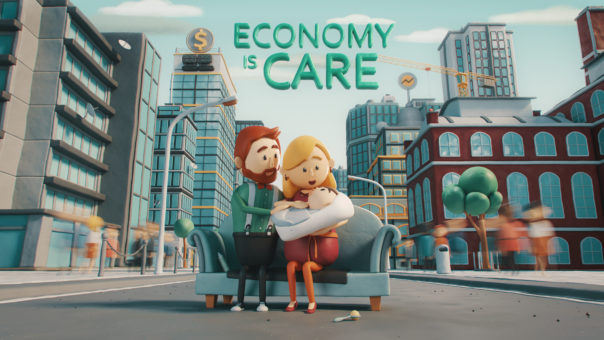
Toward the end of last year, Swiss film and animation studio Guave Motion released their “Economy is Care” animation, aiming to encourage people to ask questions about the current state of the economy, and delivered with a distinctive rendering style. We spoke with CEO and 2D/3D Generalist David Fritsche about how the project came to be, and how they created it!
Economy is Care from Guave Motion
Tell us a little about Guave Motion
Guave Motion is a studio for film and animation, located in Wädenswil, near Zurich. We started as a group of young teenage guys that wanted to revolutionise the internet! That was about 15 years ago. We ended up as a company with two business branches: Guave Motion (film production) and Guave Interactive (web agency). This is the shortest answer I can give, as our story is too complicated and too long to explain 😀
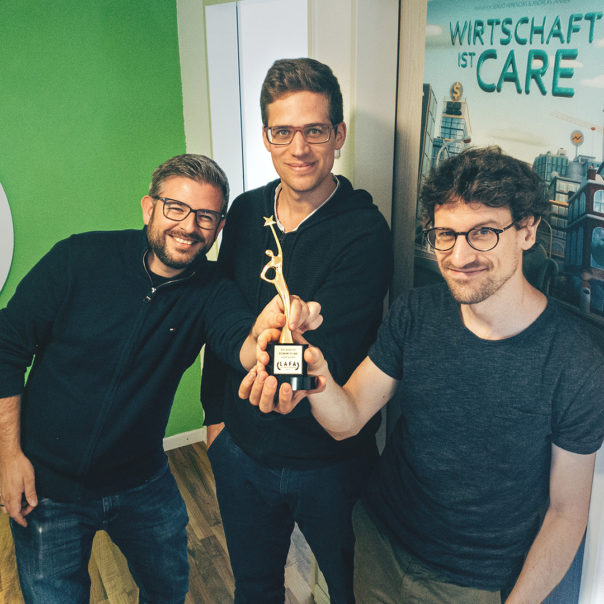
We offer quite a large range of services. Primarily, we do film and animation. Sergio Herencias is our in-house director, cinematographer and motion designer; Andreas Tanner is responsible for all kinds of 2D and 3D animation; and myself, David Fritsche, the 3D Artist in the company with a flair for technical direction and scripting. Our Studio is quite different from other studios here in Switzerland – usually you’ll find a studio for animation or a studio for film, but we do both, and each of us has a own specialty.
One of our core philosophies is to allow ourselves to question the client – we don’t just blindly do our work. At the end we want to create something that fulfills its core purpose, and sometimes this purpose can get lost in communication, or other times ideas can sound really cool and creative but in truth they are not really useful. We’re not afraid to speak up!
Also, we always strive for “the best bang for the buck” and if we get the liberty to get a little crazy, we’ll gladly put in the extra effort
How did the “Economy is Care” project come about?
The idea for the message came from our client Ina Praetorius, founder of a Swiss association called WiC (Wirtschaft ist Care / Economy is Care). The association is committed to the reorganization of the economy around its core business, the satisfaction of actual human needs worldwide. Ina has been dealing with this subject of “care” for a long time now and she wanted to do something big to show it to the world. In her opinion, care is not really visible and appreciated in economics and in our daily life.
And how did Guave Motion become involved with the project?
This was a funny coincidence! About two years ago, Ina’s husband Hans Jörg contacted Andreas Tanner, asking to show Andreas’ bachelor degree movie “It’s a Plastic World” in the local cinema in Wattwil (Toggenburg, Switzerland). Andreas didn’t know them at all, but it stirred his interest. At that time, Hans politely asked Andreas to read Ina’s essay about the care economy in the hope of creating an animated movie about it, similar to Andreas’ movie.

At first, we didn’t really think that this project would become reality, but some time later, we took the chance, deciding to tackle the project with Guave Motion and diving into this complex topic. Andreas and Ina then started writing a first script.
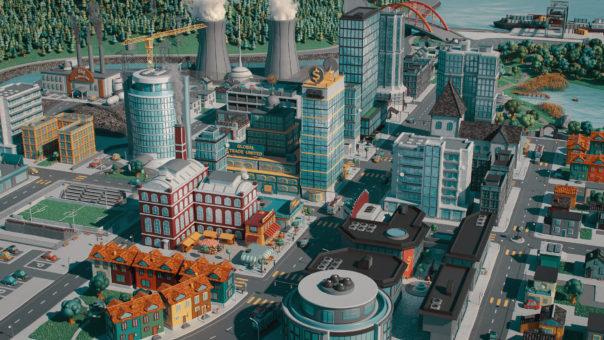
How did you create the clay/plasticene materials, and ensure they had a consistent look across all the objects?
To be as efficient as possible, we chose an art style whose textures and shaders could all be created procedurally. This way we didn’t need any UVW maps! We analyzed some real playdough, and Andreas watched his children playing with it. He saw these tiny different colored dots inside the main color playdough.
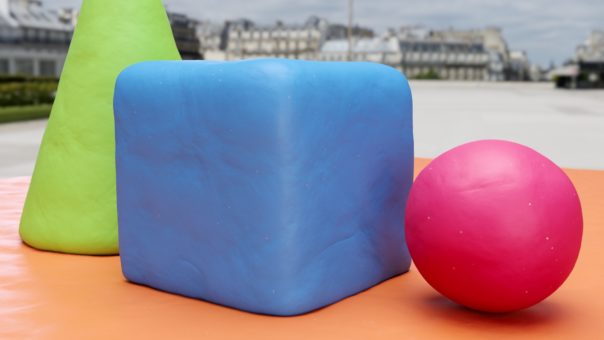
To recreate these color dots inside the plasticine, we needed a special noise generator. To get better control over the noise parameters, we used a very handy plugin called SigerNoise. You get a lot more flexibility over the noise compared to the basic noise shaders inside 3ds Max.
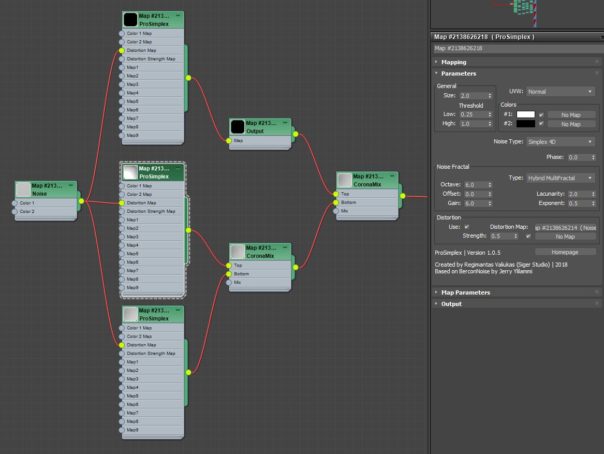
For some color variety, the CoronaMultiMap with its gamma and hue random did a perfect job. The color of the tiny dots was automatically inverted to actually see it, so now we got bright colored dots on dark base colors and dark colored dots in bright base colors.
To get some randomness for the fingerprints, the noise pattern, and the color dots, we used Corona’s UVW Randomizer which randomly moves the UV’s on an object. The bigger playdough deformations were done with displacement and noise modifiers directly on the geometry. All the tiny details like the fingerprints and color dots were made through the bump channel.
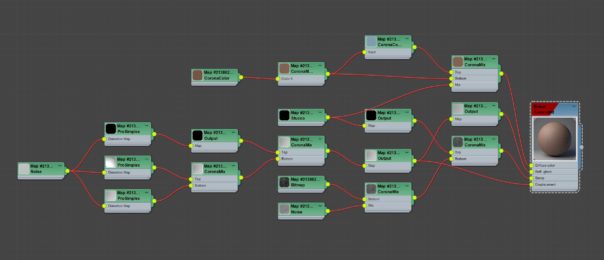
We had to make sure the city looked great in overview shots, as well as in close up shots down in the street, so we had to change some material properties like displacement and bump scale to let the playdough look realistic at every scale in every shot.
How did you create the wheat?
Thanks to Corona Scatter, we just had to create two or three different wheat stalks. These stalks were then scattered many hundreds of thousands of times, with variation for rotation and scale. To make the wheat look a bit more interesting, the scale and density of the scatters were driven by different noise maps. Some of the wheat stalks in the foreground, or laying on the ground or on the wooden cart, were done individually with Scatter on other distribute-on objects. After a little tweaking, the wheat stalks were baked to geometry.
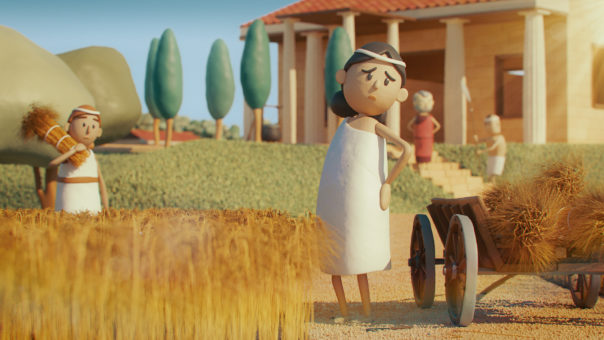
By the way, the grass and the little pebbles on the lanes were done the same way. What they all have in common is that we used the Corona Distance Map to avoid visible collisions of different objects. The only disadvantage was a huge loss of performance while working on the scene, but that was easy to resolve by disabling the scattering until the job had gone through some test renders, and then enabling the scatters again when finally submitting them to the render farm.
There are many different scenes over the 5 minutes of animation – how did you keep a consistent look for all of those scenes?
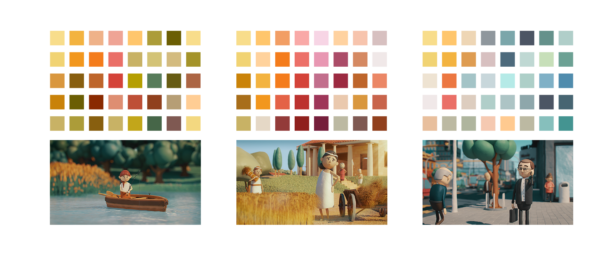
The basic idea/philosophy was to use simple shapes (primitives like spheres, cylinders, etc.) and stick them together, similar to what a child would do when playing with dough. Based on this idea, we had a concept artist who created some basic looks for characters and objects.
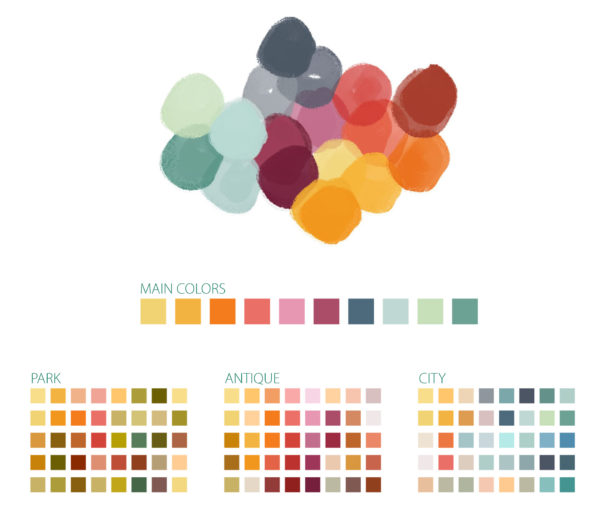
We also had a collection of some base colors, and then for different scene sets like back in the past or in the modern city, we used slightly different colors to get unique overall color moods. We used one single LUT for the whole movie, and we could preview the LUT directly in the Corona VFB. From time to time we assembled all scenes and watched their thumbnails to see if any scenes popped out and looked out of place.
Except for isolated parts, we took a Corona Sun and a Sky as our basic light setup. In a second step, we placed a lot of additional lights on the characters or window panes to get nice reflections and more dramatic illumination. The main color correction was done in After Effects where we could correct the colors that did not yet fit perfectly.
Was there anything you had to do differently for an animation vs. stills (in terms of lighting, materials, camera set ups, scene design, or even anything in render settings)
Sure, there were some things we had to keep in mind, especially for rendering the animation. If you make a still rendering, you don’t have to care about global illumination flickering, but we all know it’s different with animation. So basically most of our scenes were exterior shots. The best method for the global illumination calculation was path tracing for both primary and secondary solver. It was vital that we completely avoided any flickering.
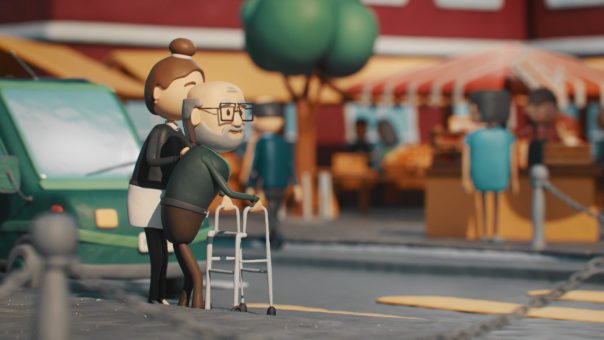
Path tracing is the closest method to depict reality, but we couldn’t apply this to our interior shots, as the render time for the interior shots would have increased a lot. So there we used UHD Cache as a secondary solver to get faster rendering. To avoid GI flickering, we increased the UHD Cache precision. Sure, the precalculation now lasted a bit longer, but we didn’t get any flickering!
What was the workflow in terms of producing tests for the animation, before going to final renders?
As each of these 32 shots were quite expensive to render, we had to do several tests. For example, we locally rendered every 20th frame in full resolution to see if some of the smaller details had any problems. For longer or more complex shots, we also rendered very small previews in 640×360 pixels in low quality (that is, fewer samples). This way we could spot things like imperfect focus shifts or render problems with the complex water animation that was driven by Corona Distance Maps and several Gradient Ramps.
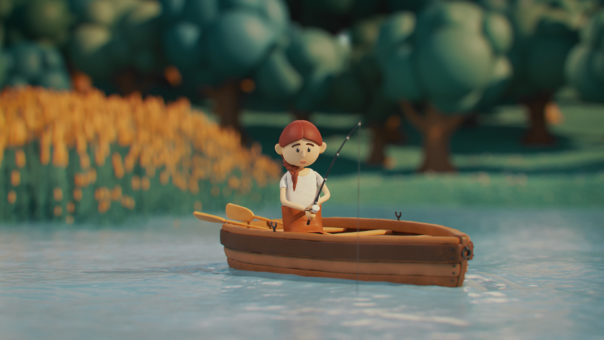
To judge the animation better and see if the shots would match once lined up in Premiere Pro, we rendered a 3ds Max viewport preview with smoothly subdivided geometry. This ended up as a very good workflow for us, a good balance between efficiency and quality management. Nevertheless, we had to render a few shots a second time to adjust things like the lighting or fix render problems we didn’t see the first time.
What was the biggest challenge in rendering the animation?
We like Corona Renderer very much because you don’t have to handle GI flicker and other stuff like that. For all exteriors, we used path tracing for both, primary and secondary solver and we had absolutely no problems. For interiors, we had to take the UHD Cache because of it’s massive speed advantage. To avoid artifacts or GI Flicker, I increased the precision from 1 to 3. And that’s it!
I think a big challenge was that moving and static objects had different shaders – the noise for all static objects was projected with Corona’s Triplanar texmap to save having to set up UV’s, while all moving objects needed fixed UV’s because when they move, the projected noise from the Triplanar texmap would float. So every moving object needed an additional box UV projection and this was a very arduous thing. I can’t count how many times I forgot to check every moving object in a scene to make sure it had the right UV’s, and in the rendering, you get the result: Floating noise bumps/displacements, some lost money – and anger at yourself! 🙂
What was the most fun or rewarding part in creating this animation?
We had a lot of fun during the animation and I guess we lose count on how often we laughed on several shots. There was this scene in the past, when the old slave holder insults the slaves – I mean, it’s a very sad scene, with the old man yelling badly and the slaves having to kneel on the ground, but it was funny to hear it when the old man voice was done by our own audio guy!
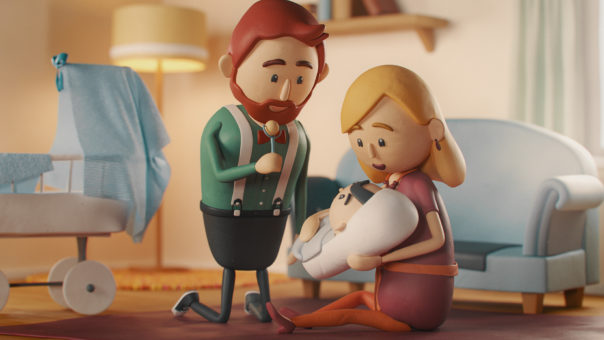
I guess the most challenging part was the room with the family. Just before the room scene, we had to make a complex transition from the city to the room while the baby was falling down into mother’s arms. So, we took the camera from the room and tried to reconstruct a similar down movement in the city scene. It wasn’t easy to match the different camera speeds and lenses. Finally, about ten shots had to fit together in the film cut and I remember this was the biggest task regarding the animation – and very rewarding to see that completed.
How much post processing was done for the animation?
The color correction and color grading were quite time consuming and took most of the post-production time. A lookup table was used for every shot as a base grading. On top of that, the color tweaking could be started.
But there were a lot of other improvements done in post like lens flares, light wraps, chromatic aberration, noise, glow or fancy shine effects. And of course we didn’t render all the fonts directly into the picture, they were rendered in a separate pass to keep the flexibility for other languages. Also the 2D content for the TV screens was done separately in After Effects. Thanks to the 3D camera in 3ds Max and additional positioning data we could easily integrate the 2D animation into the 3D renderings.
How long did it take from starting the project, to having the final animation complete?
We needed about five to six weeks to finish the script and get it in a form everybody was happy with. Another week passed until the city concept and character design was done, and then the following three weeks were needed to make the storyboard. So the pre-production took about ten weeks. The production itself lasted about nine months, so in total the creation of the movie took nearly a year.
When did the studio first learn about/use Corona Renderer?
Five years ago, we worked with Mental Ray which was free and built-in in 3ds Max at the time. But more and more, we began to miss several features which other renderers already had, and after some research on the internet we landed on Corona Renderer as our choice. It had the best compromise between affordability, efficiency, and creative freedom. So we started using Corona in 2015.
What did Corona let you do (or let you do faster) for this project, compared to other render engines?
Corona gave us blazing fast renderings, it was amazing how accurately and quickly the rendering was done. The Interactive Renderer was extremely helpful for all lighting tasks, as we got instant feedback and saved a lot of time. For this project, we didn’t use the LightMix as it would have complicated our workflow, and I see it as more useful for VFX tasks or still renderings. But it’s a definitely very useful tool.
We think the biggest advantage compared to other render engines is the very lightweight and simple render setup. In a lot of production houses, you will find that one guy who is responsible for, you guessed it, rendering. Finding the best render settings can consume a lot of precious time, time we didn’t have with this project. But the beauty is that an animator or a modeler can produce good renderings with Corona, you don’t have to tweak for hours and hours to get good results, you only have to click on render 😉
Did you use a render farm, and if so, was that in-house or an external farm?
Yes of course. A single frame would take between 25 and 45 minutes, so it was inevitable we’d end up working with a render farm. Let’s say we had nearly 9000 frames, then our three PCs in the office would render about 70 days non stop! We went with Rebus Render Farm, they have a very good price-performance ratio and our jobs started instantly without having to wait for too long. Some shots were rendered on our machines during the many weeks spent on the project, but at the end we had to render the whole movie a second time because of changes in the script, bug fixes, animations refinements or relighting.
Any other projects that you have used Corona Renderer on? Any future projects where you are planning to use it?
Sine 2015 we’ve used Corona on pretty much every 3D project we work on. As long as there is a need for PBR, we’ll stick to Corona. Right now we’re working on a project where we have to do some particle and hologram effects, so for that Corona would be a bit of an overkill – stuff like that you can easily do with the basic scanline renderer. But in a few weeks we’ll have to do some animations that need photorealistic of architectural imagery, and I’m pretty sure Corona Renderer will be the perfect fit 😉
David Fritsche
CEO and 2D/3D Generalist, Guave Motion
LINKS:
Company Website: https://www.guavemotion.ch/
Company Vimeo Channel: https://vimeo.com/guavemotion
Company Instagram: https://www.instagram.com/guavemotion/
Film Website: https://www.economy-is-care.com/